How to work twice as fast using templates in MailerLite

Whenever our team needs to create a new email and we have the copy and image ready, we can build a newsletter in under 3 minutes.
Sounds too good to be true? Not when you’re using templates.
Templates simplify your work and save you lots of time. Once you’ve created a newsletter or landing page design you love, you can save it as a template and use it for future email campaigns and landing pages.
The template feature is also useful if you’d like to build a library of designs to show clients or other people in your company.
Today you’ll learn how you can create new templates, save and store your designs and re-use templates for future campaigns.
Step 1. Start with adding your default details
If you regularly create email campaigns and landing pages, we highly recommend that you set up your default details, such as your company info, logo and social links. This default information will be automatically embedded in your email and landing page footers and blocks.
You can find these settings in your Account settings (upper-right menu on your dashboard) and then in the Default information tab.

On this page, you can upload your logo and provide your social links. If you upload a logo here, it’ll be shown whenever you create an email or landing page and insert a logo content block. The same goes for your social links. Add them here once and you don’t need to manually add your links ever again.
You can also provide your company details and unsubscribe disclaimers. If you leave the company data field open, the data appears automatically from your account details.
You can check the force-update boxes for each change if you want your changes to also apply for all drafts, sent emails and ongoing automation emails. For sent emails the changes are applied when you copy a sent campaign.
Step 2. Create a great design
It’s time for the creative part. You can build a newsletter or landing page using our drag & drop editor and then save it as a new template. Or, you can choose one of our pre-designed templates and customize it to your liking.
The drag & drop editor allows you to add new content blocks, change colors, add text, etc.—just mess around until you’re happy with your creation. And don’t forget, all changes can be undone with the arrow on the left side of the Preview button.
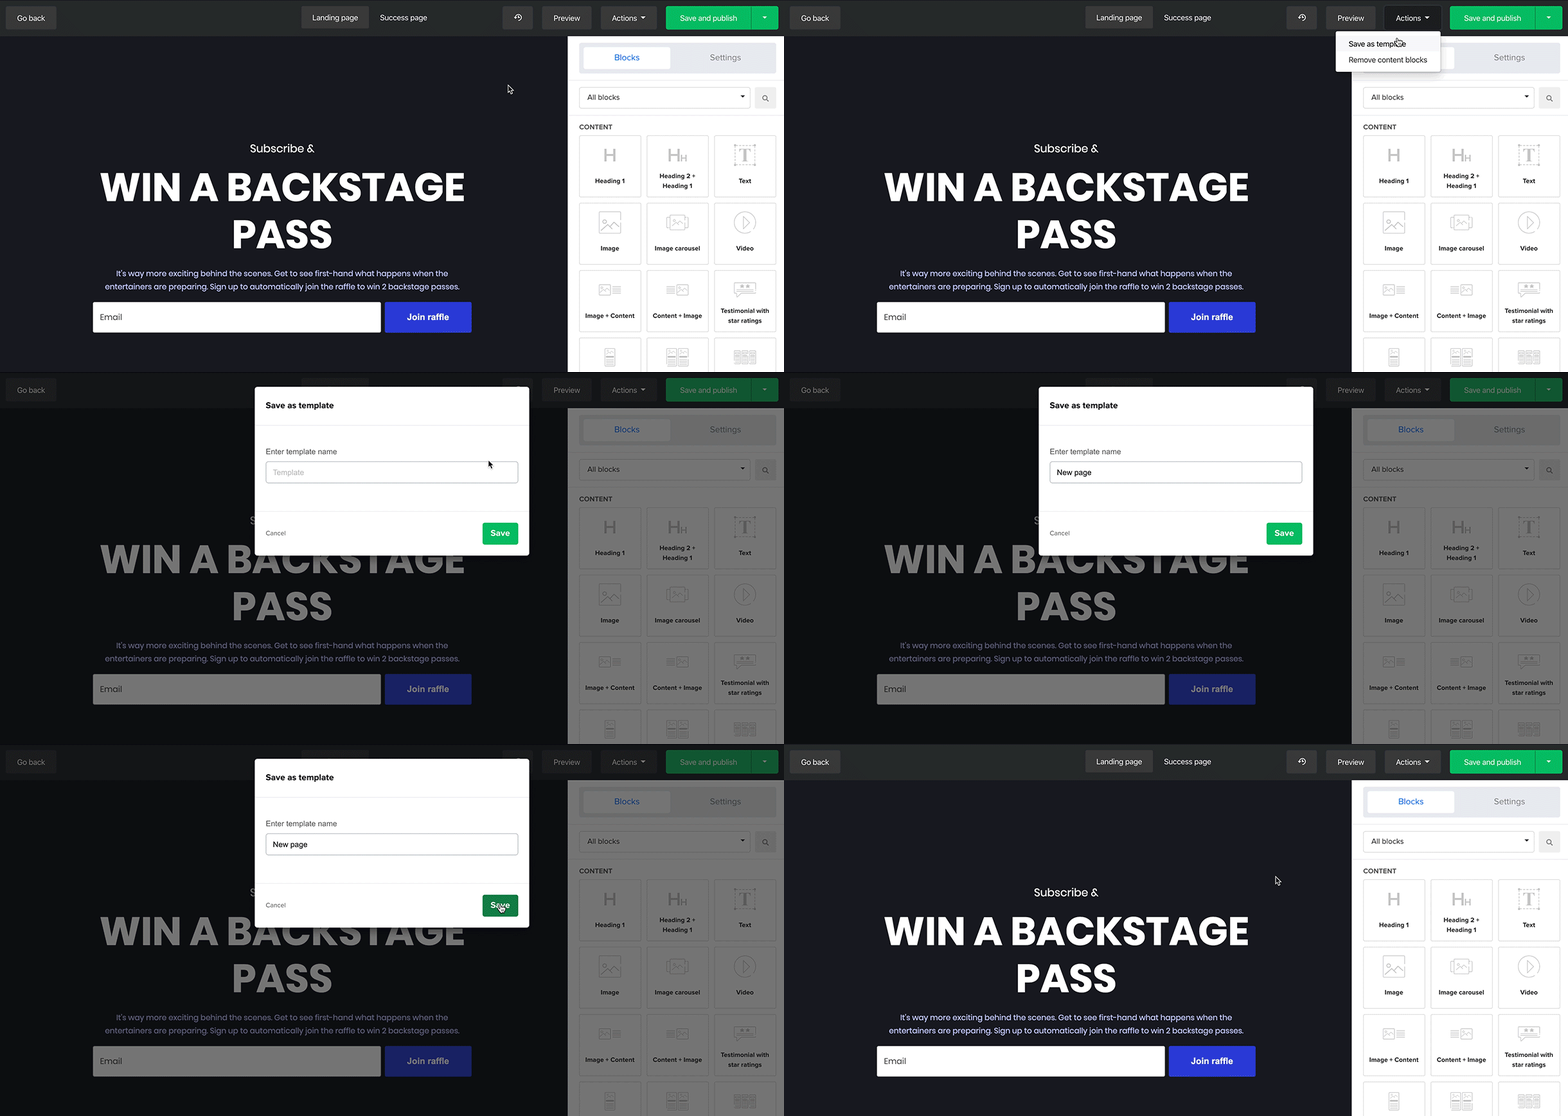
Once you’ve finalized your design, click the Actions button in the top navigation and choose Save as template. Add a name and you’re good to go!

Where did my saved template go?
Good question. We’re saving all your templates in My templates, which you can navigate to from the top-right profile menu. On this page, you’ll see all the templates you’ve saved. Either view them all at once or separate your email from the landing page templates.

You can also create a new template directly from this page. Click on the button Create a template, select whether you want to create an email campaign or landing page and get started. This feature is useful when you only want to create a new design, without needing to go through the steps of choosing subscribers and sending options.
Step 3. Update your template whenever you want
Need to update or change something in your template? No problem. Templates can be changed or updated at any time. Just navigate to My templates, find the template to change and click Save.
If your template is already in use, you have the option to make the changes in existing emails or landing pages. Isn’t that great?

Let’s say, you decided to change one of your template’s background colors. Open the template, add the new color and save it. If the template is already in use, you’ll get a notification. If you select the option to also update existing landing pages/emails, they will all get the new background color.
Keep in mind that we only change the global style settings (every setting you see under the main sidebar’s settings tab in the editor) and all static blocks (more on this later). When you have clicked on any block in a template and changed the settings of that specific block, these settings will maintain the same.

Also, your blocks will not be deleted. Let’s say you go to your templates, open an existing template and edit the background. Then you also delete the countdown timer block. When you force-update the changes, only the background color will be changed. The countdown timer blocks will remain in the other templates.
If you choose to update existing email templates, your changes will apply for drafts, sent emails and ongoing automation emails. For sent emails the changes are applied when you copy a sent campaign.
Dynamic versus static blocks
Our emails and landing pages are built using 2 different types of blocks: dynamic and static. Force-updating template changes only works for static blocks. But what’s the difference between dynamic and static blocks?
Dynamic blocks are all the blocks you can drag from the sidebar into your template. Email campaigns only contain dynamic blocks and no static blocks.
This means that for emails you can force-update only changes that are made in the global style settings. If you want to make changes to some of the dynamic blocks, you’ll need to head to the default settings tab in your account settings. Here you can change your logo, social links and company settings (as explained in step 1).
Landing pages contain 3 static blocks: The header, footer and notification pop-up.
If you want to change the logo on all your landing pages, you can do so in the default settings or directly in your template (since it’s a static block). Both methods can be used!
