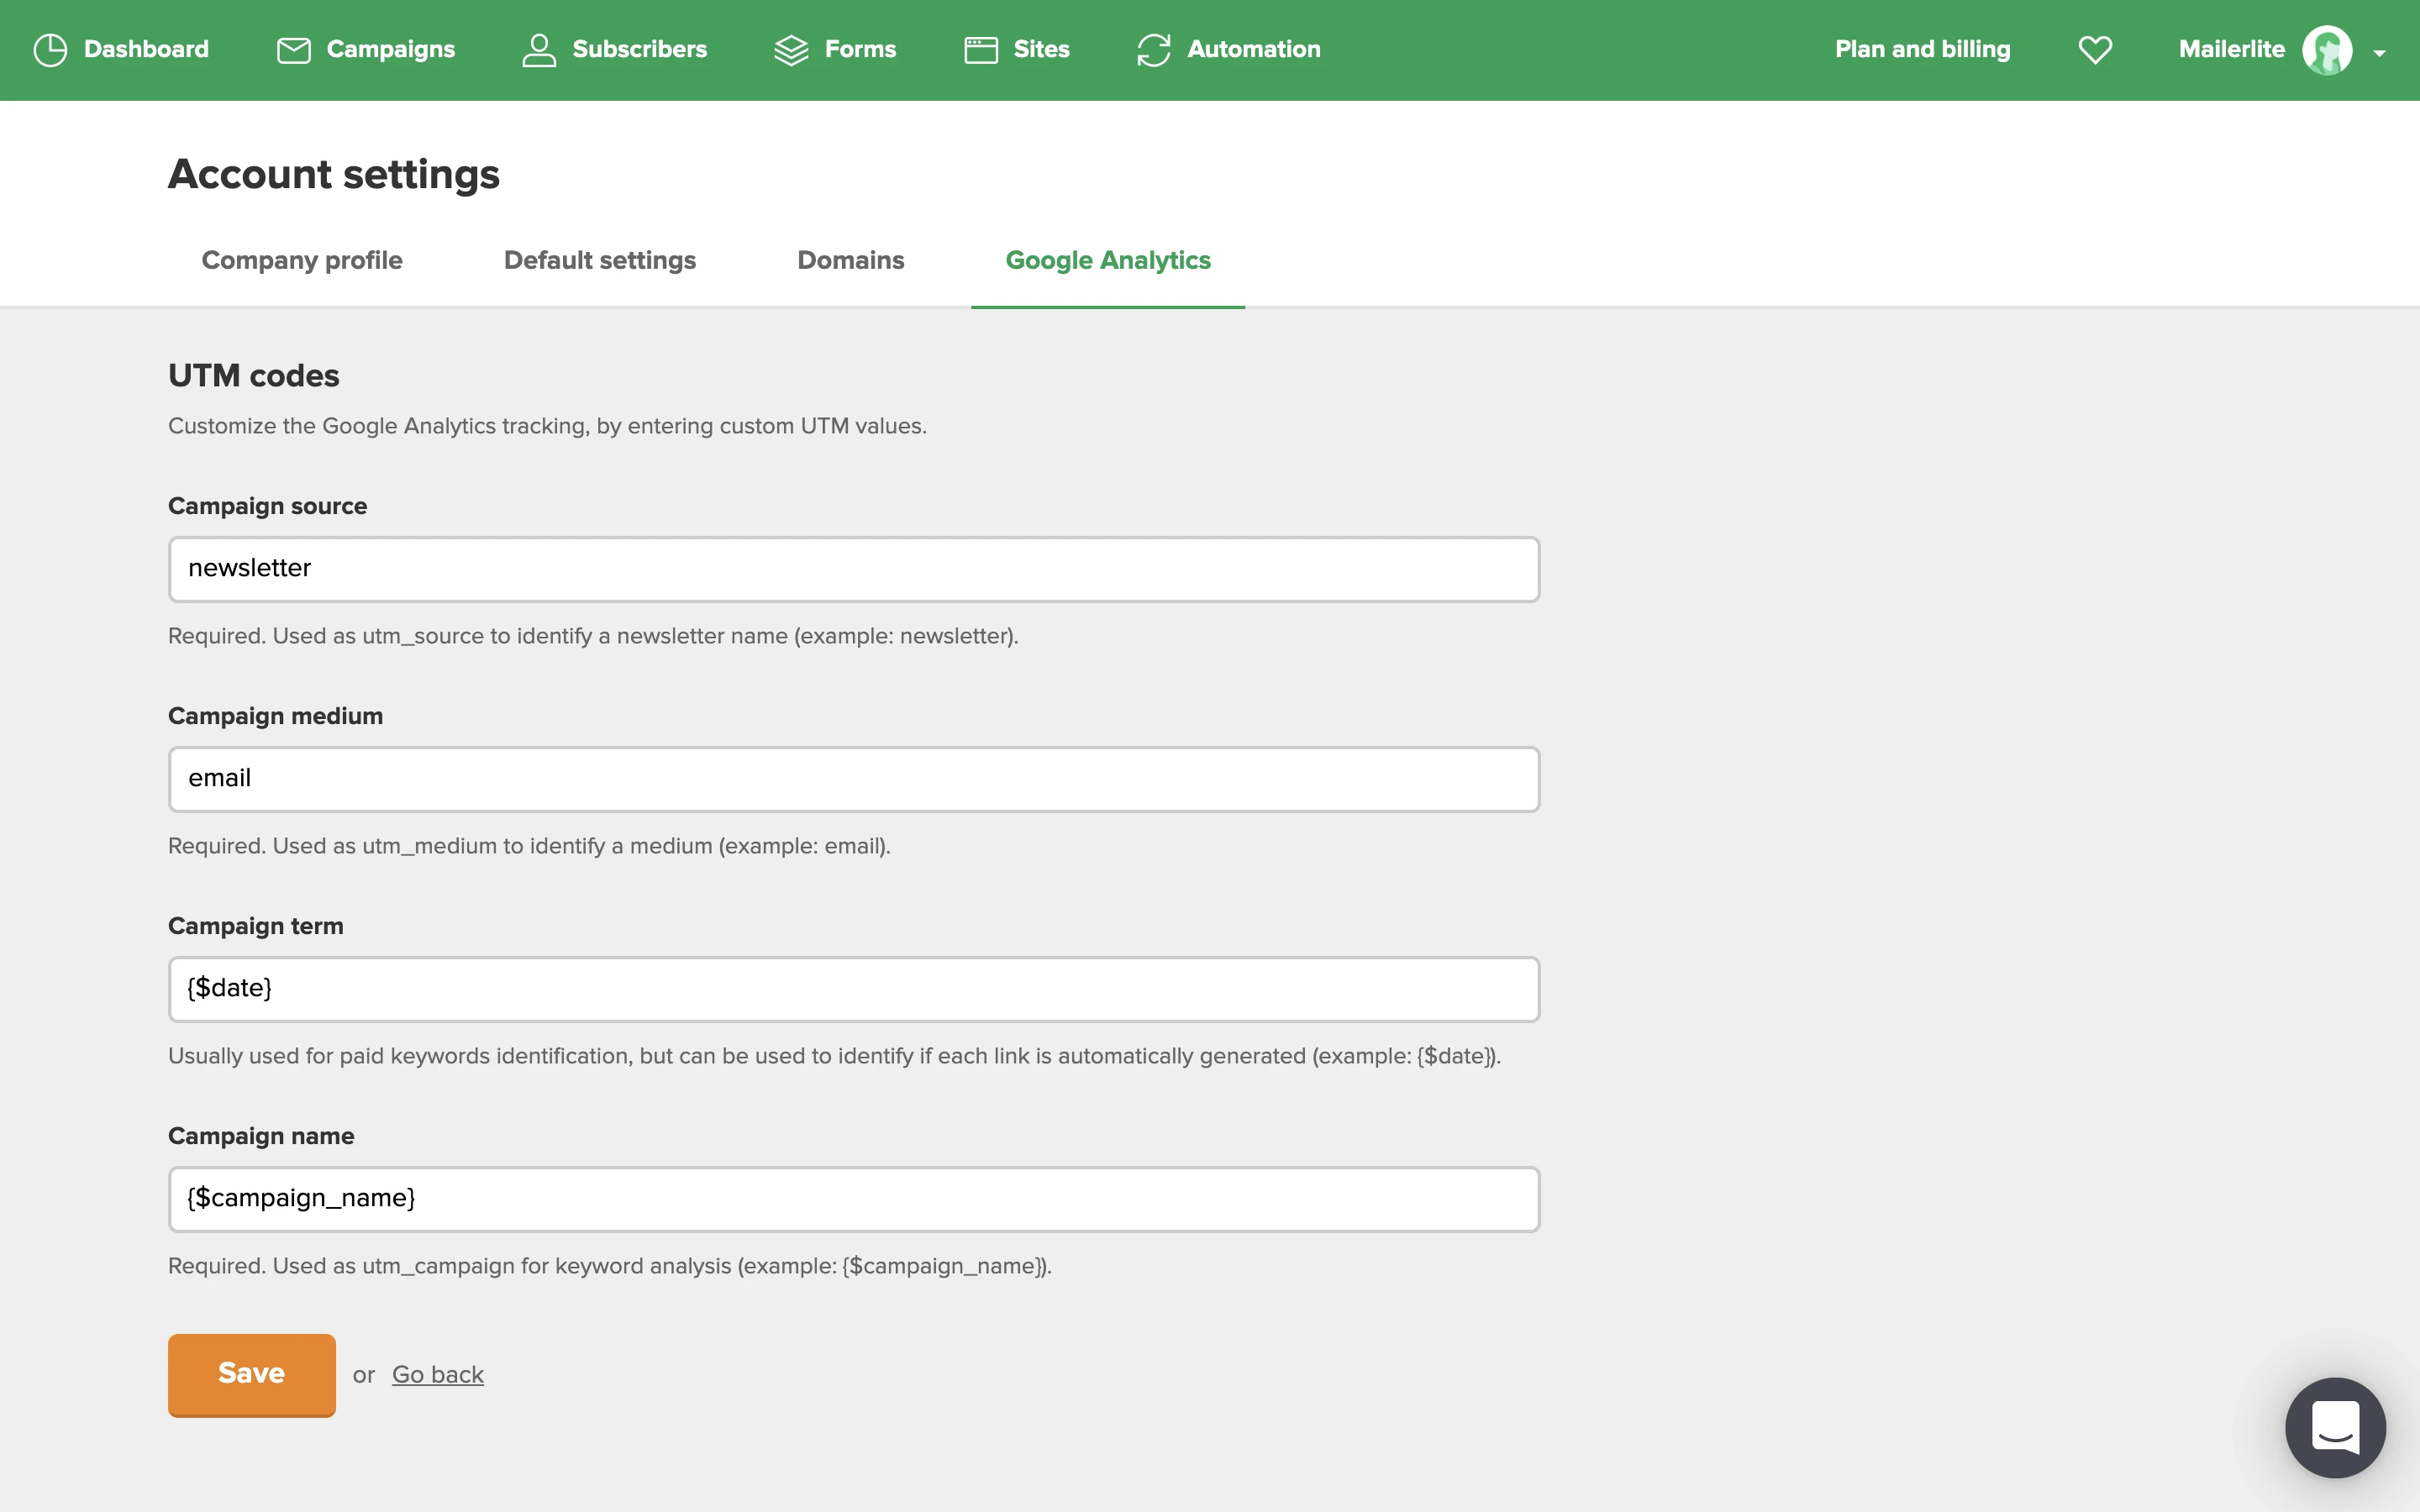
MailerLite tracks engagement in your campaigns for you. This information can be found in your campaign report. However, you can also enable Google Analytics to further record activity in your newsletter with the click of a button.
How Google Analytics works with MailerLite
When you enable Google Analytics, MailerLite adds a UTM tag to the links in your campaign. If you have Google Analytics enabled on your website, then those tags can be tracked in your Google Analytics dashboard.
How to enable Google Analytics in campaigns
To enable Google Analytics in your campaign:
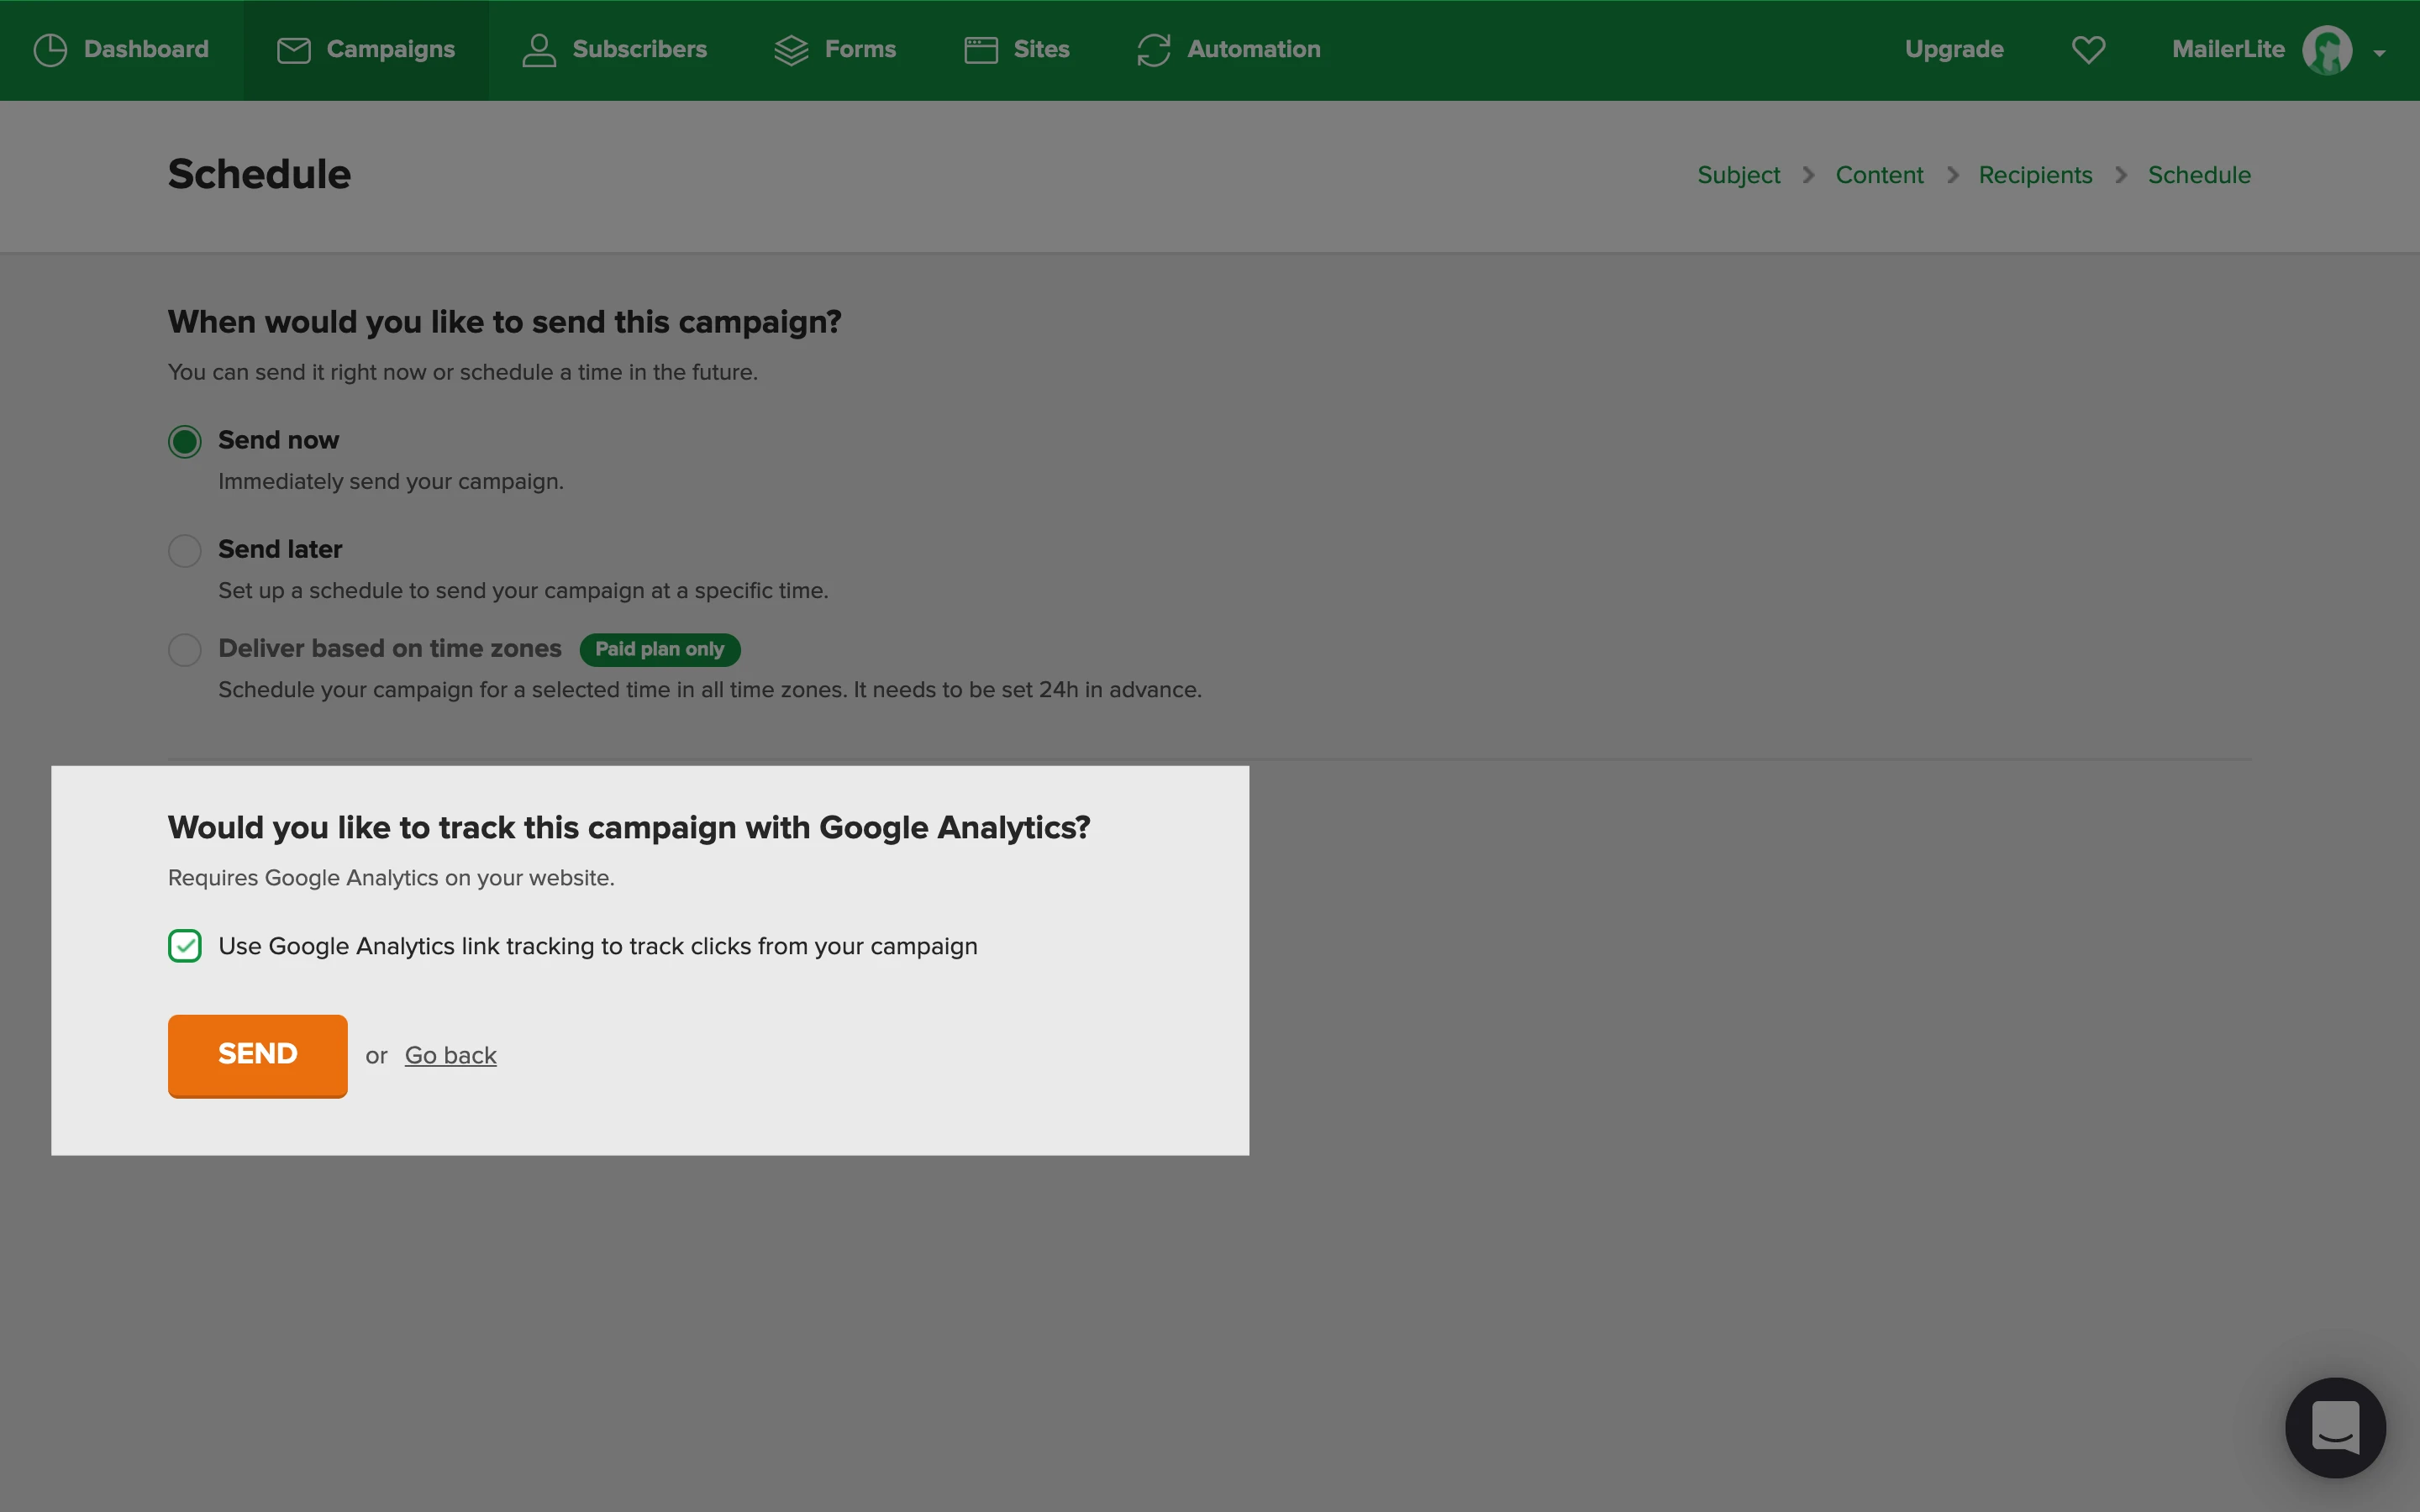
On the Campaign details page, scroll to the Tracking options section.
Check the box labeled Enable UTM tags.

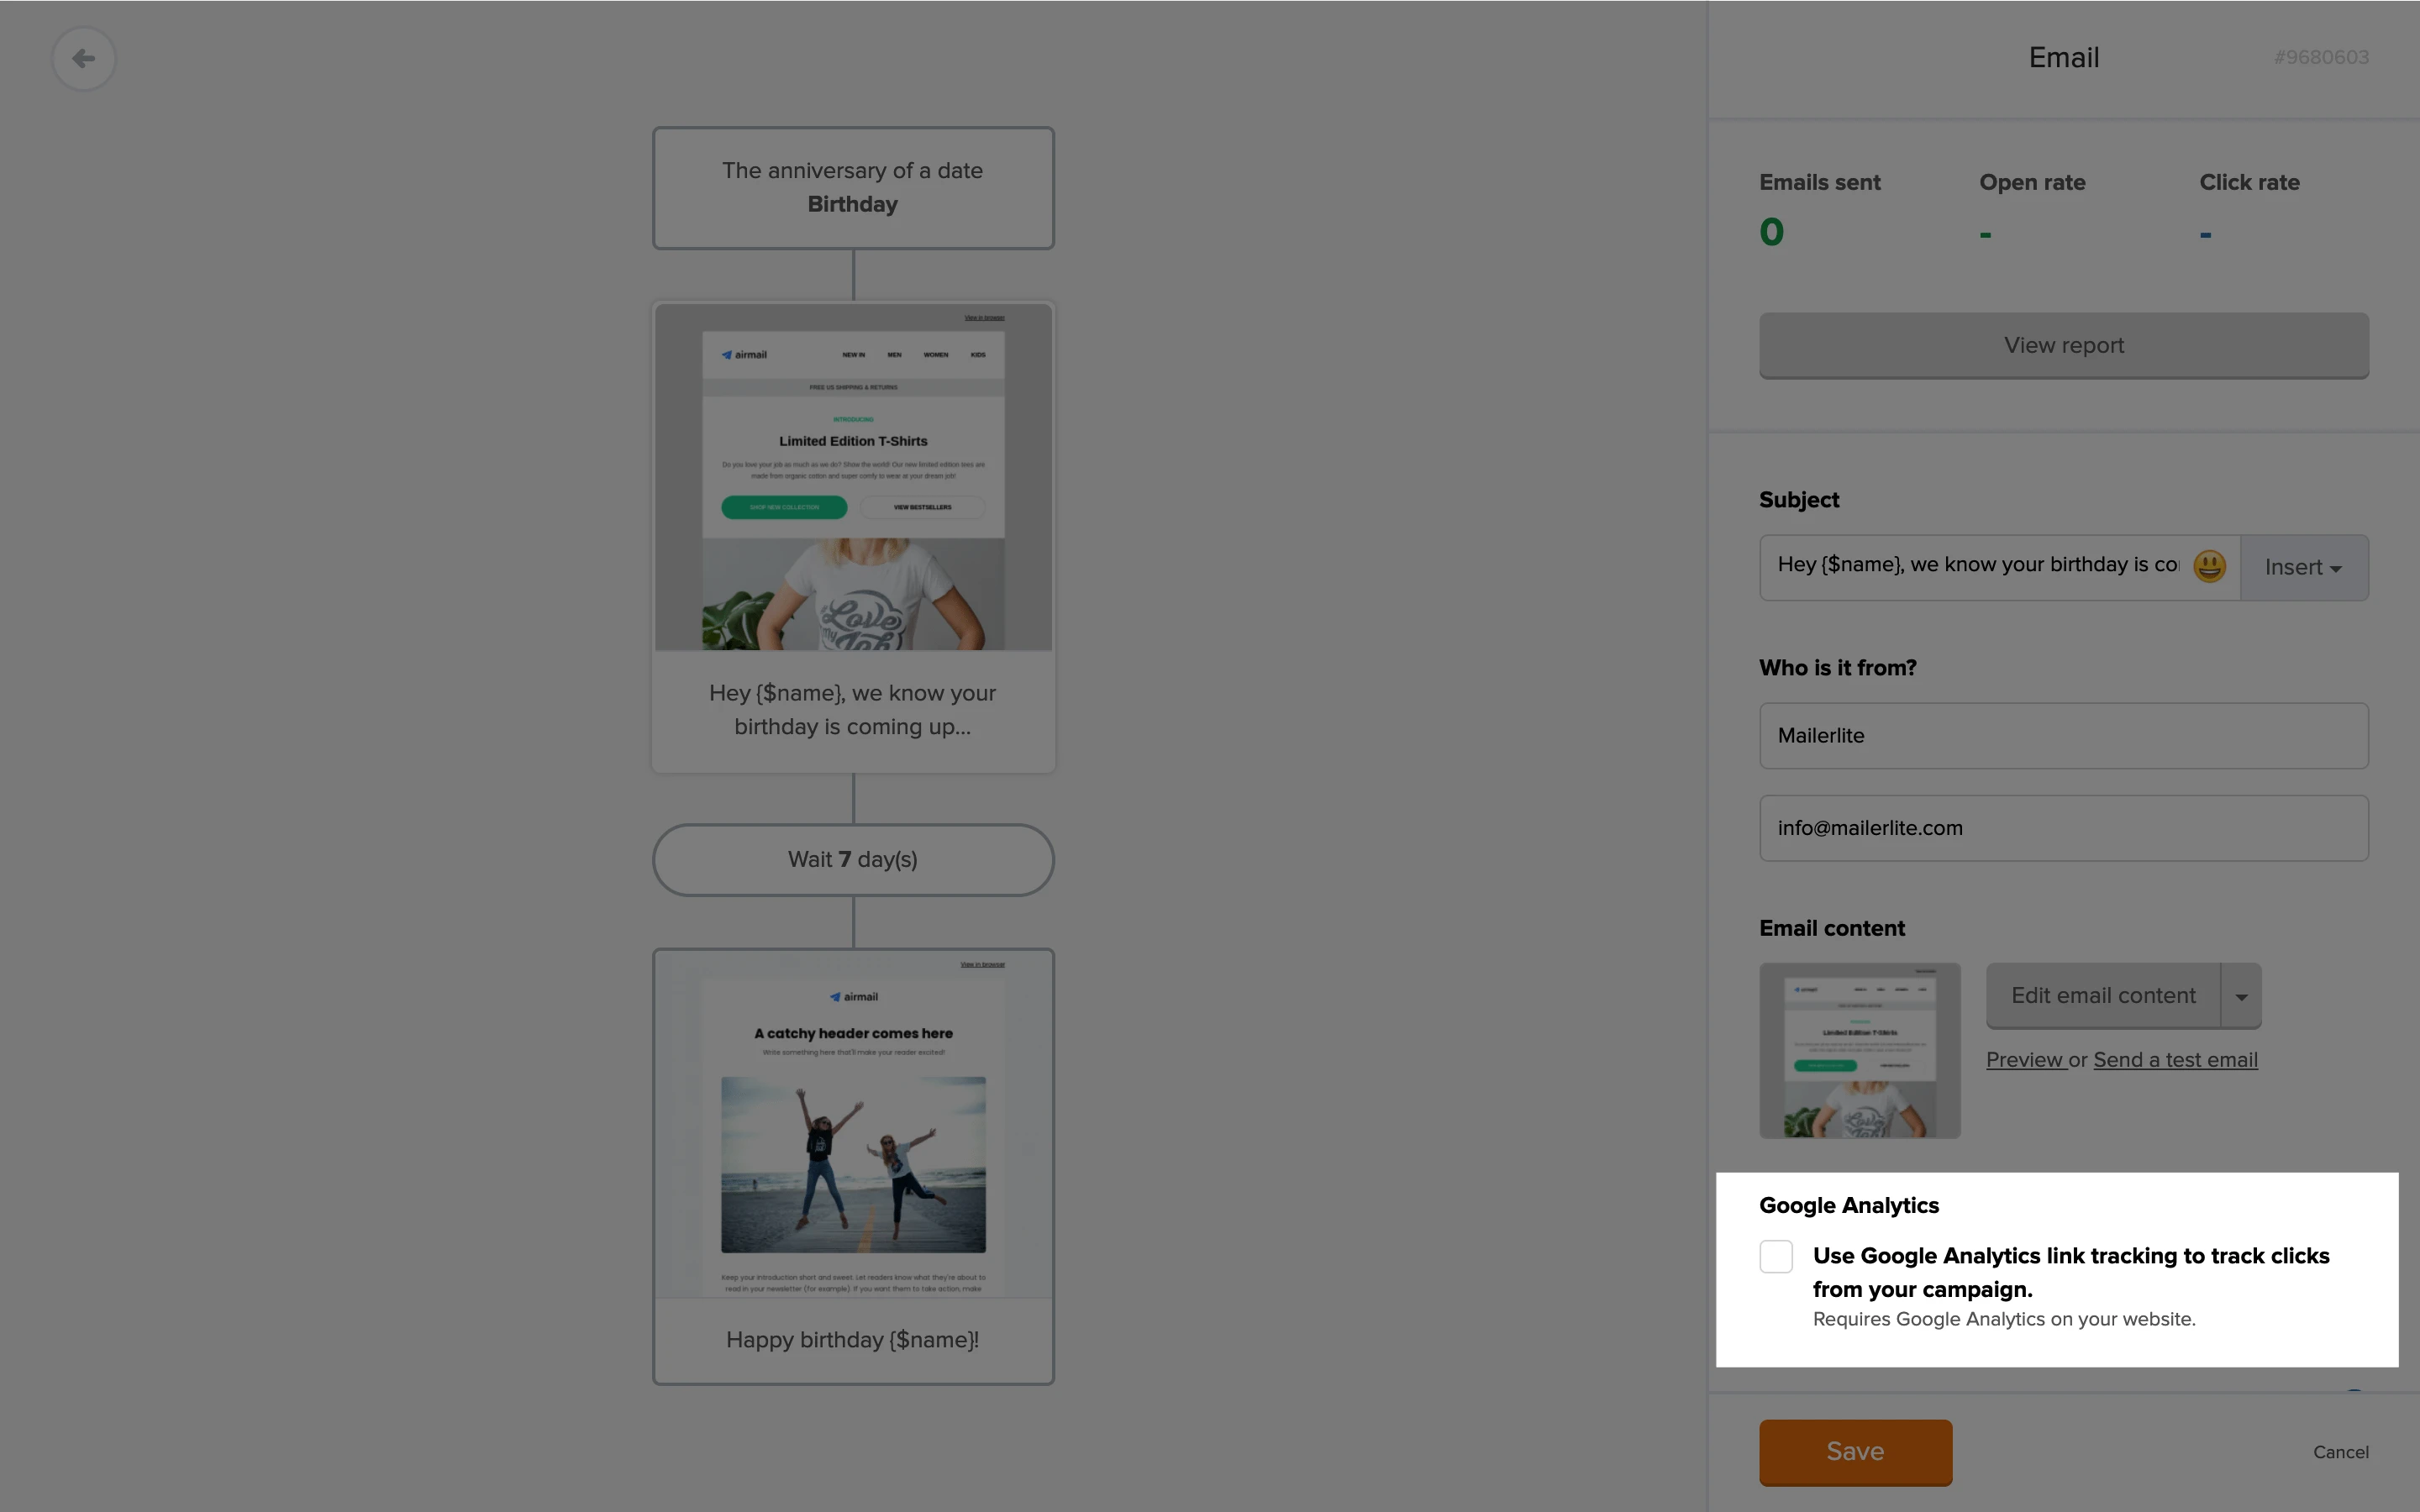
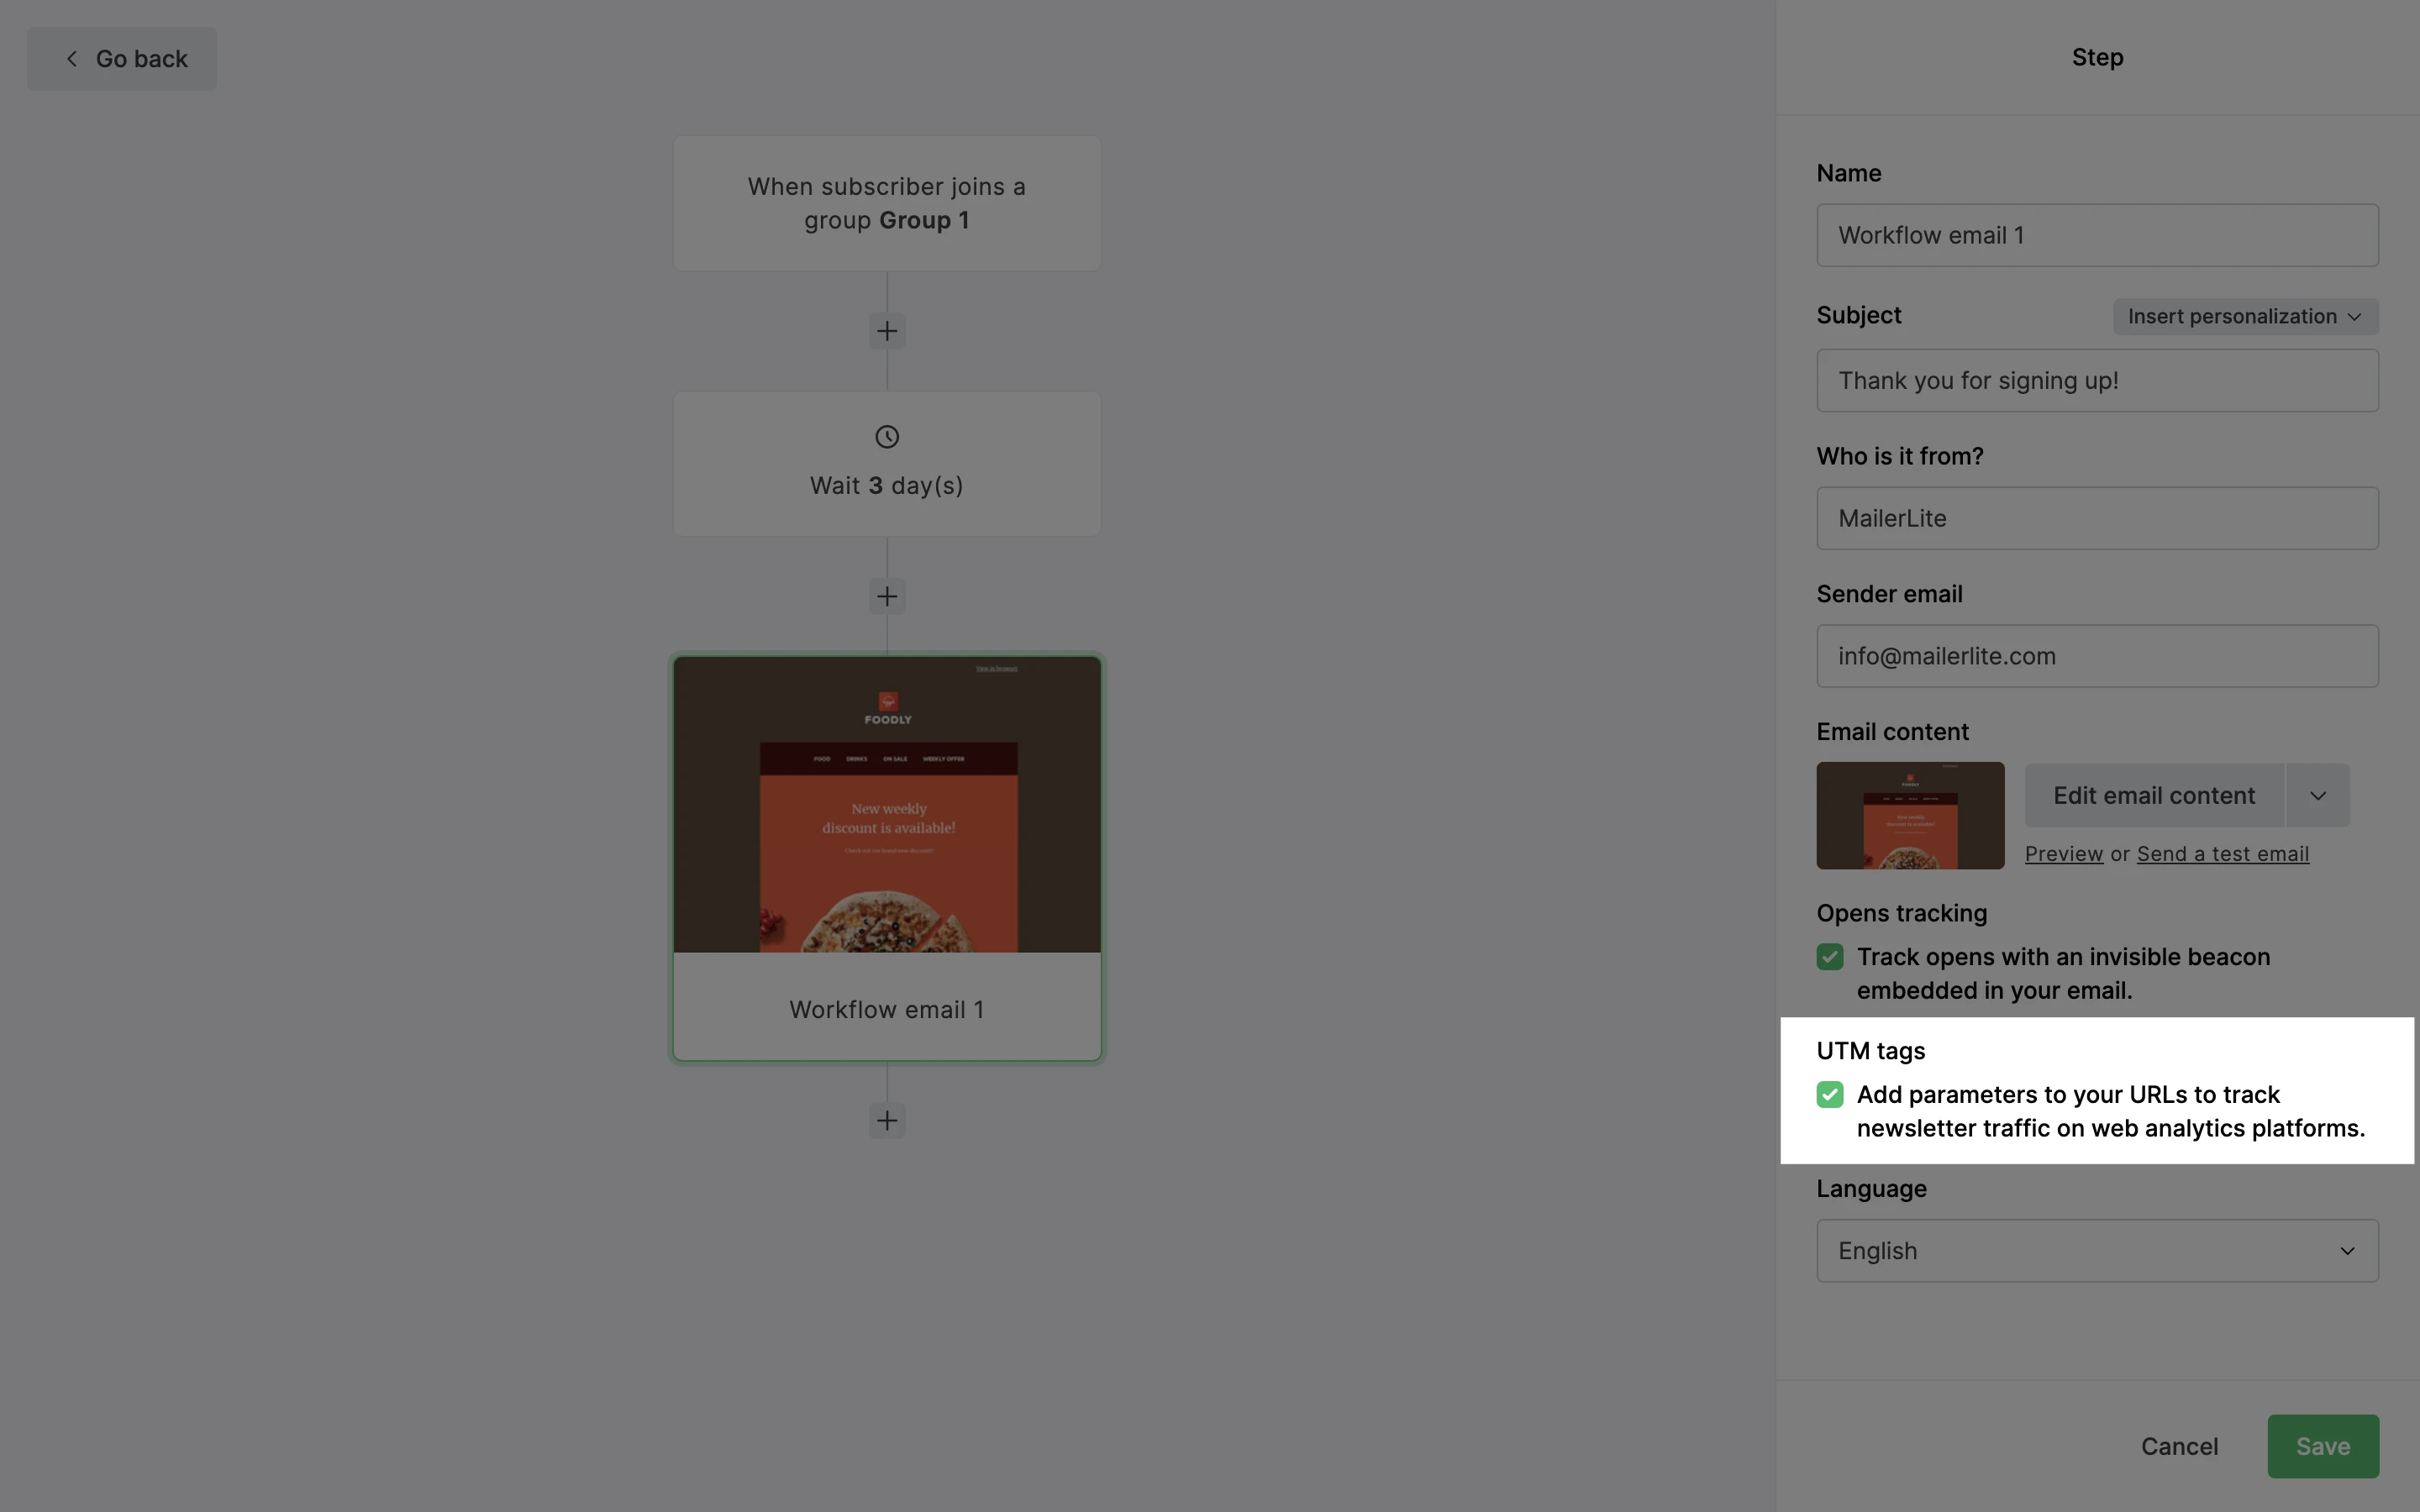
To enable Google Analytics in your automation emails:
Navigate to the Automations page.
Open the workflow editor of the automation workflow.
Click on the email step to select it.
In the sidebar, under UTM tags, check the box labeled Add parameters to your URLs to track newsletter traffic on web analytics platforms.
How to enable Google Analytics in sites
Landing pages
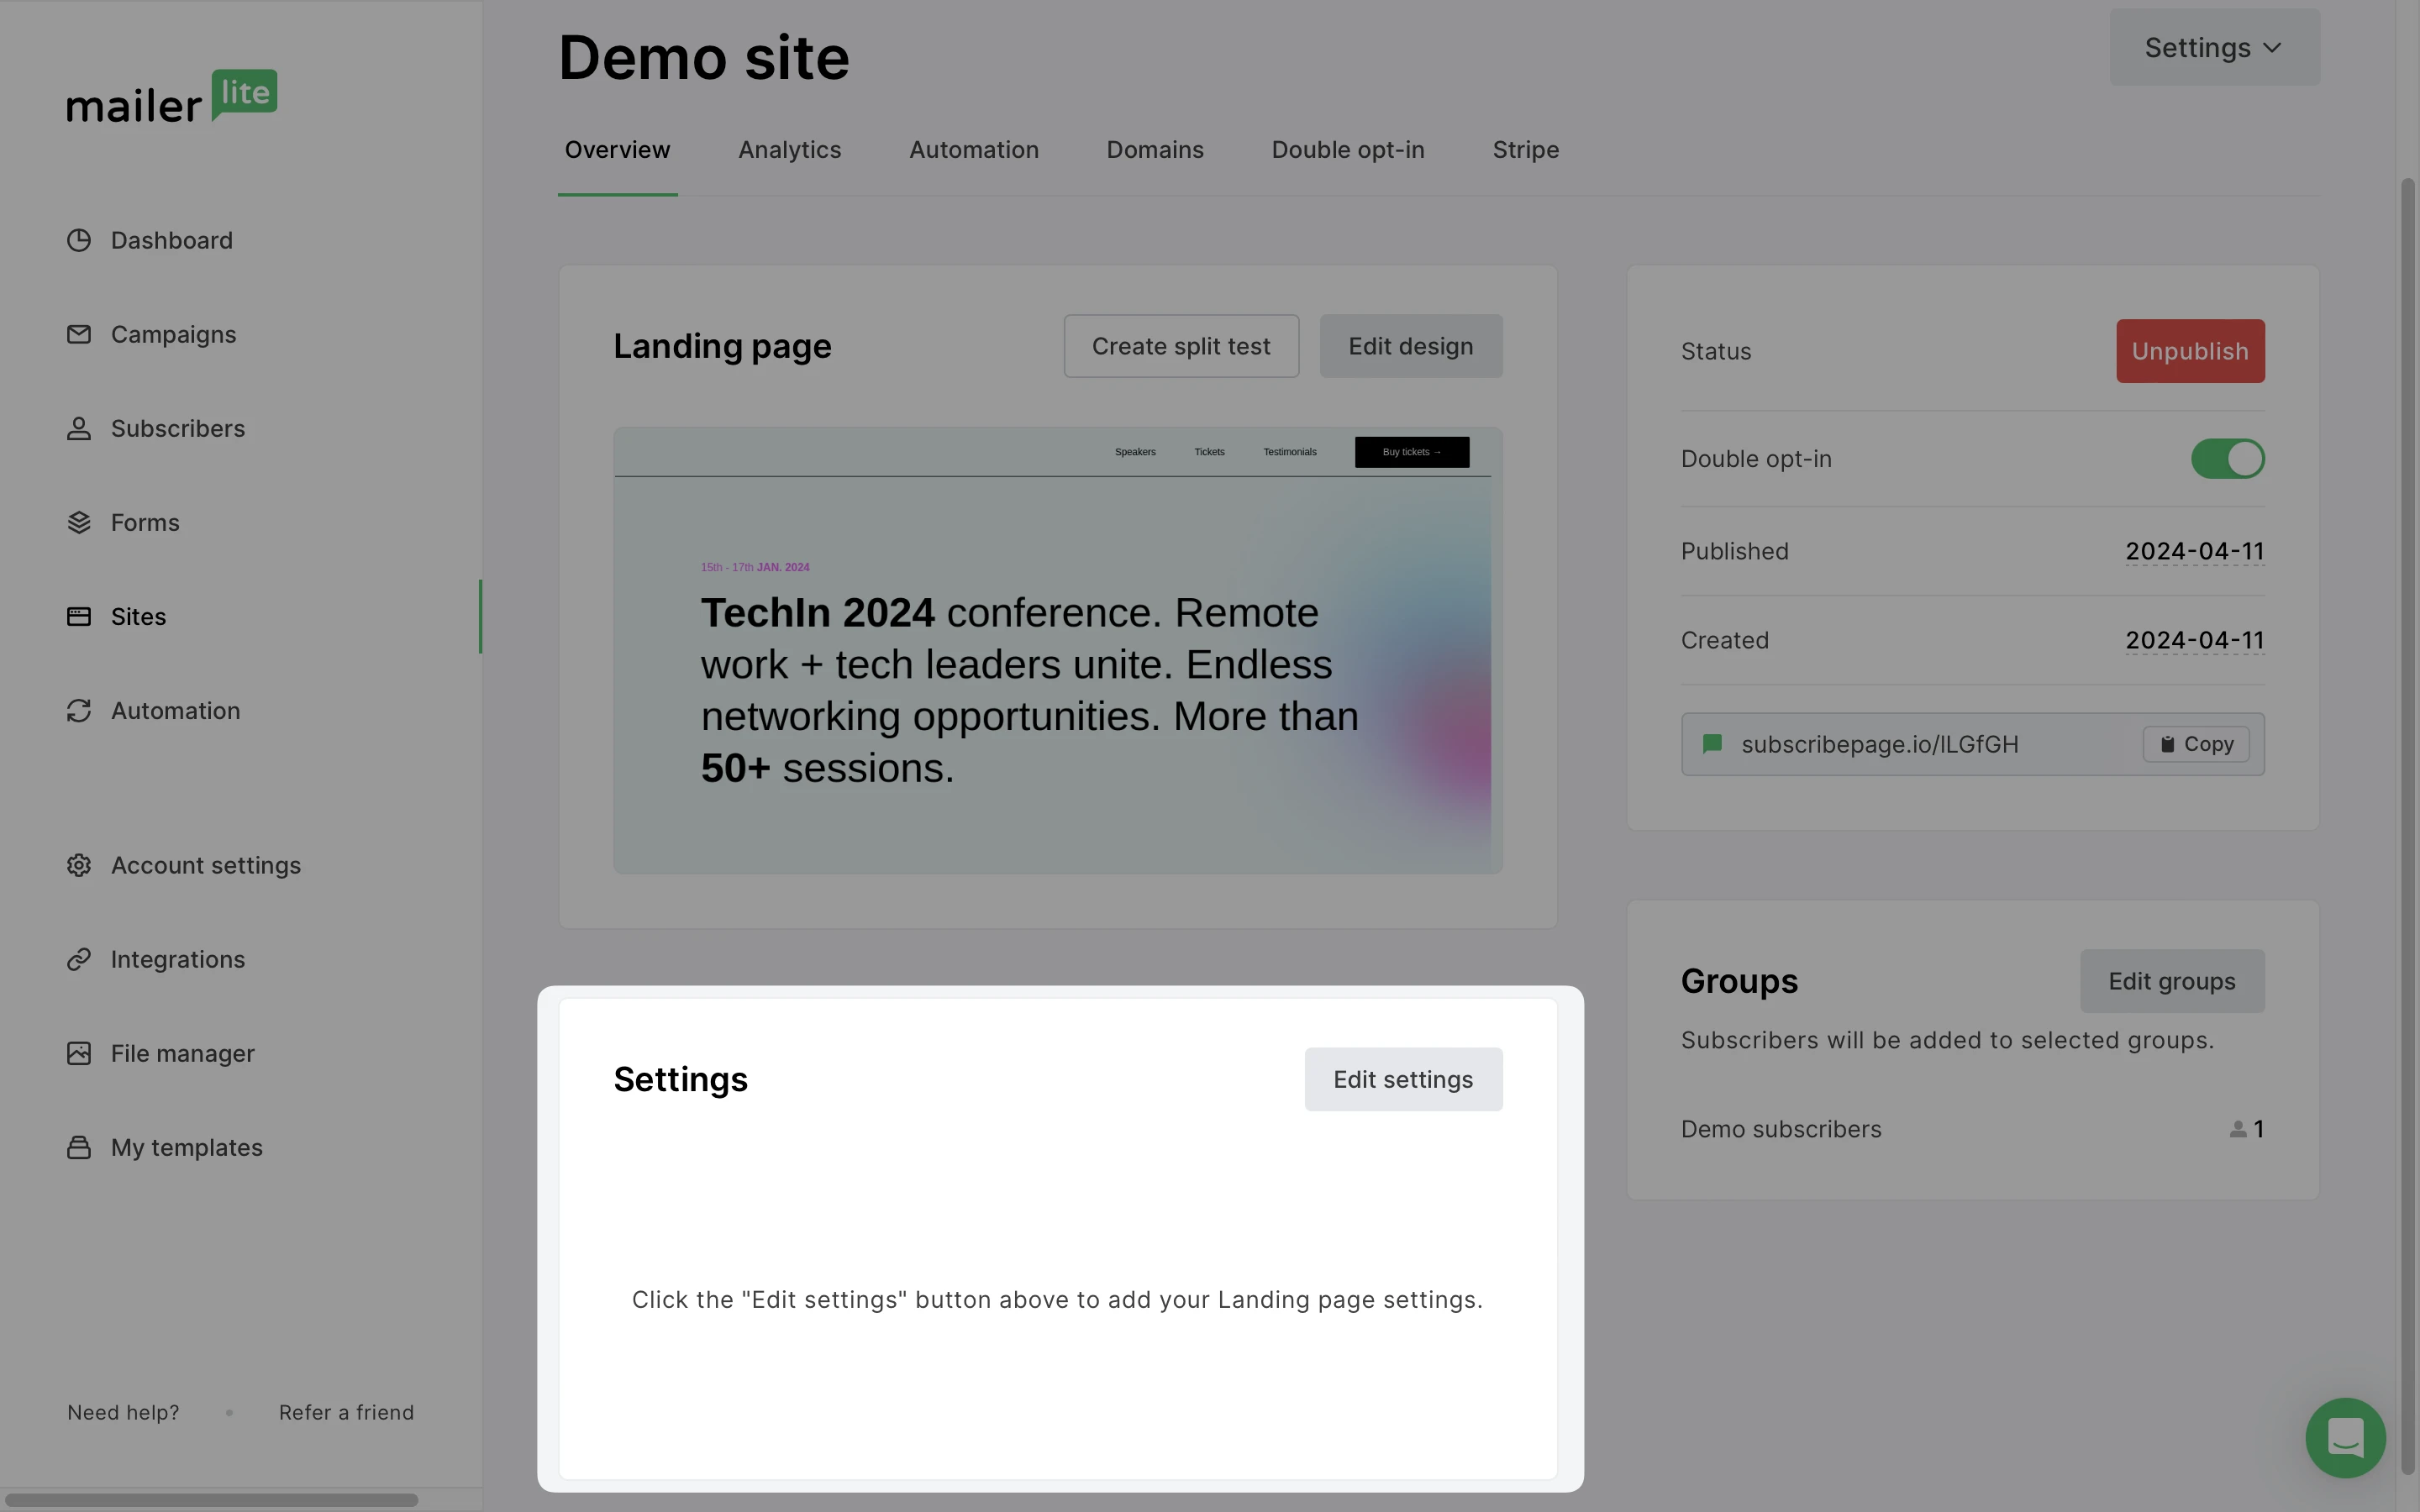
To enable Google Analytics in your landing page:
Navigate to Sites.
Locate your published landing page and click the Overview button.
Scroll down to Settings and click Edit settings.
4. Scroll down to the Analytics and custom code tab.
5. Enter your Google Analytics account number in the field provided.
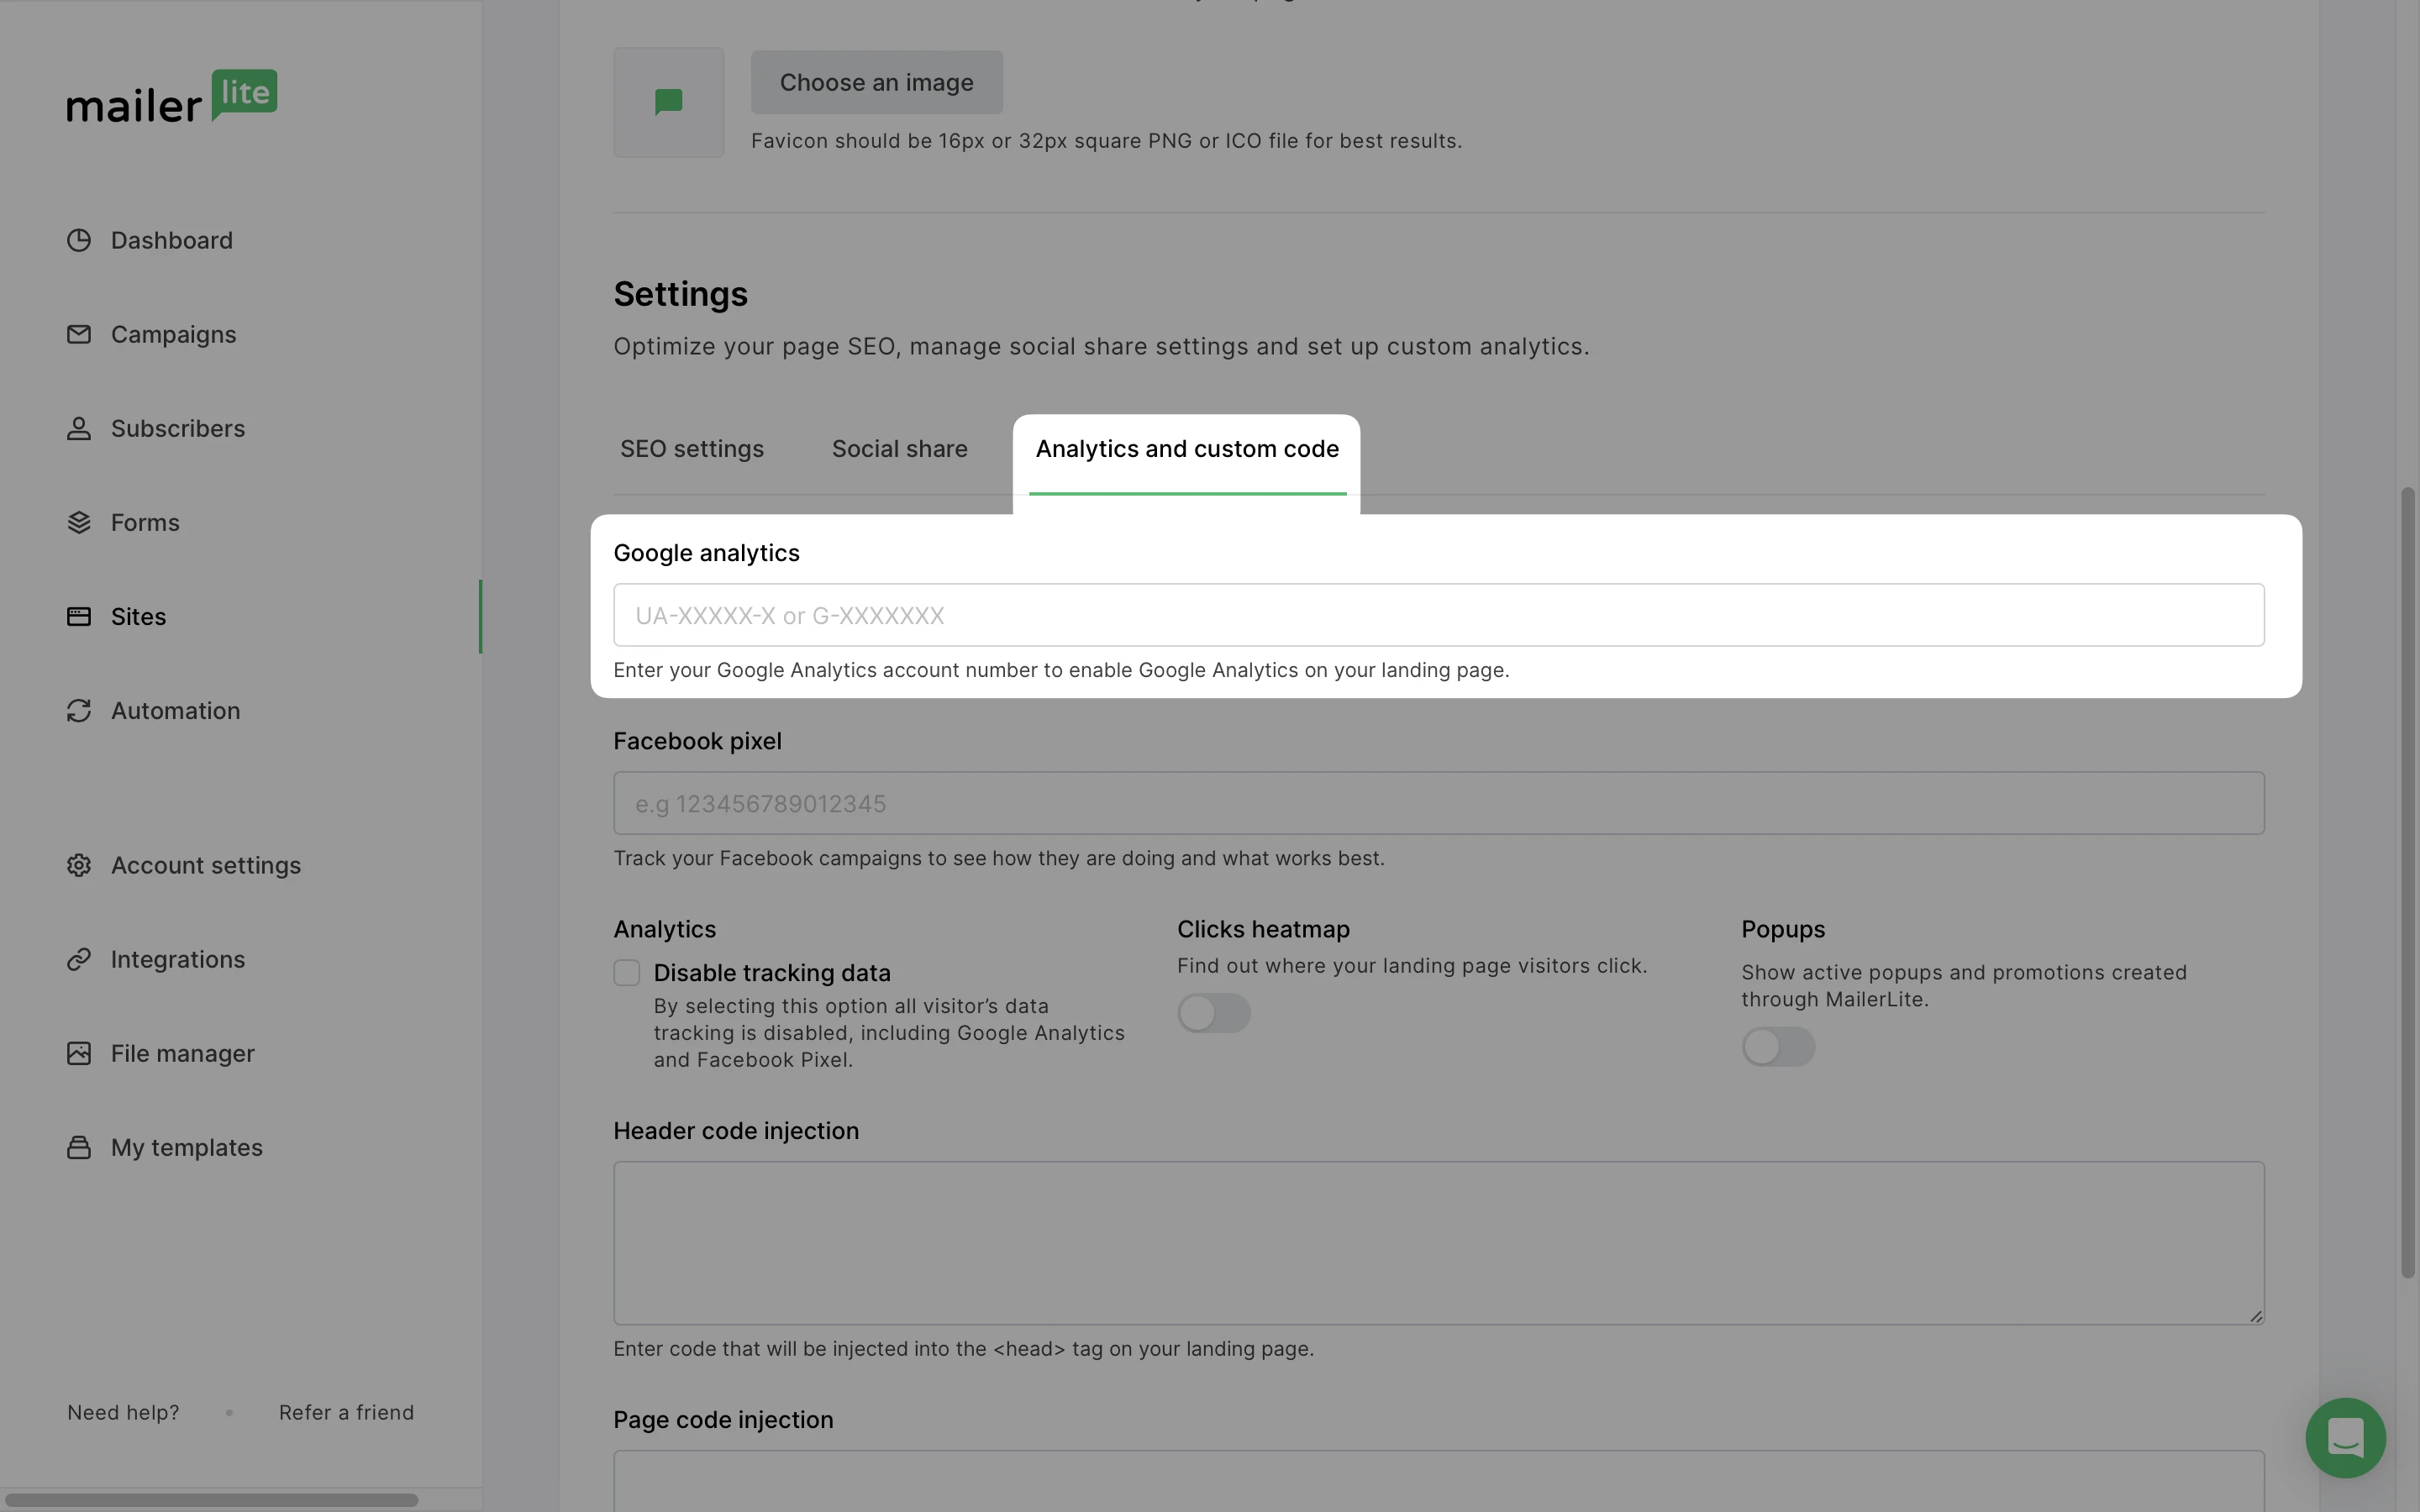
6. Click Save and Continue.
Websites
Navigate to Sites.
In the Websites tab, locate your published website and click the Overview button.
Scroll down to Settings and click Edit settings.
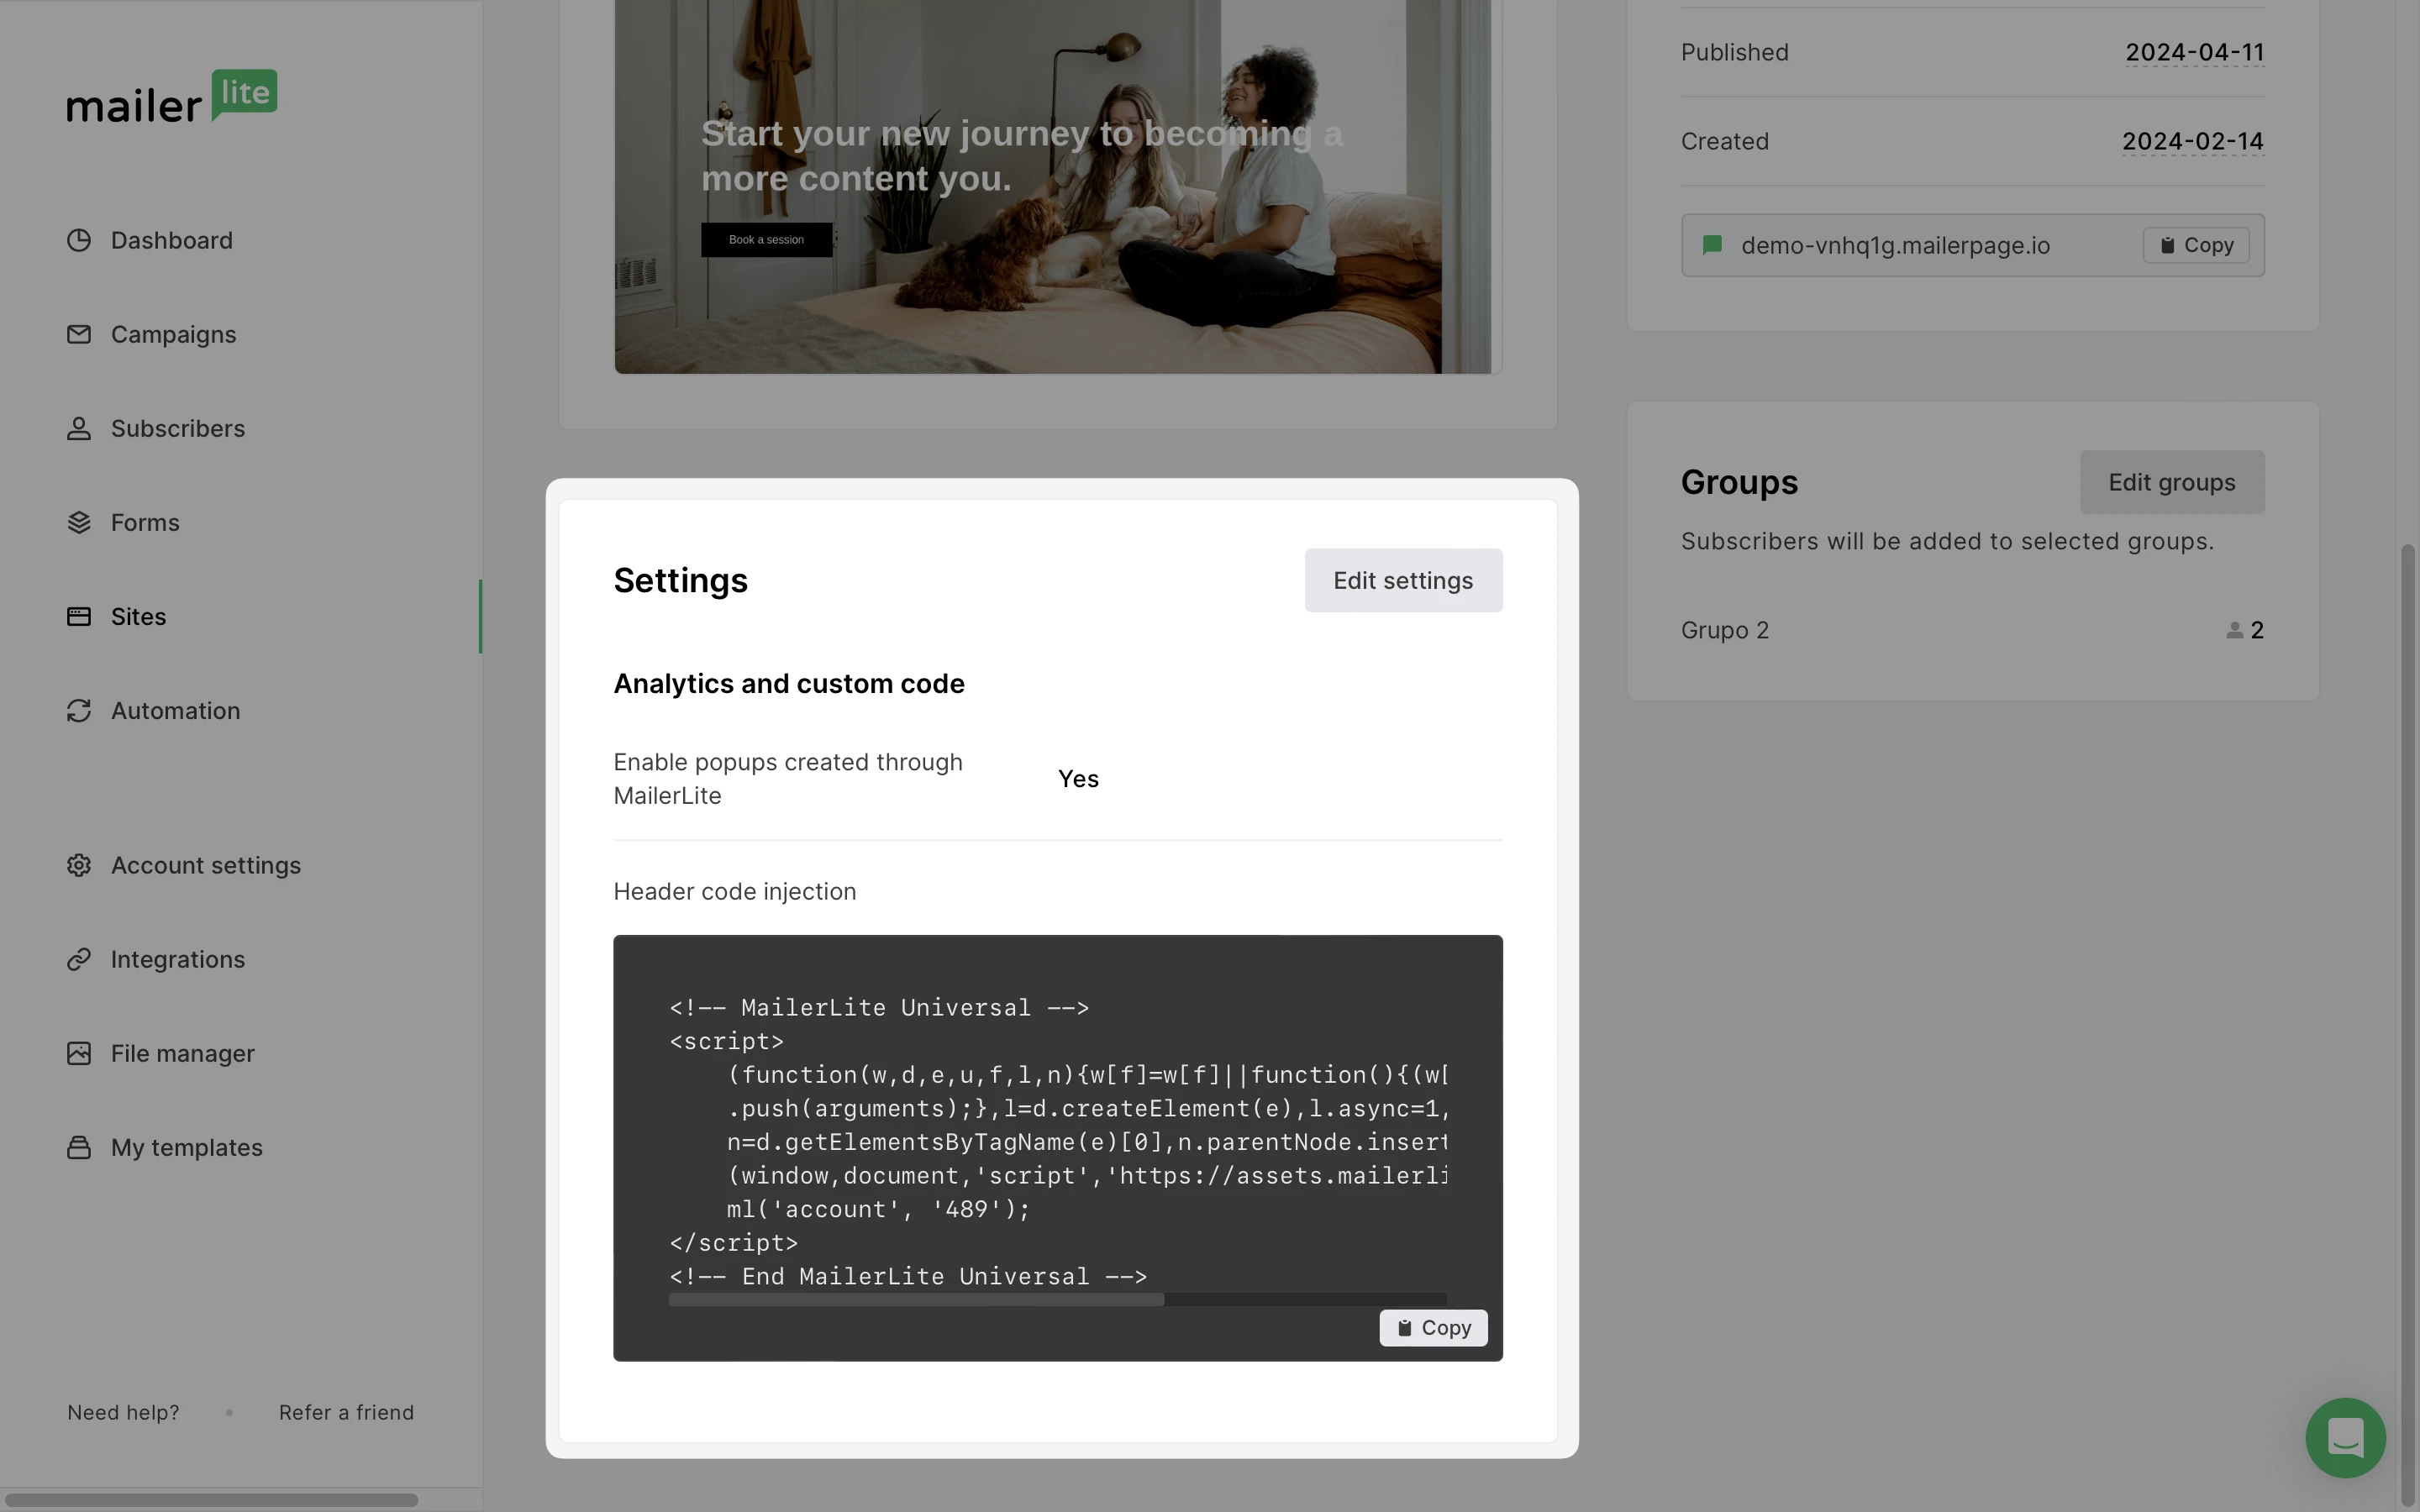
4. Scroll down to the Analytics and custom code tab.
5. Enter your Google Analytics account number in the field provided.
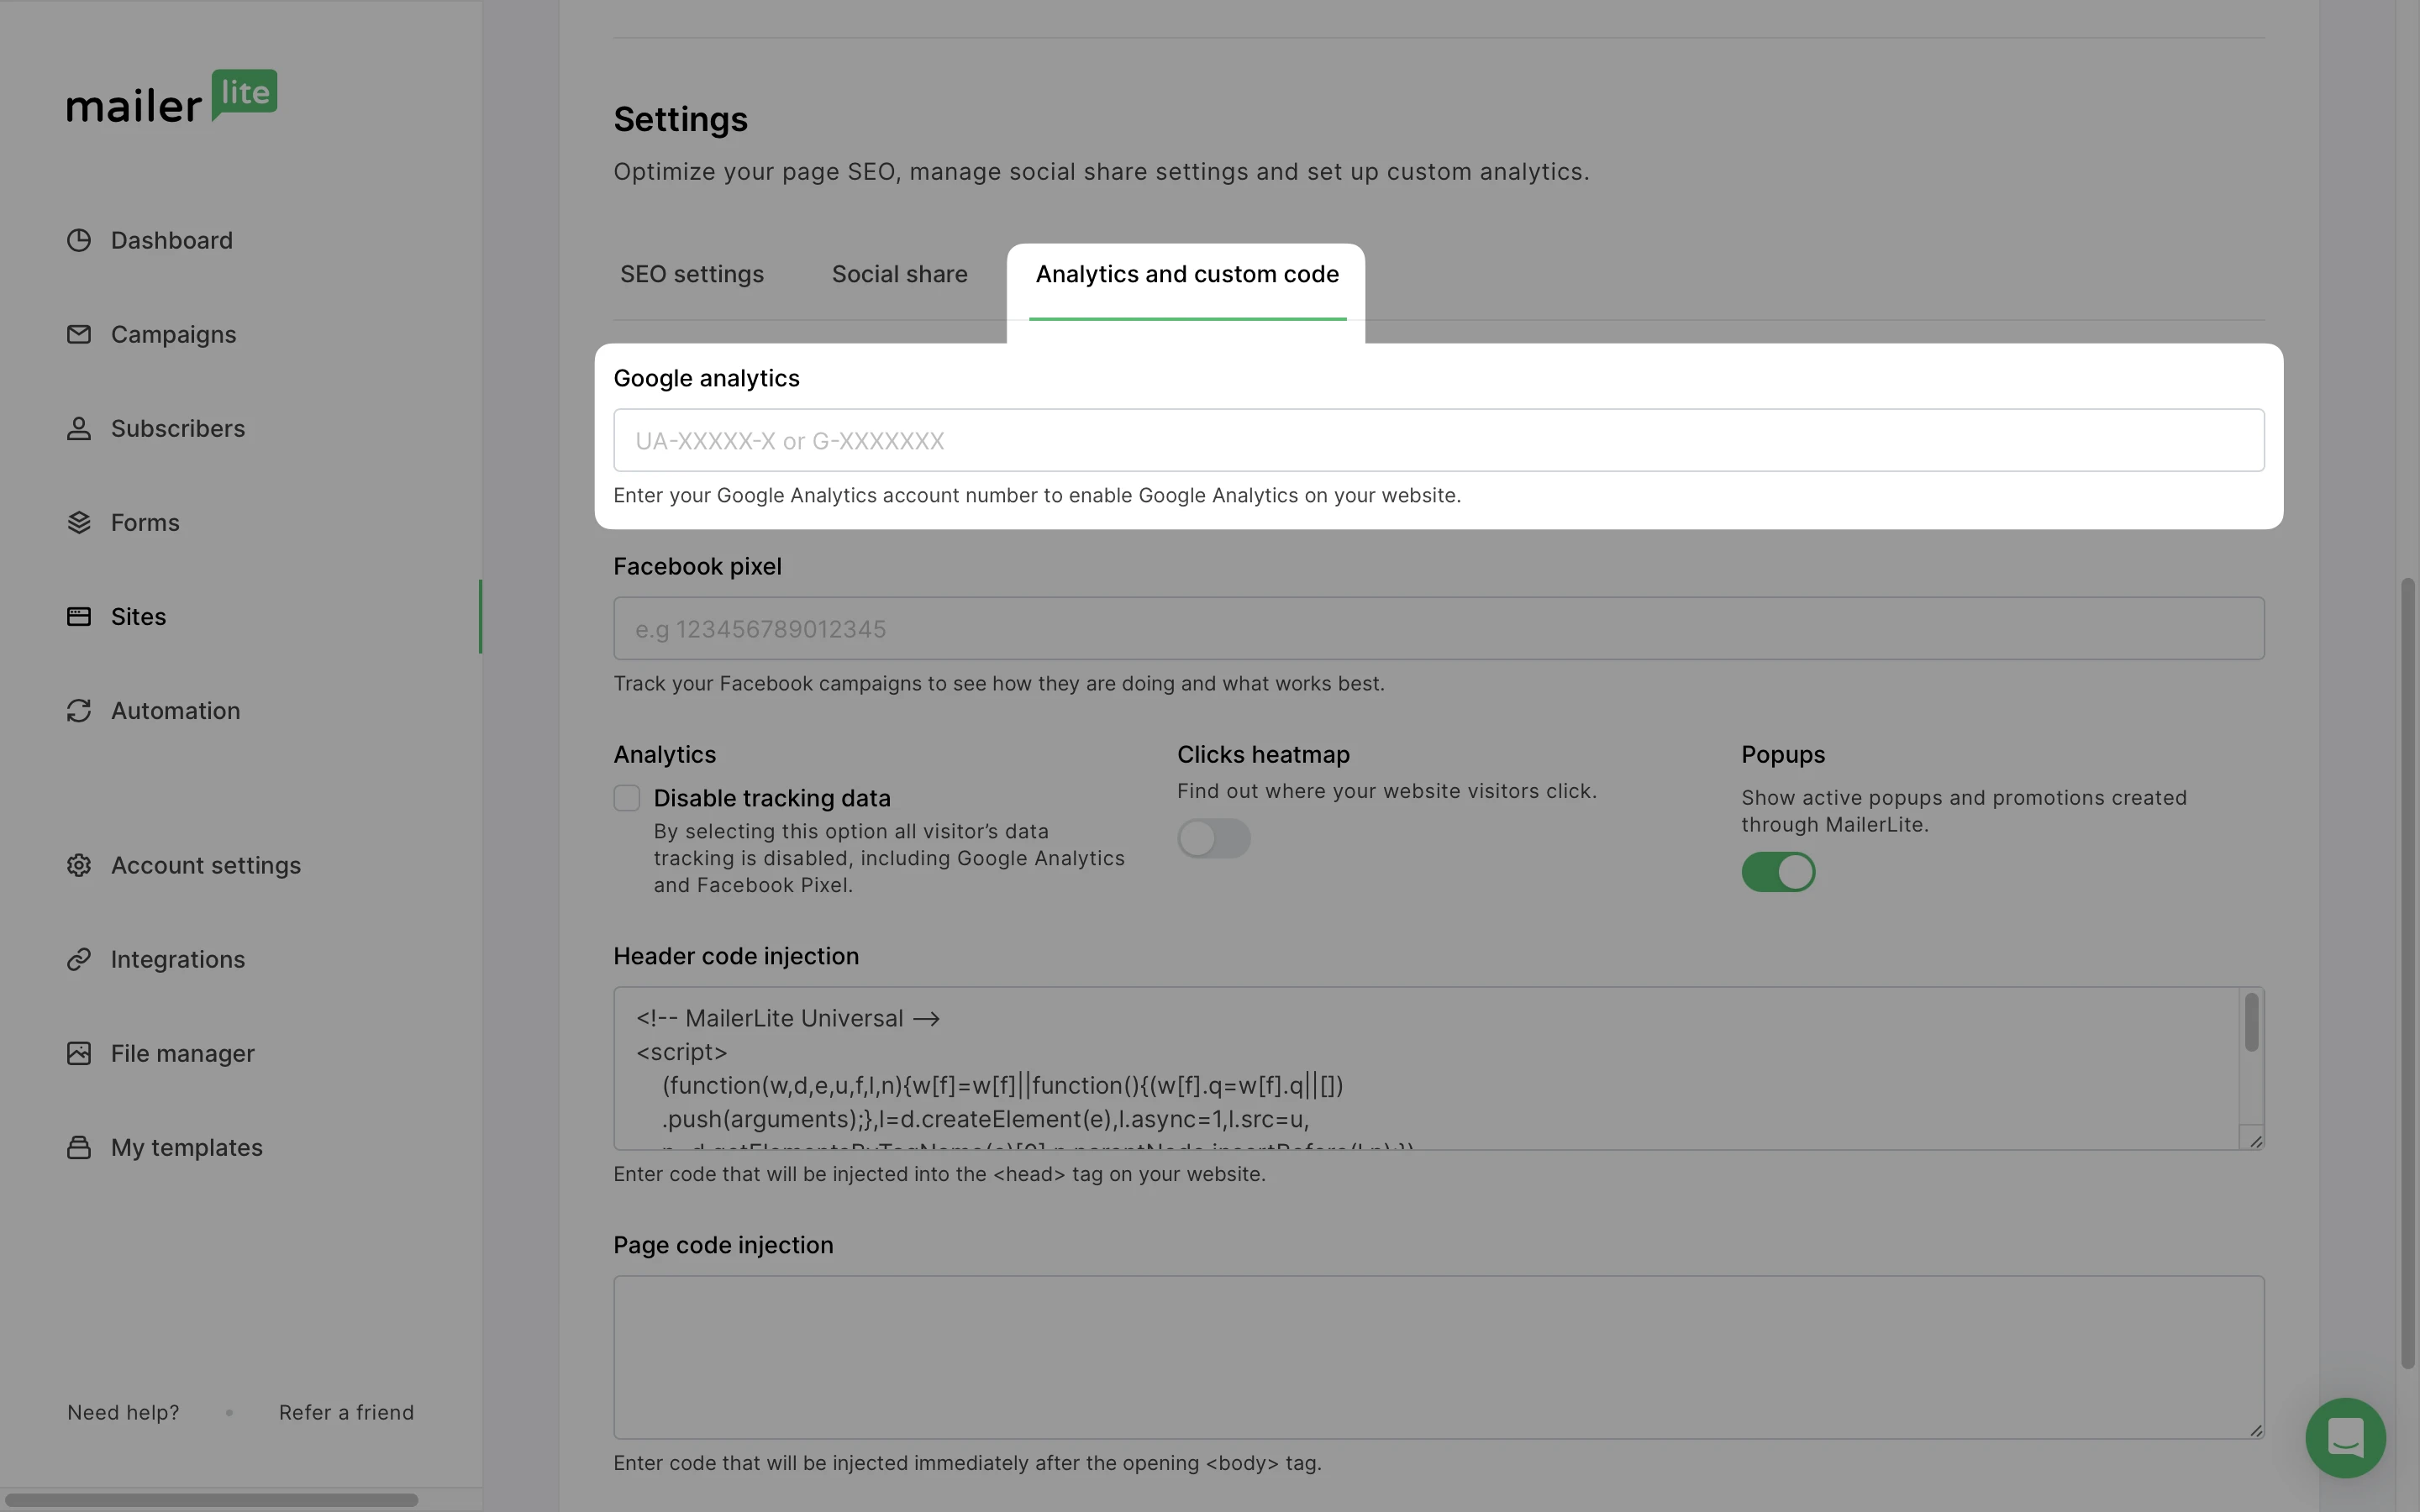
6. Click Save and Continue.
Where to find the results after enabling Google Analytics
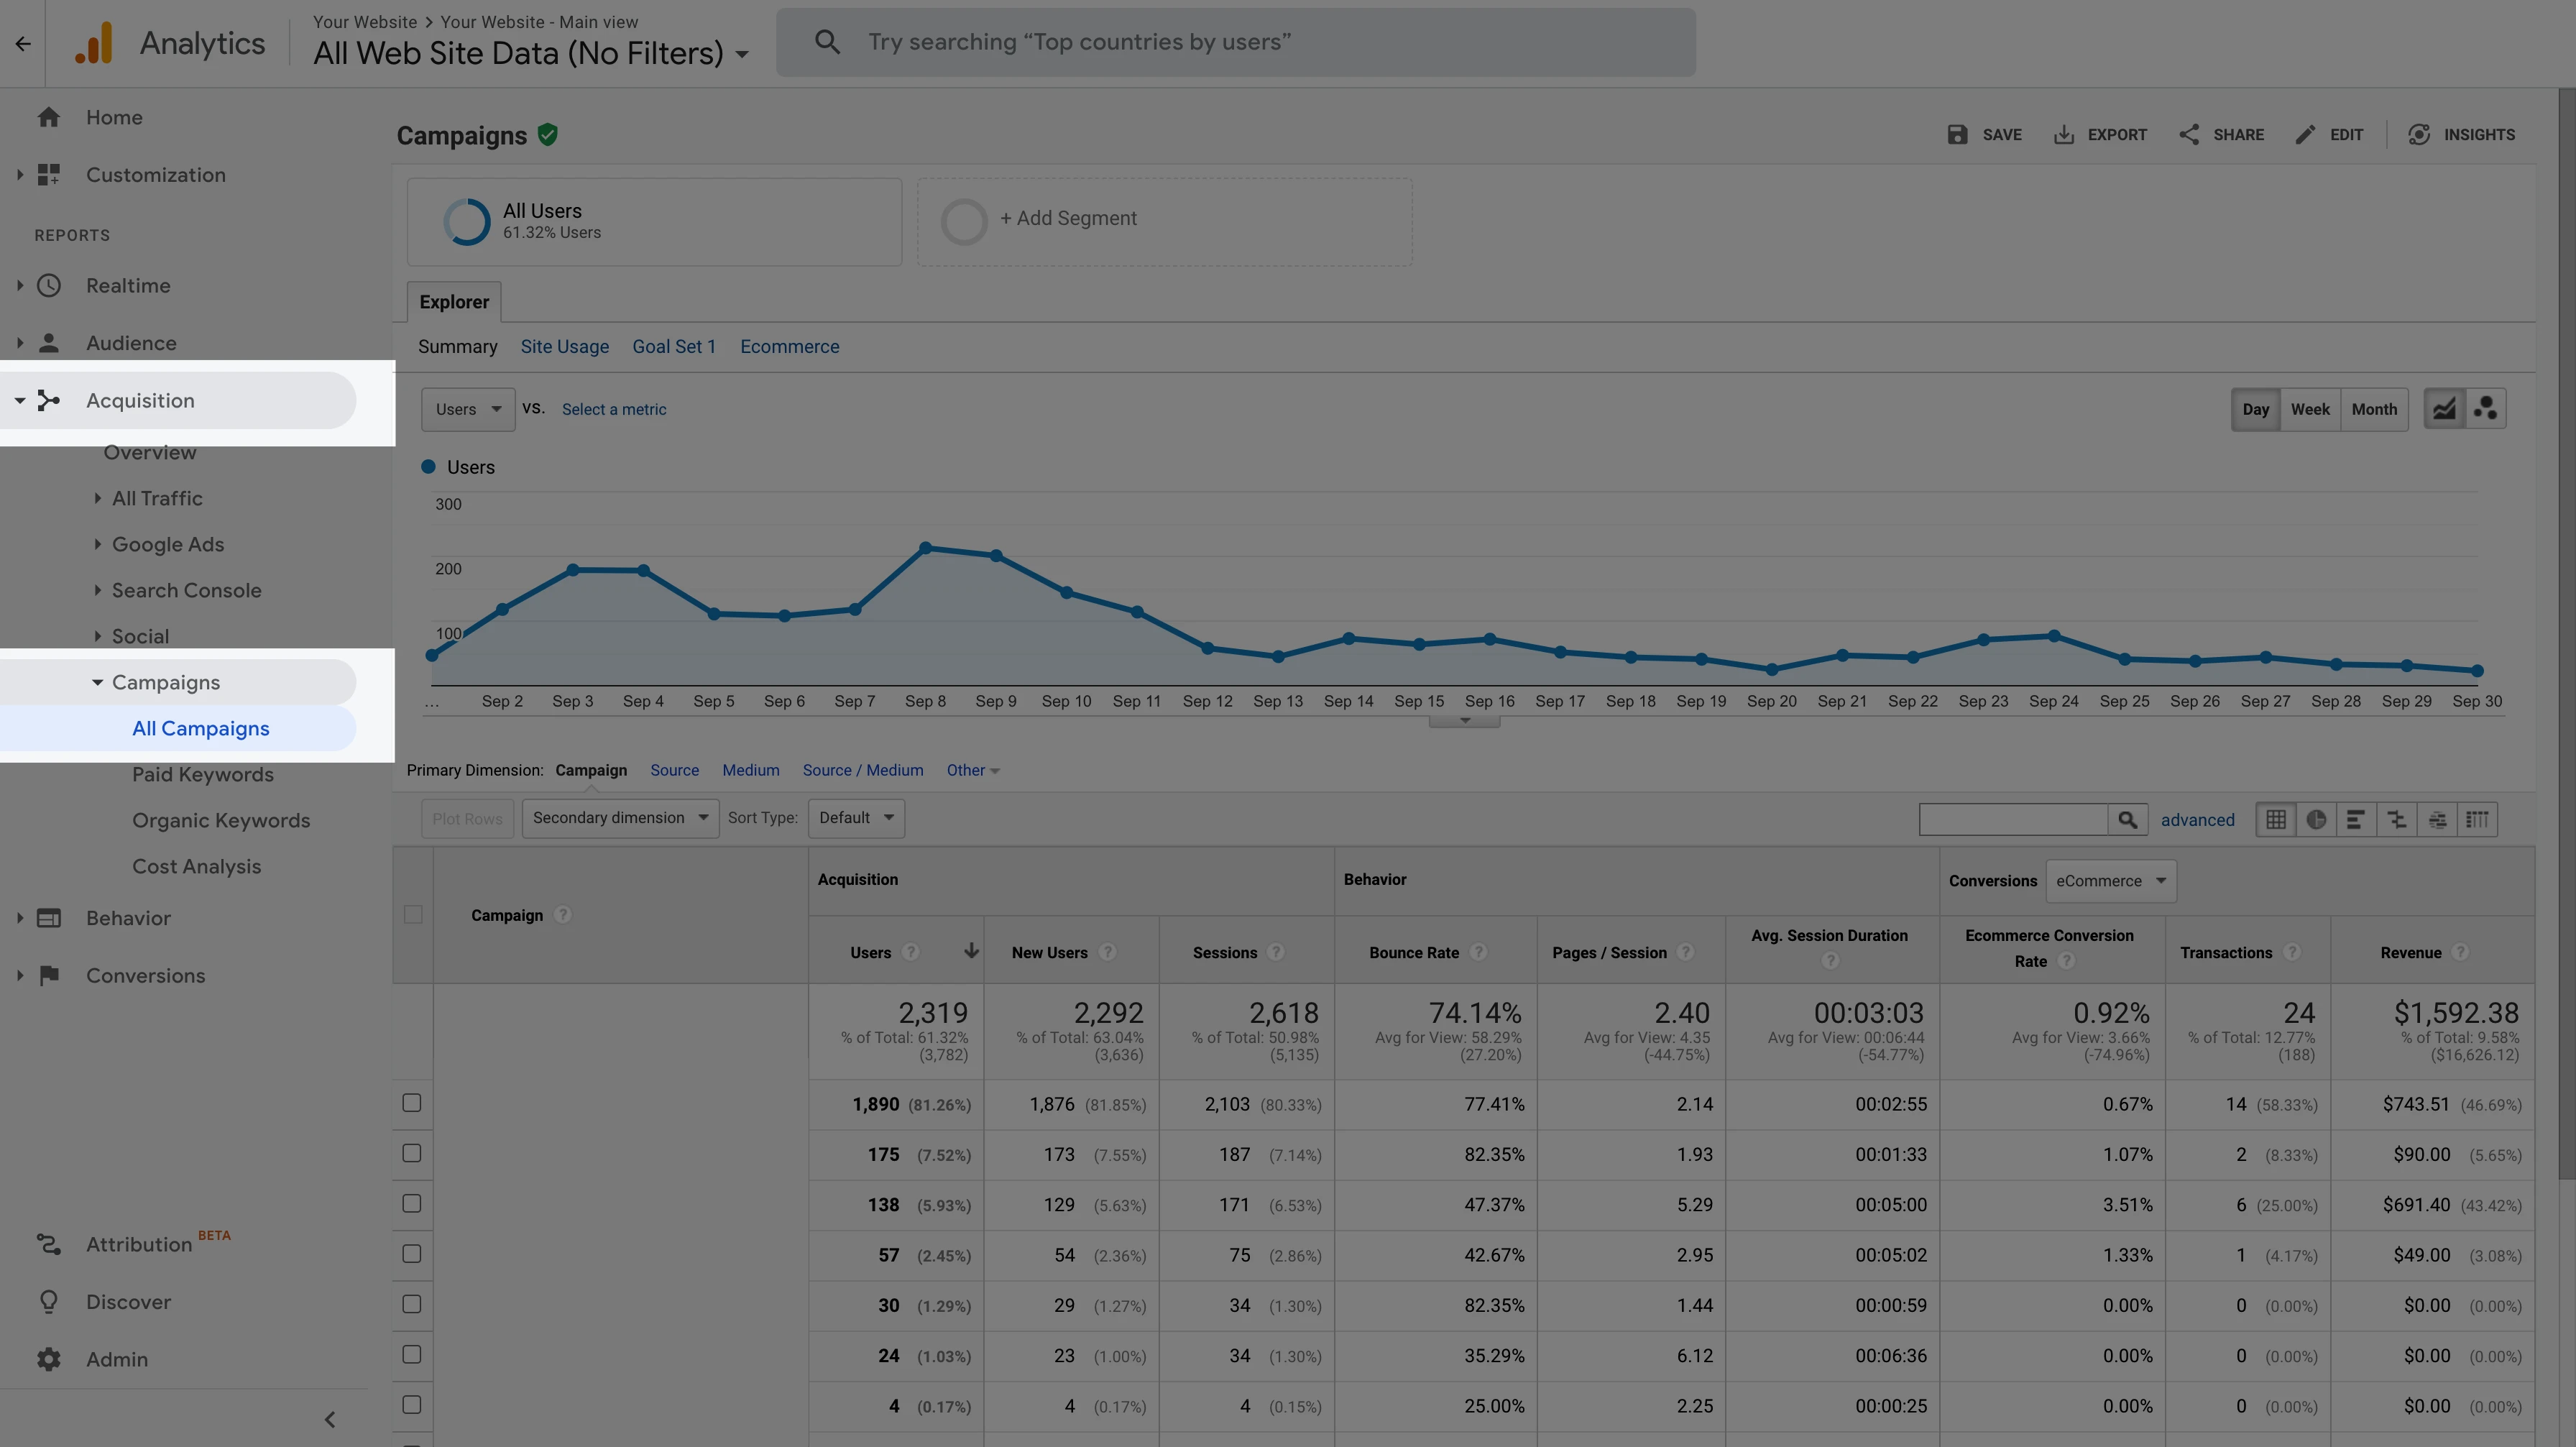
To examine the results of your email campaigns on Google Analytics:
Log in to your Google Analytics dashboard.
On the sidebar, click Acquisitions.
Click Campaigns.
Here you will find the results of enabling Google Analytics in emails sent from your MailerLite account.
How to add custom UTM tags for Google Analytics
If you want to customise your Google Analytics tracking by adding custom UTM values:
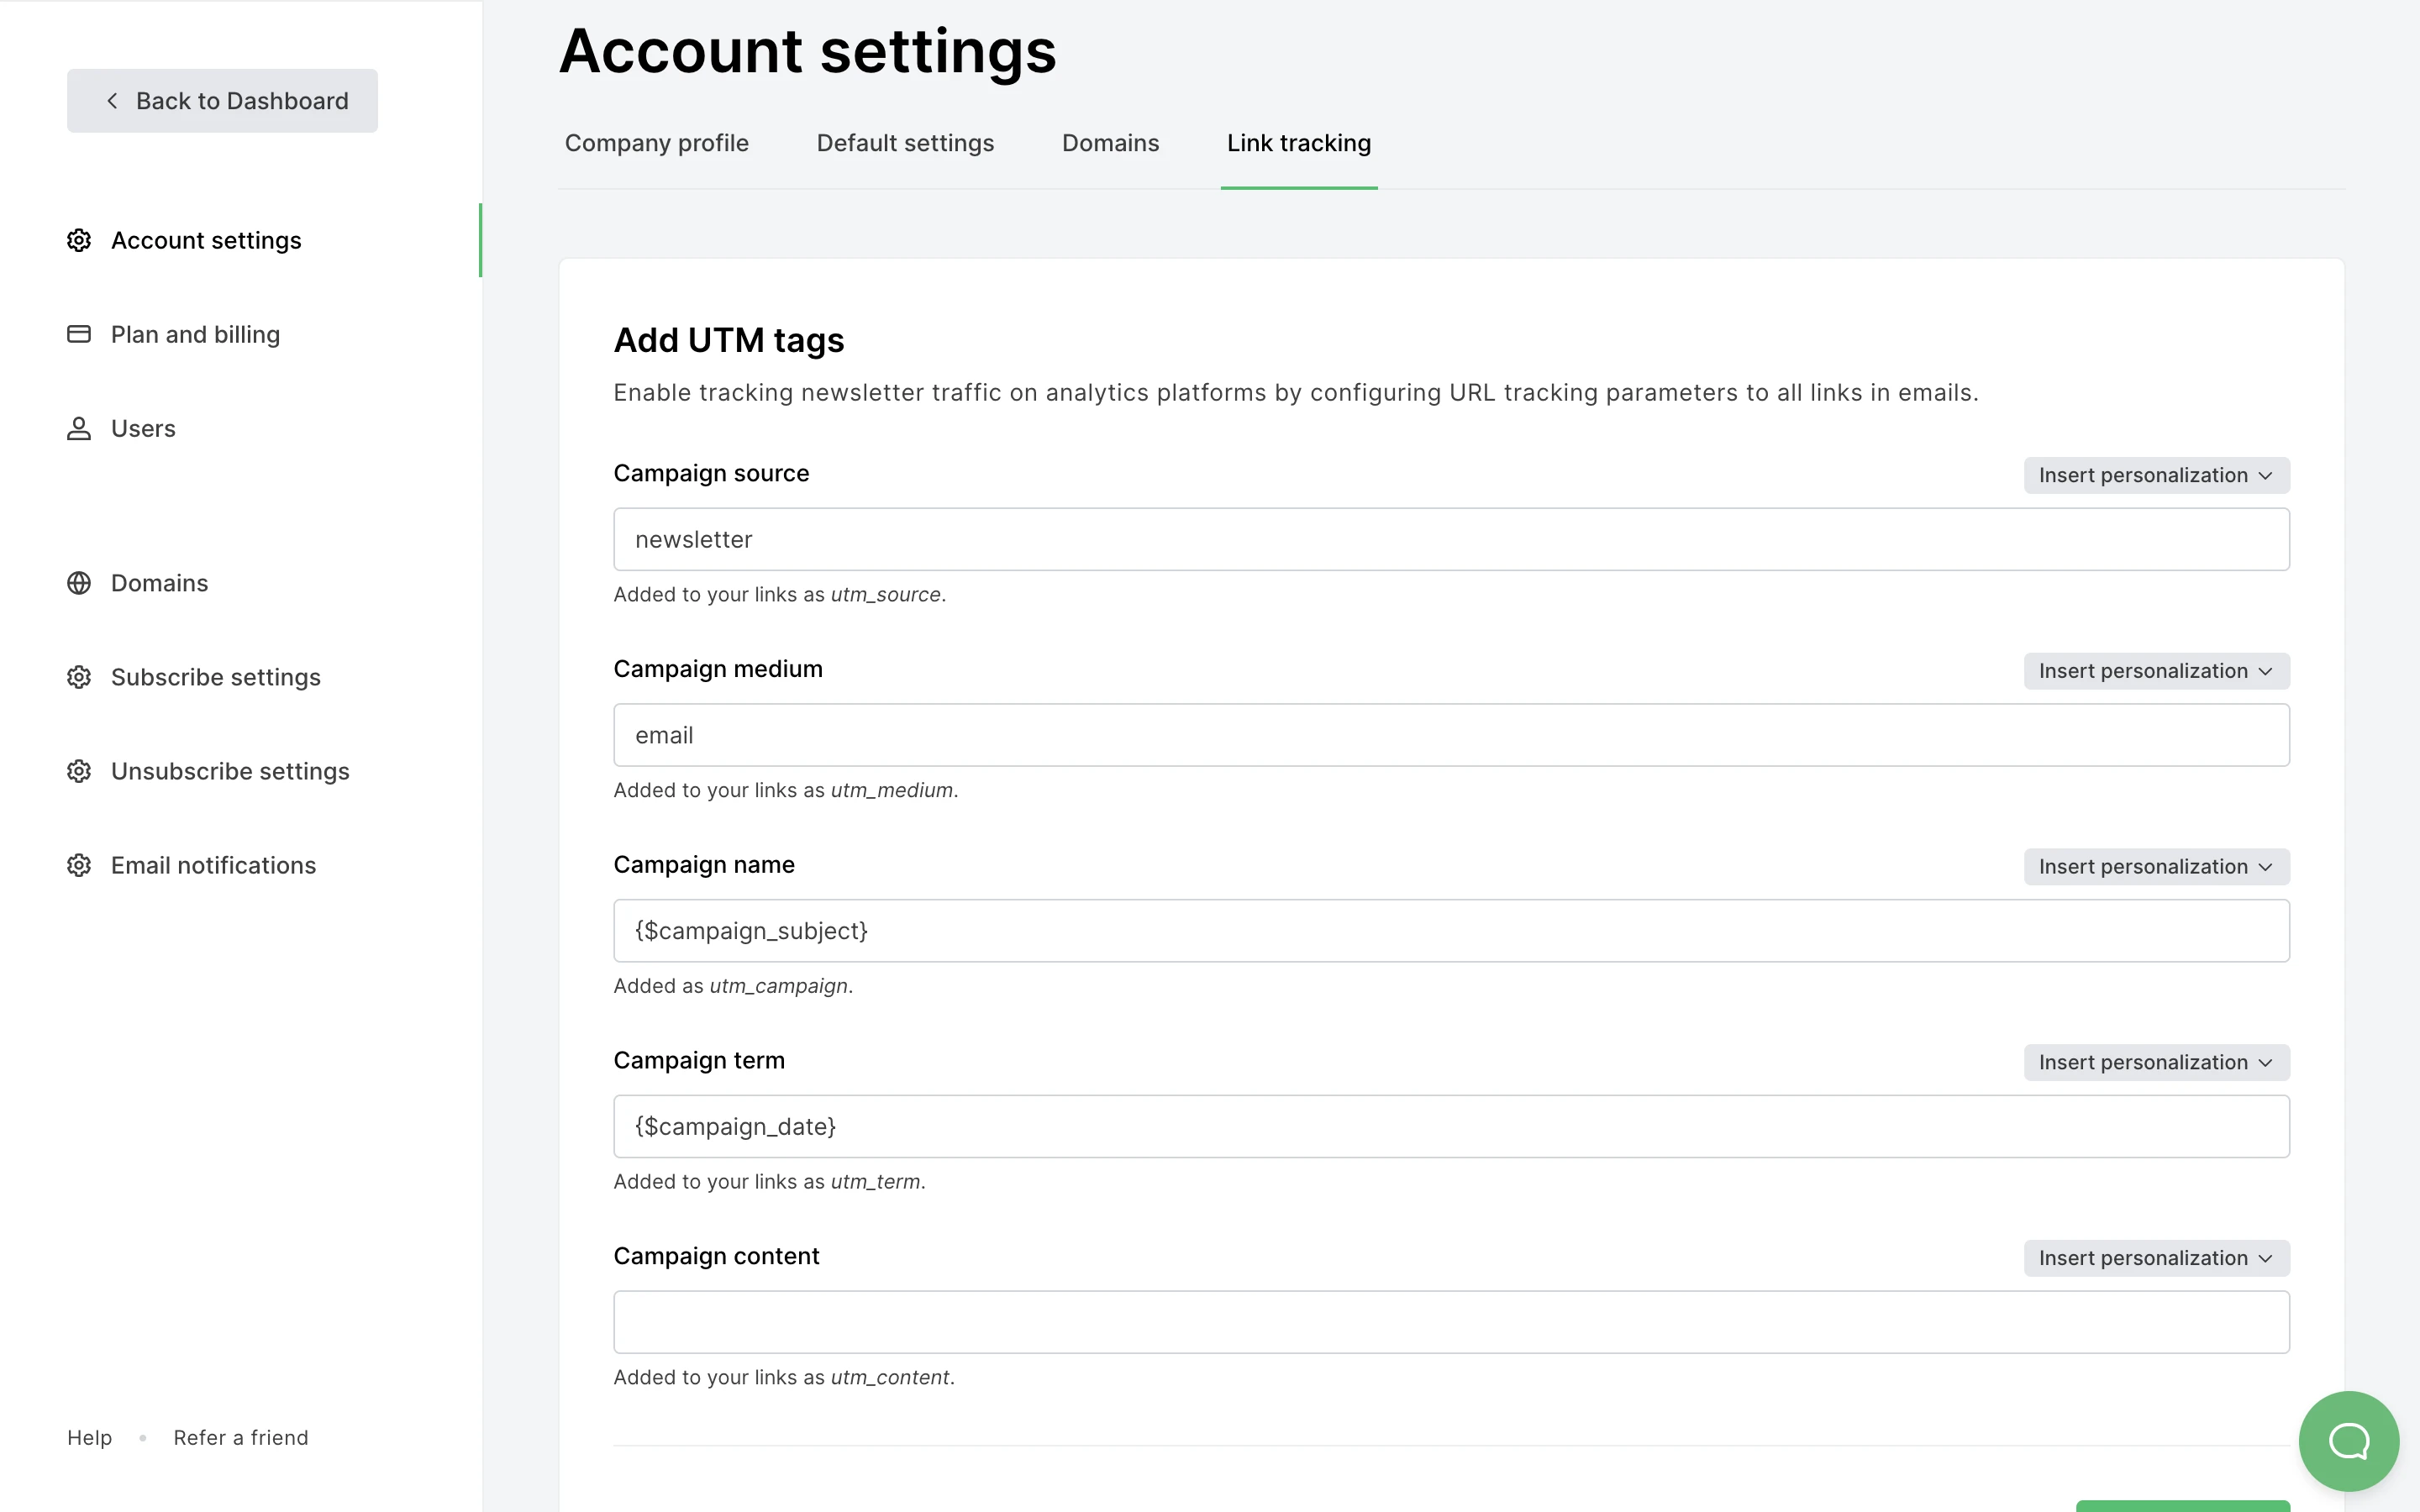
Go to the Account settings page, and select the Link tracking tab.
Enter the value of your choice into the UTM code fields.
