With the new MailerLite Subscribe app for iPad, you can create fast and responsive signup forms to collect leads and email subscribers offline and sync them to groups in your account. Use this app to take advantage of those opportunities to collect subscribers in person, such as trade shows or in-store signups.
Note: The Subscribe App for iPad is only compatible with accounts on the new MailerLite platform.
What are the features of the MailerLite Subscribe App?
The MailerLite Subscribe App for iPad lets you collect new leads offline with customizable forms that you create within the app. Features include:
Quick setup: Get up and running in a few minutes!
Collect email subscribers offline without an internet connection.
Sync new subscribers with one click once you’re connected.
Customize the form's background, fonts, colors, and add your branding.
How to create an offline form in the Subscribe App
To create a form in the Subscribe App:
Navigate to the Forms tab.
Click on + New form.
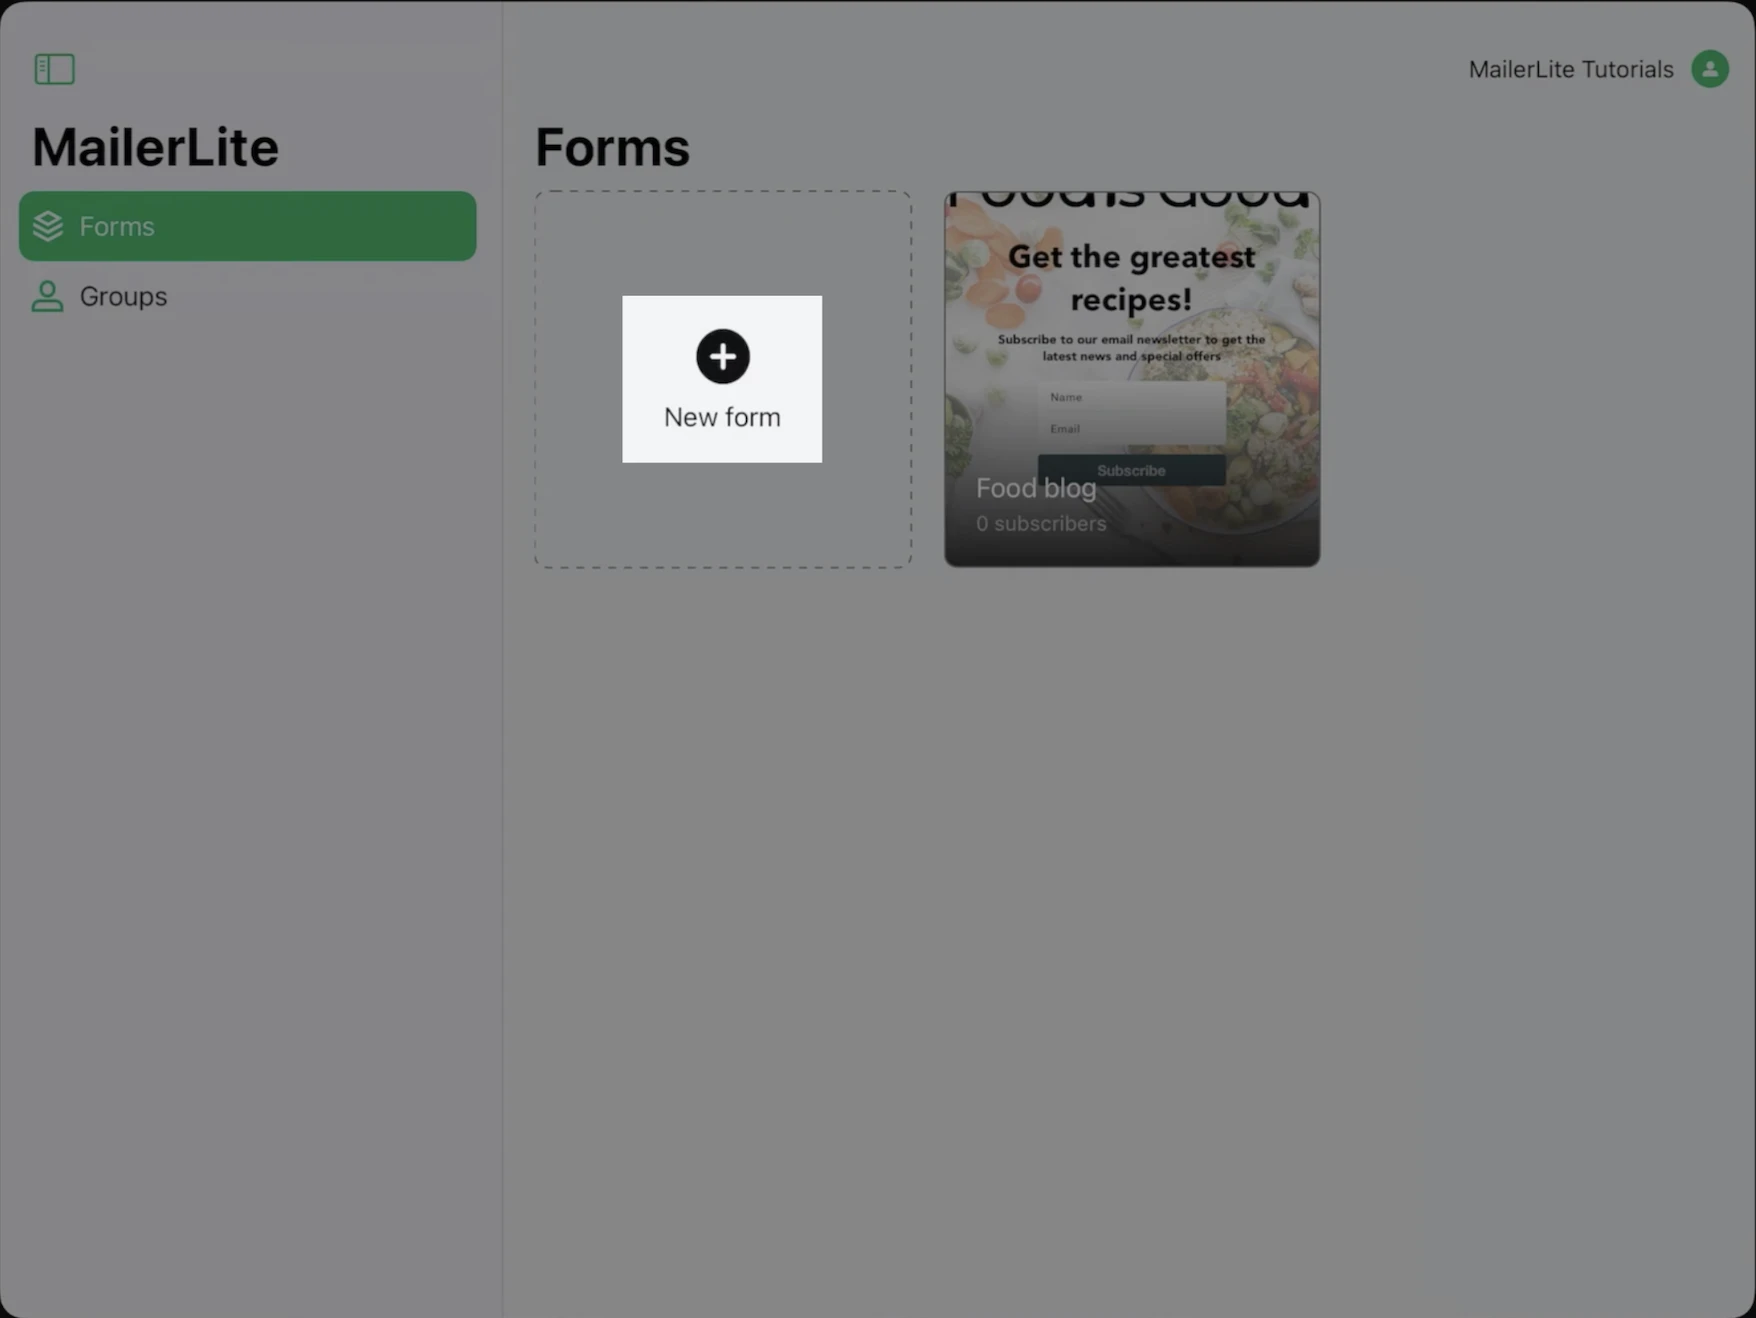
3. Give your form a name.
4. Select a group that your subscribers will be added to once the form is submitted. If you select more than one group, subscribers who submit this form will be added to all of the chosen groups.
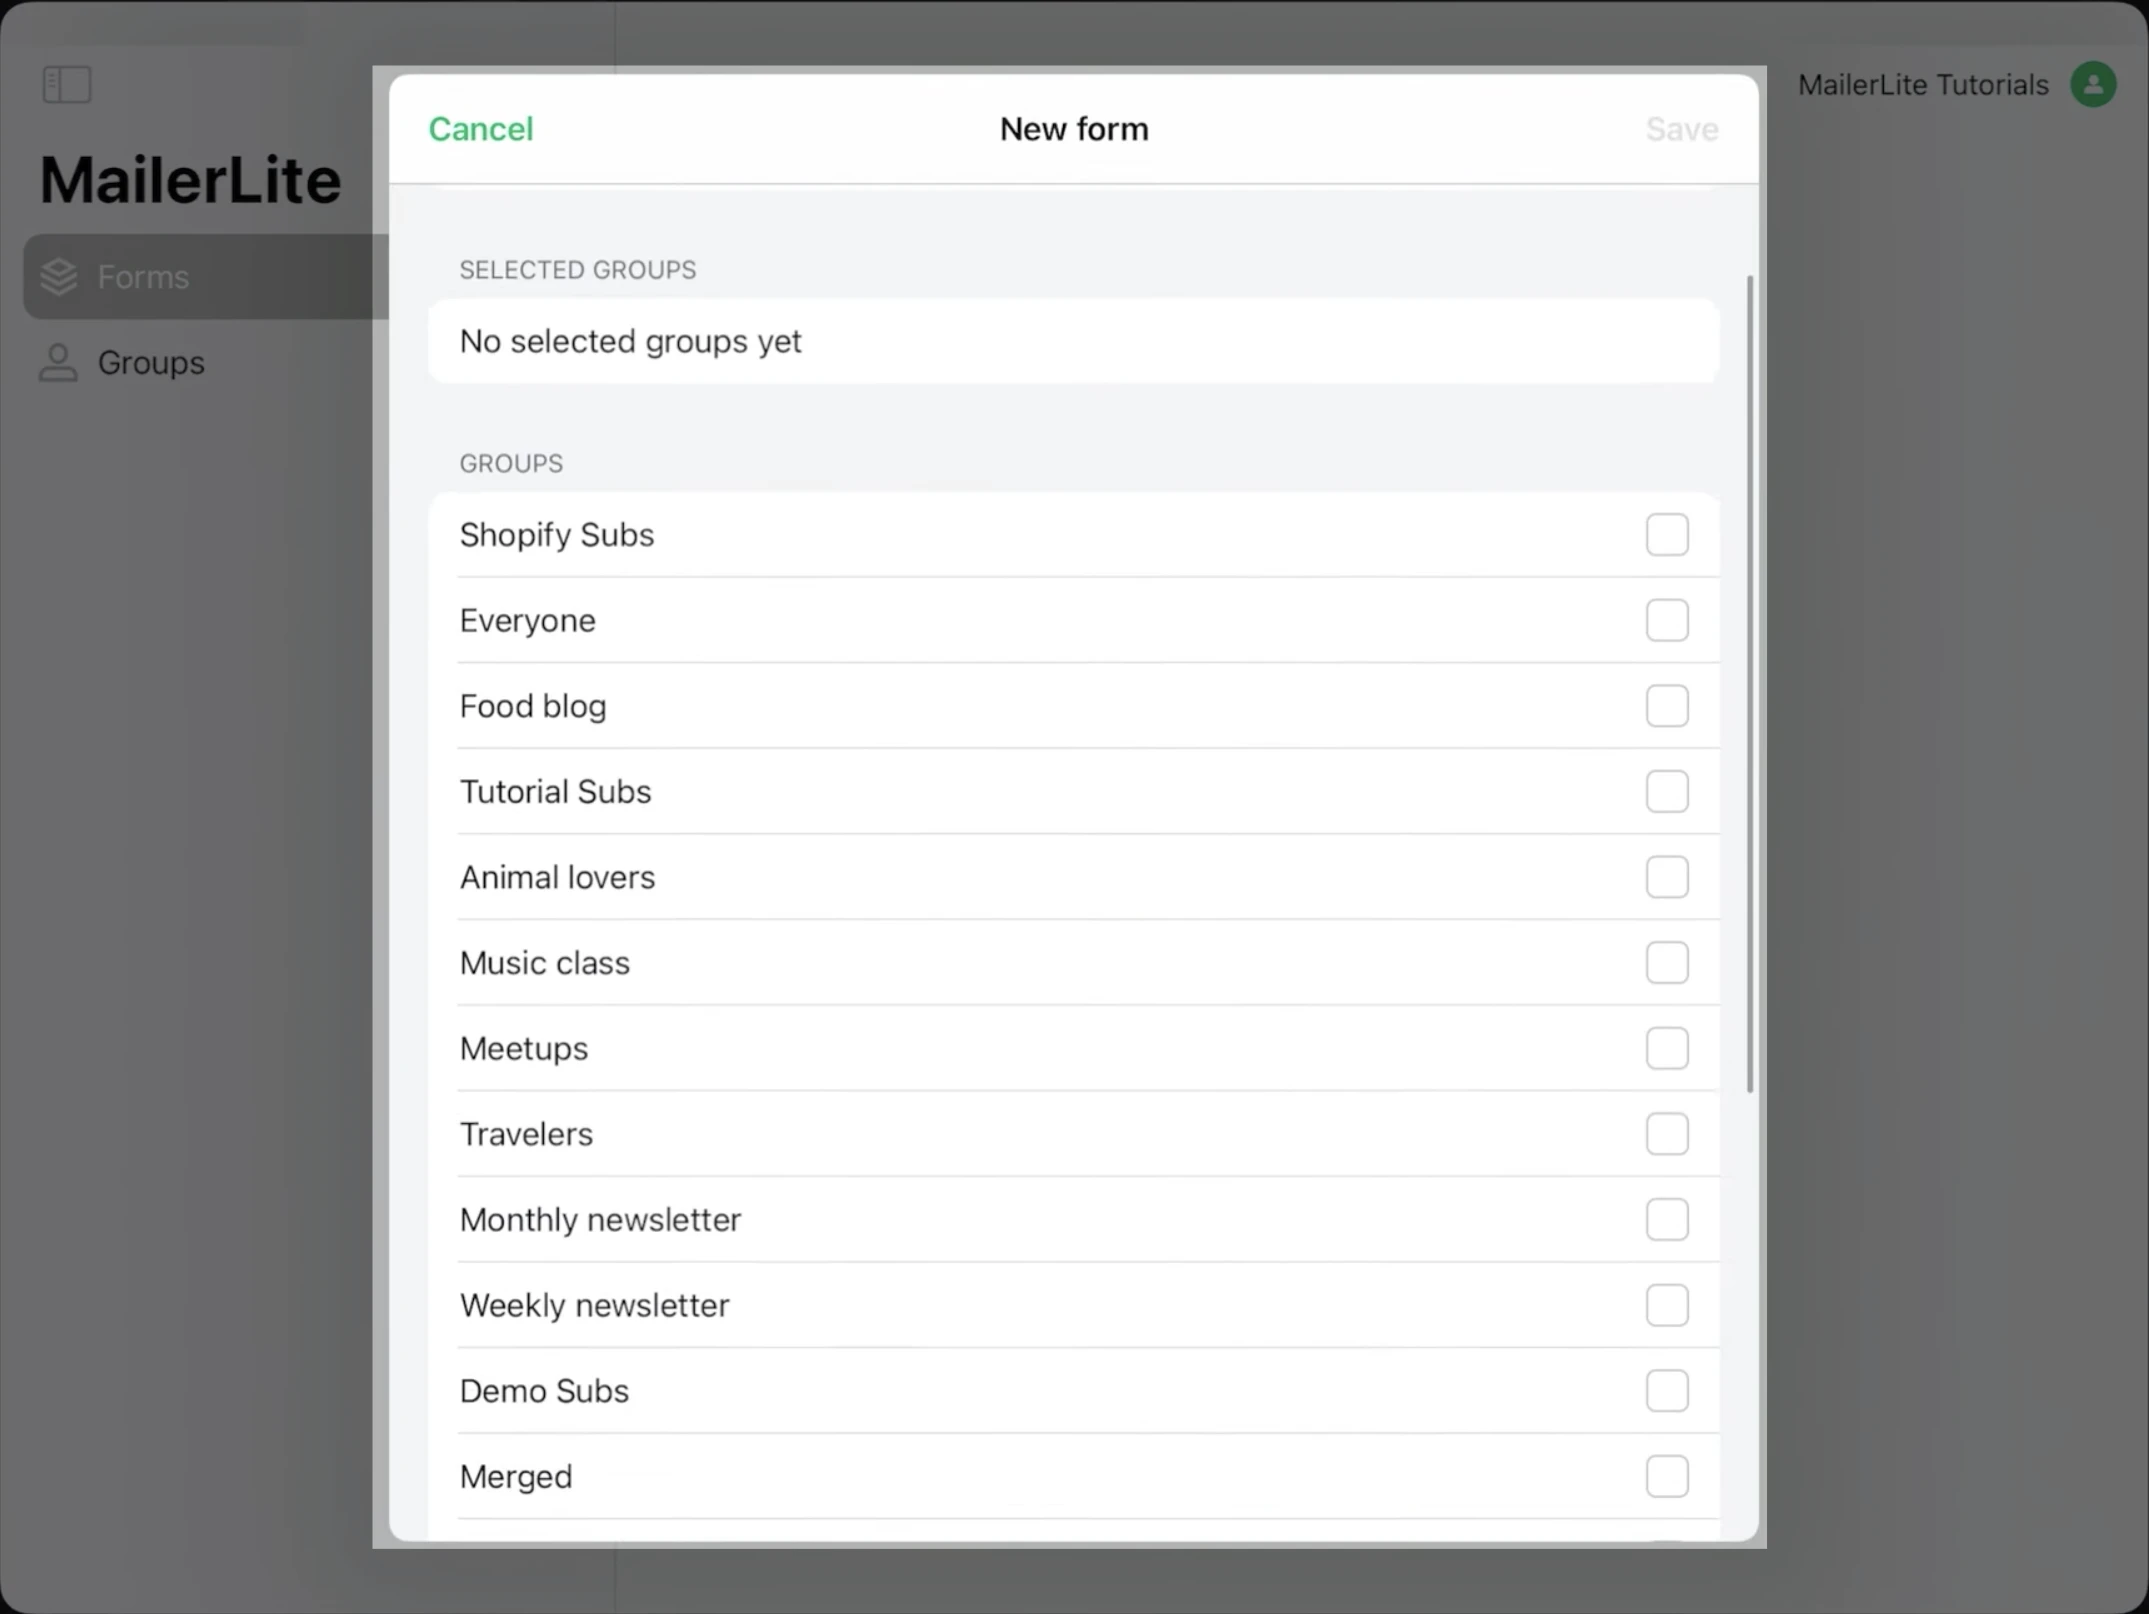
5. Click Save.
The form will appear in the Forms tab, and any other forms created within the app will appear in this area.
Editing and customizing your subscribe form
From the Forms tab, click on the subscribe form you wish to edit.
In the form settings, you can edit the group, enable or disable double-opt-in and see a list of subscribers that the form has collected.
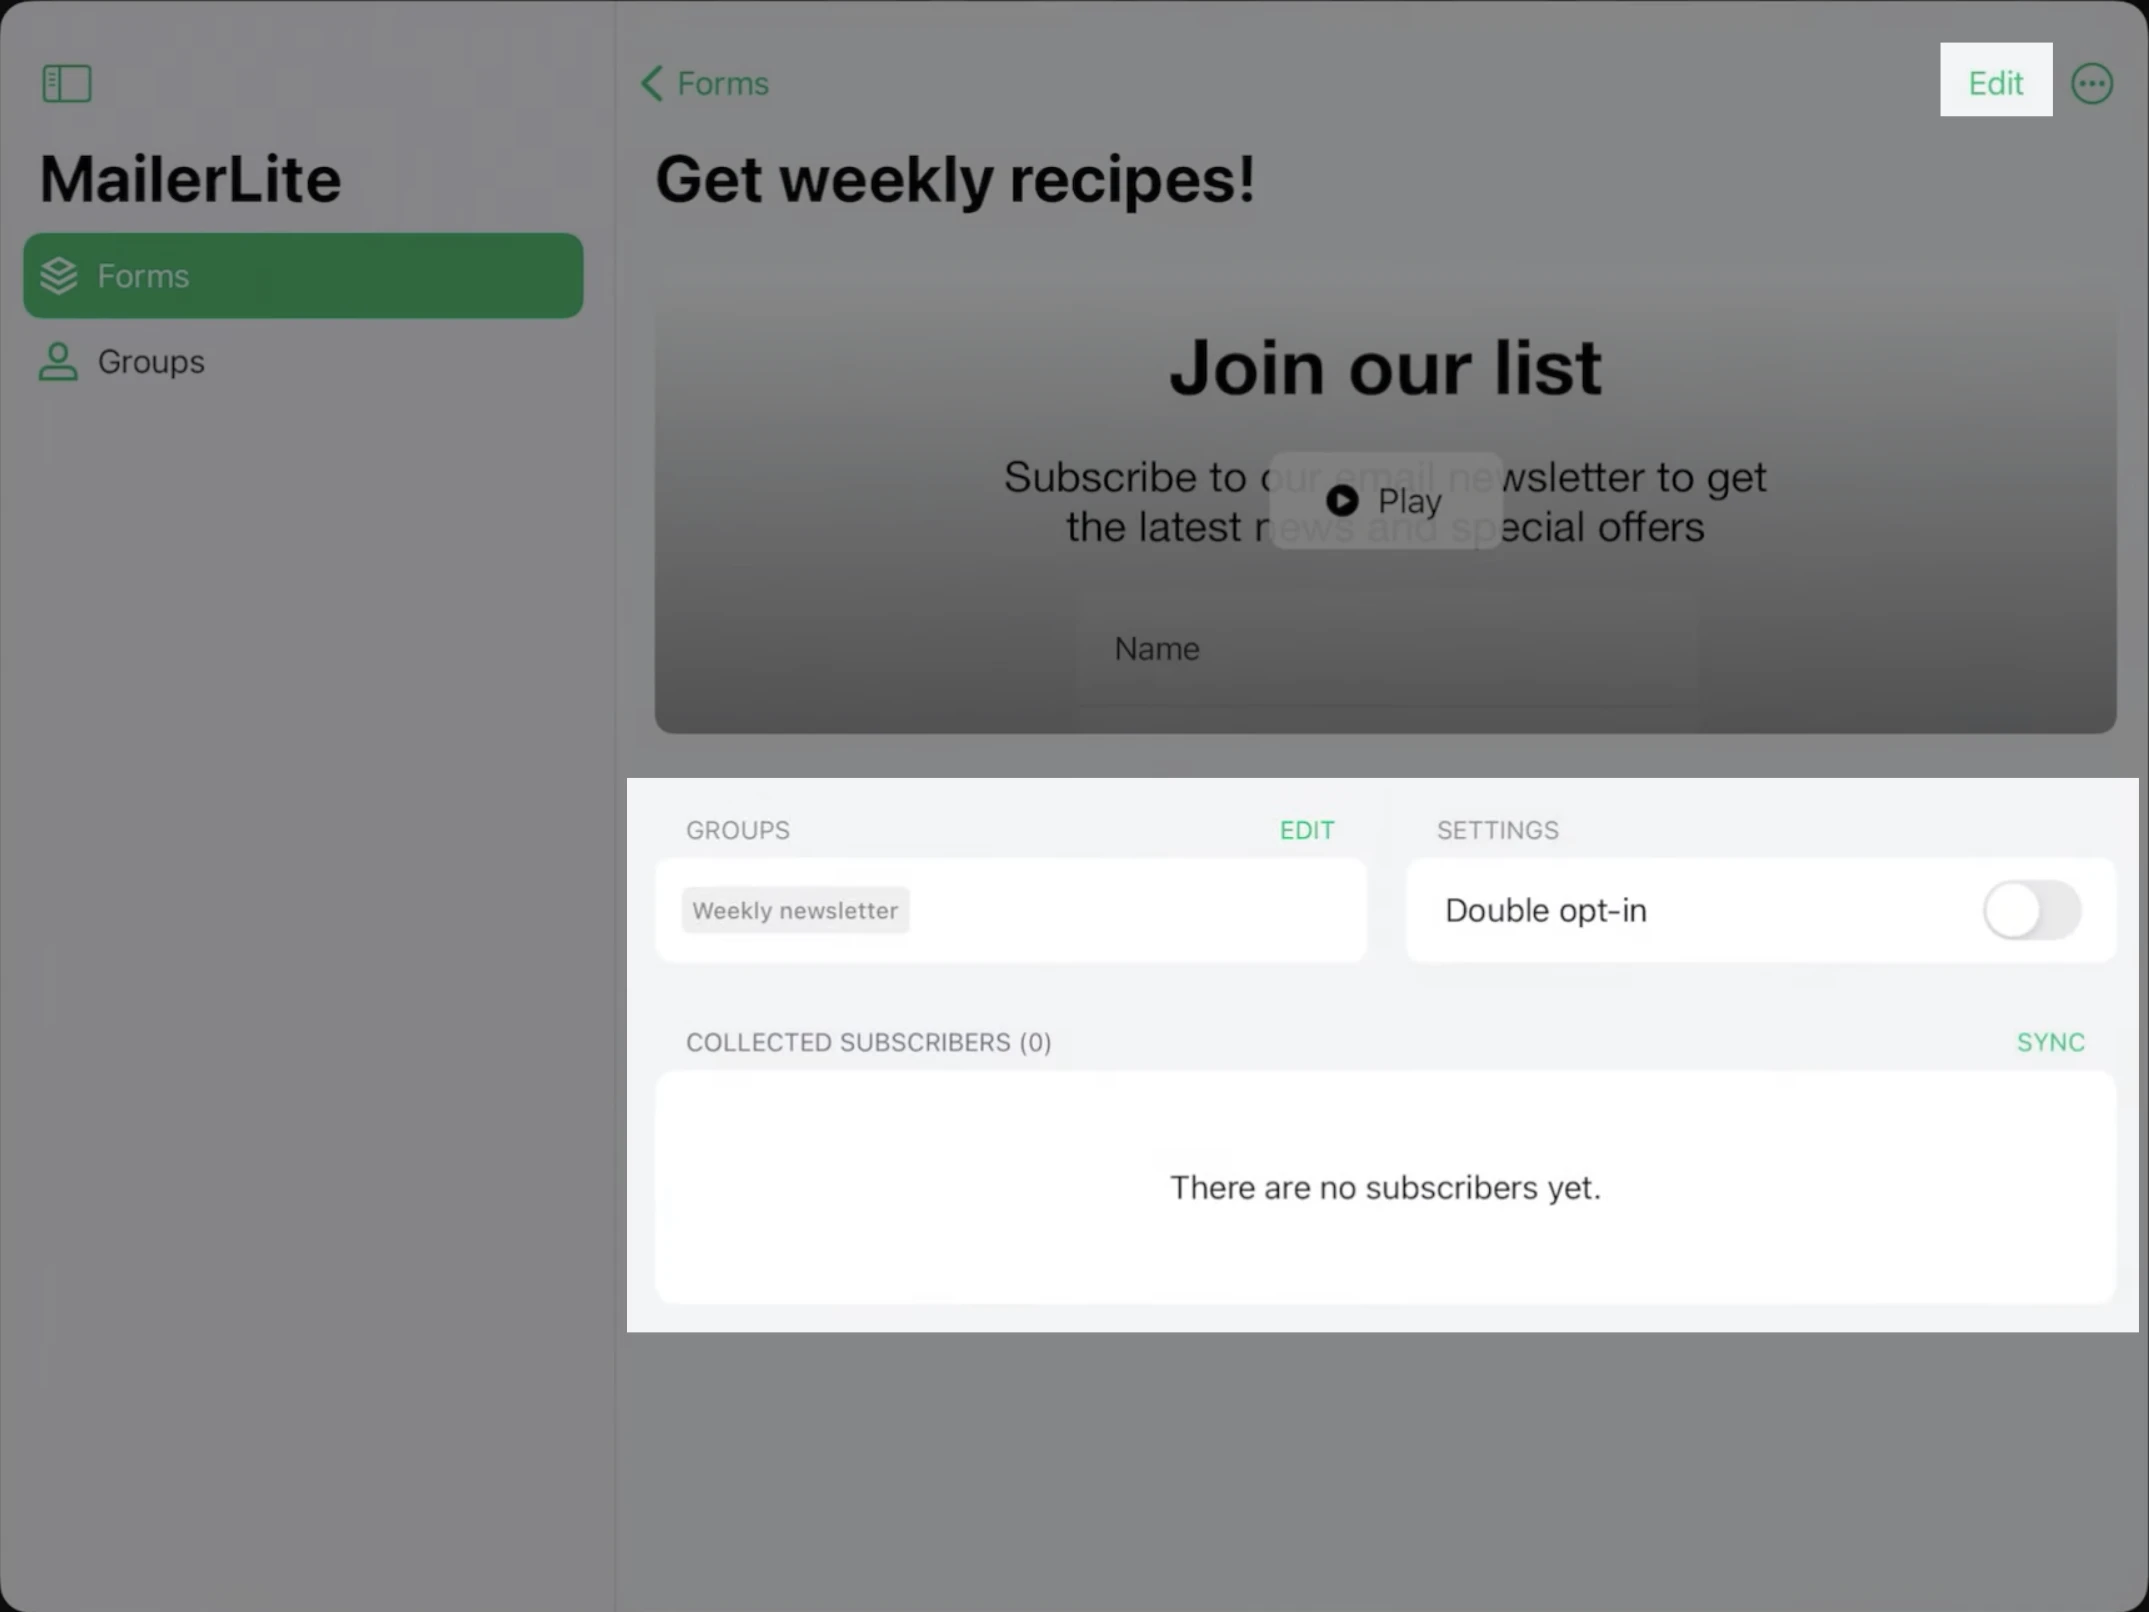
3. Click Edit in the top-right corner to begin customizing your form.
In the drag-and-drop editor, each element can be edited by clicking on the individual block. Once you have clicked on a block to edit it, a settings bar will open on the right side with options to edit elements of the specific block you have chosen. This includes:
Font Sizes
Text customization
Background and font colors
Alignment of text/images
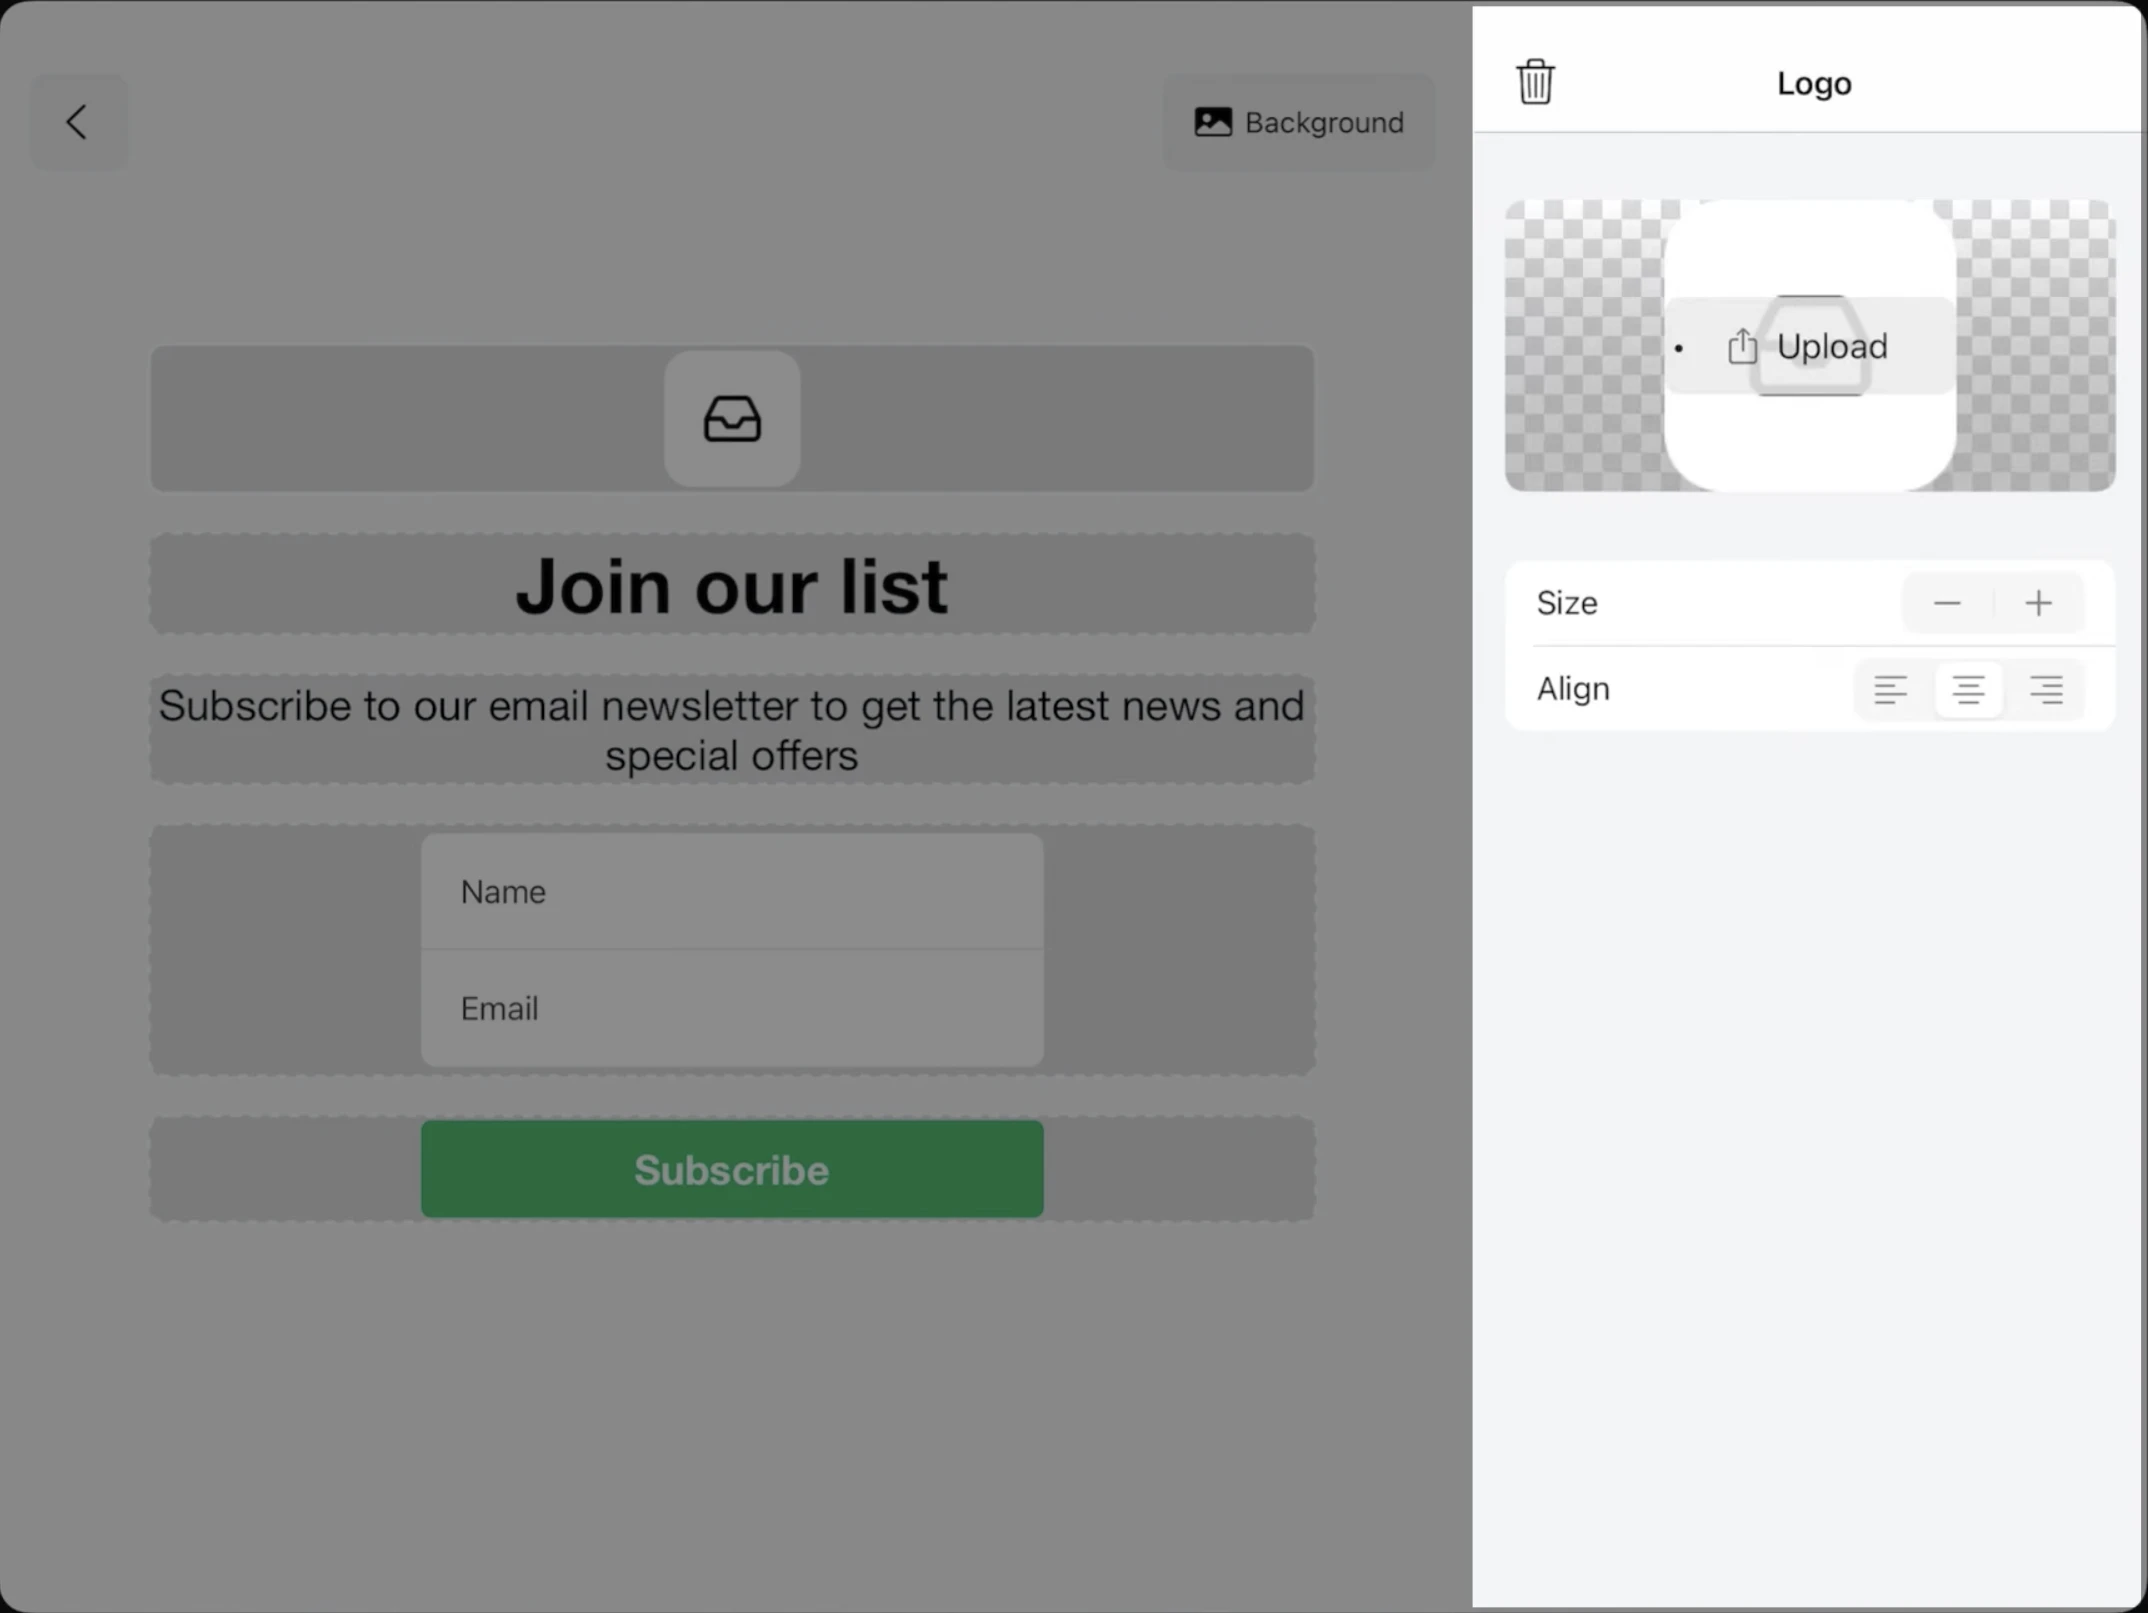
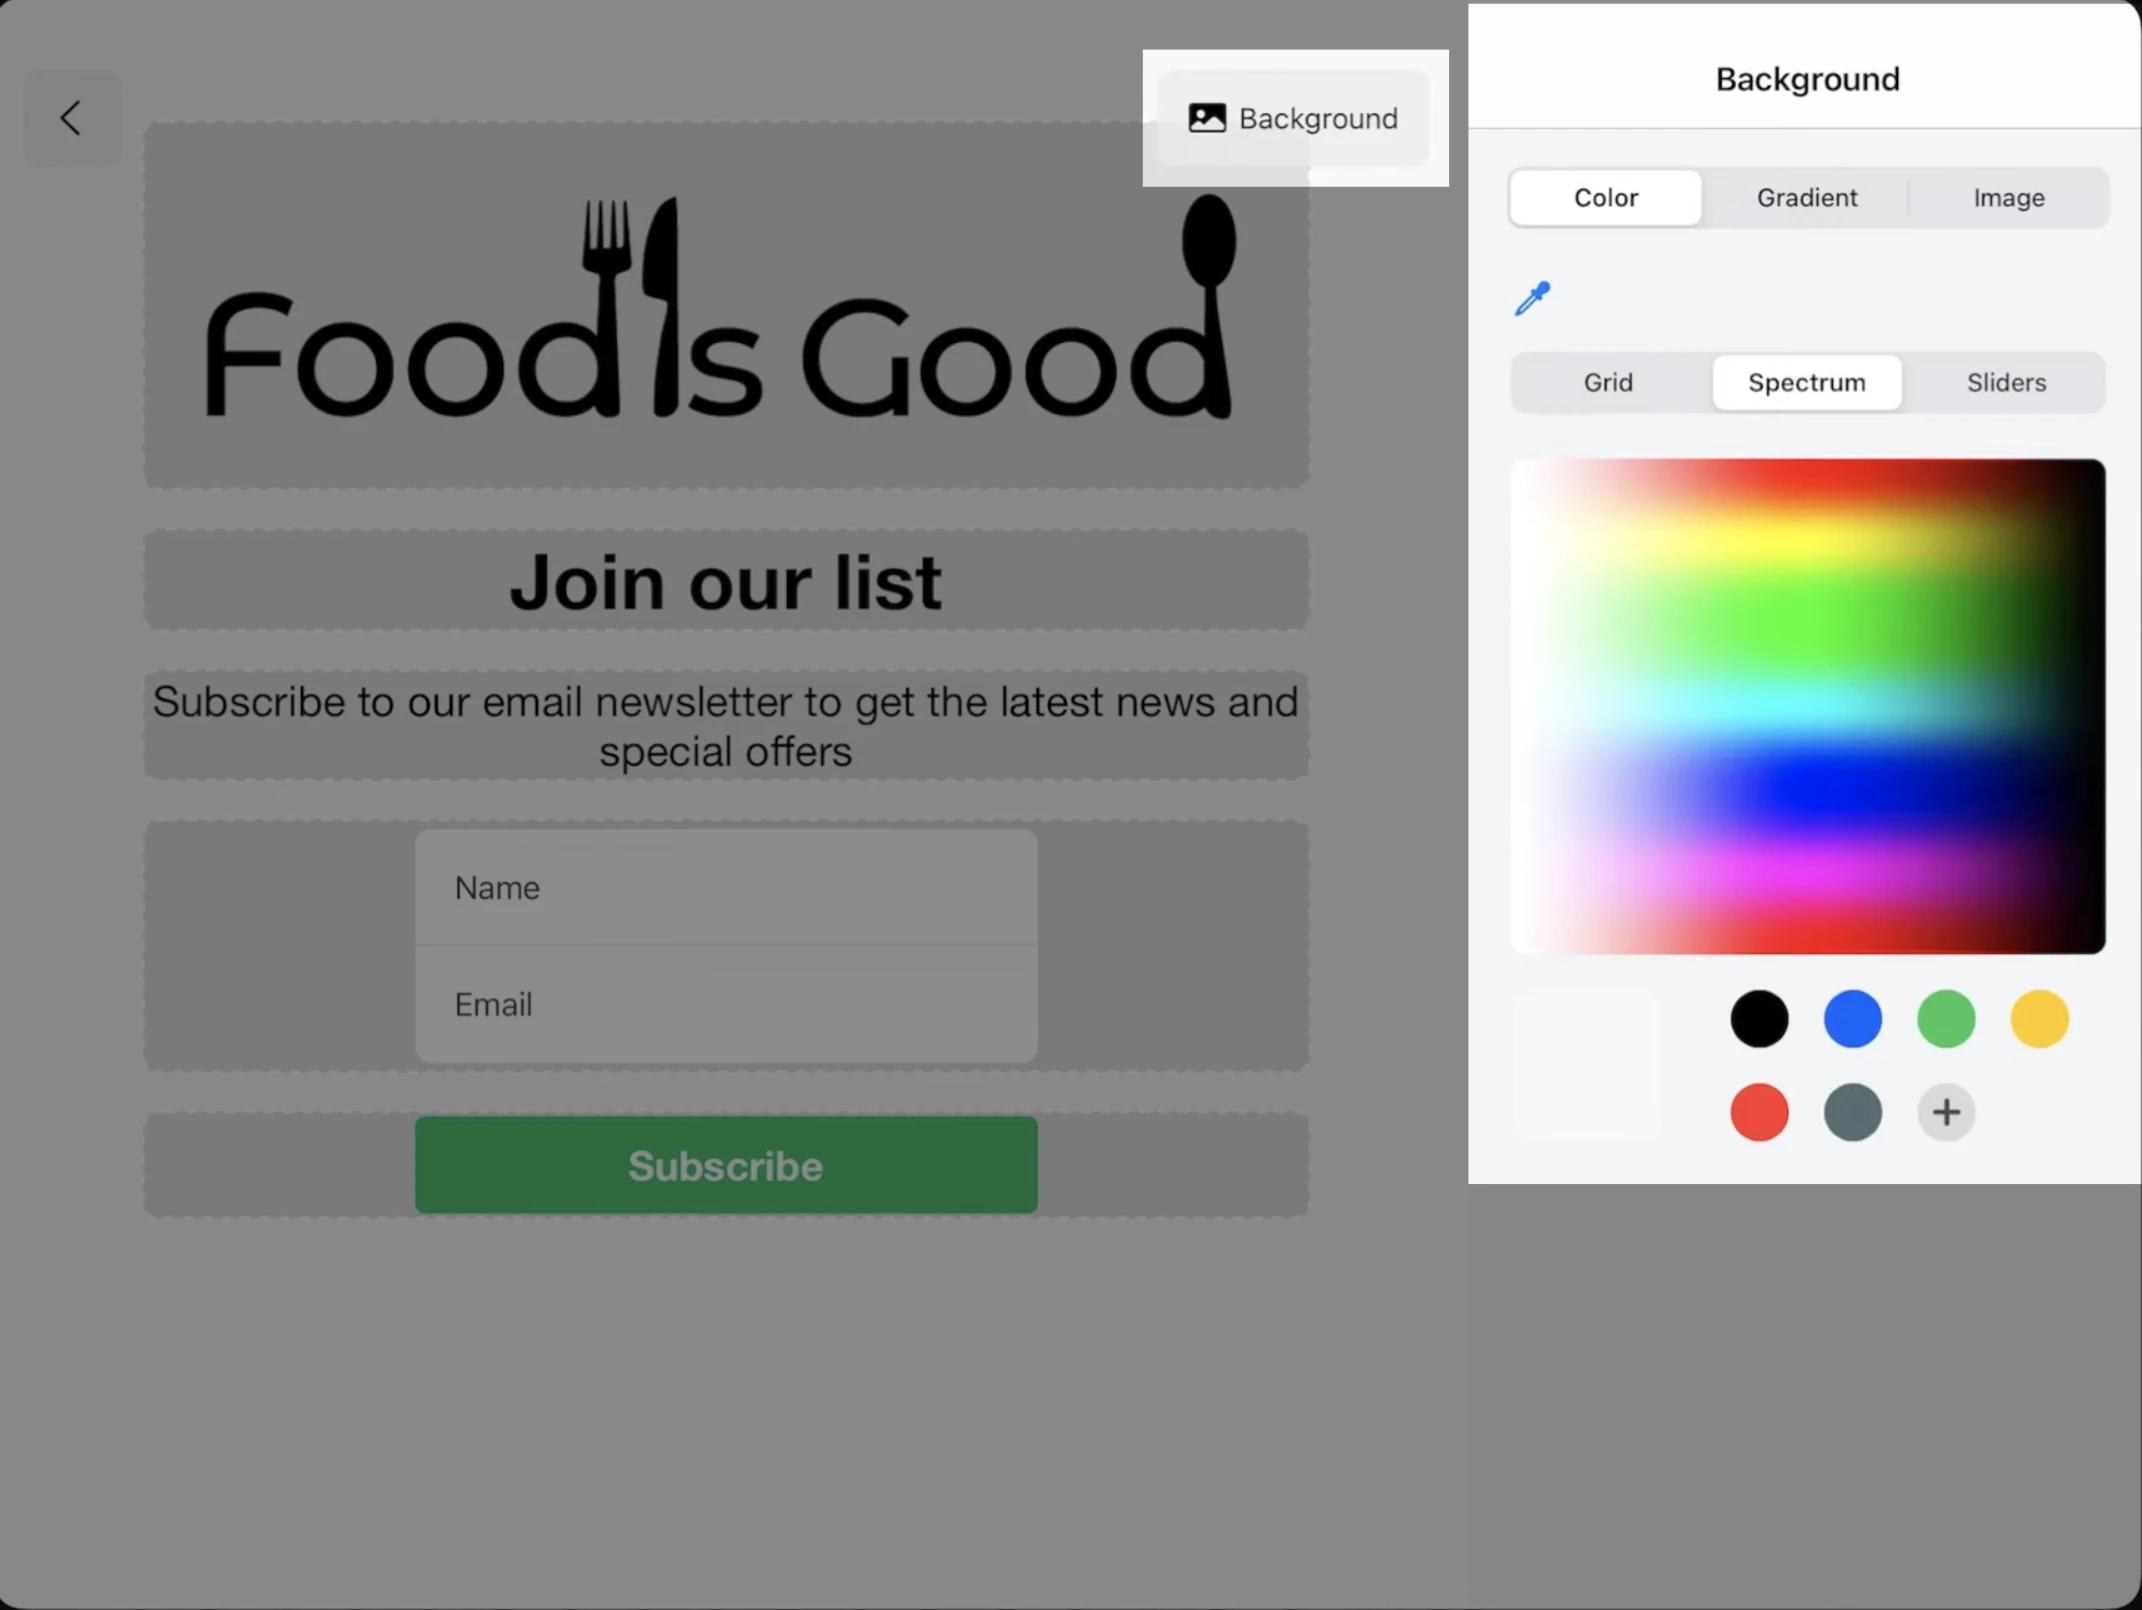
By clicking on the Background button, you can select a background color, gradient, or image for the form's background.
By default, your subscribe form will show options to collect the email address and name of the subscriber. To add more fields, click on the block that includes the Email and Name fields. In the sidebar on the right, you will see a list of the fields that can be added to your form. Toggle the option ON next to the fields that you want to add.

Note: The fields that can be added to your subscribe form correspond to the fields in your MailerLite account and can only be edited or added in your account, and not through the Subscribe App.
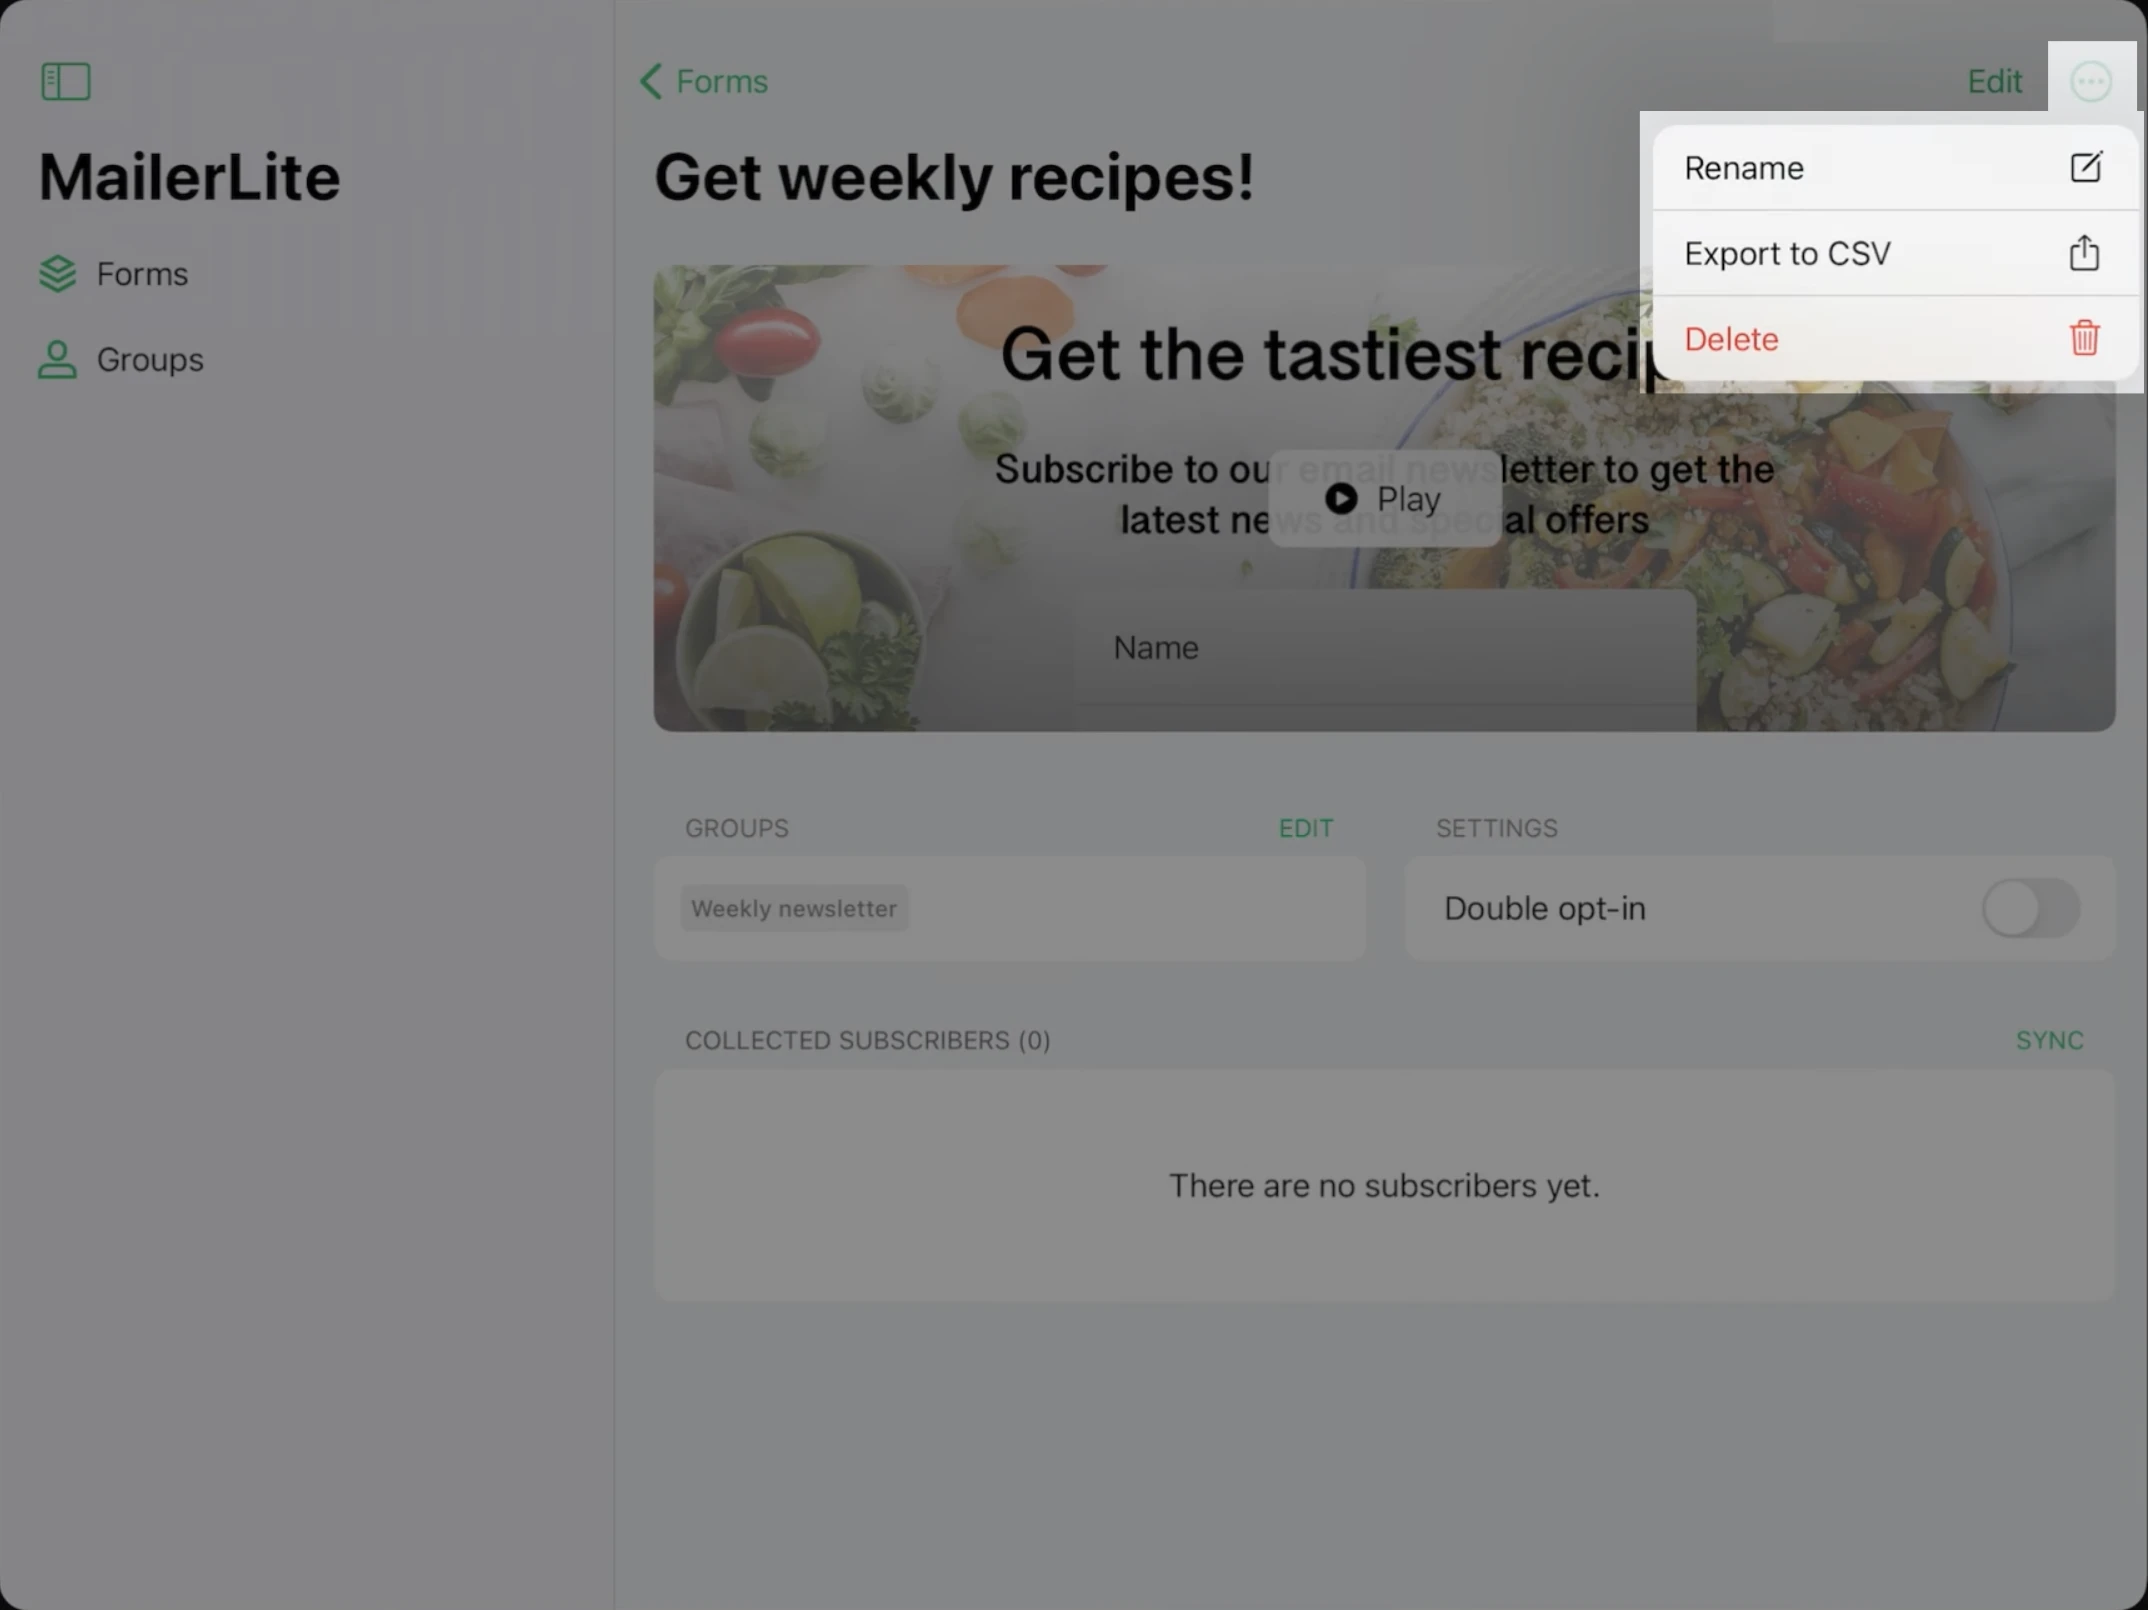
To rename a form, export the email addresses, or delete a form, navigate to the overall form settings outside of the editor.
How to sync subscribers collected offline to your MailerLite account
Subscribers collected offline will not automatically sync to your MailerLite account in real-time. To sync subscribers:
Connect your iPad to the internet.
From the Forms tab, click on the form that collected the subscribers you wish to sync.
Navigate to the Collected Subscribers section and click sync.
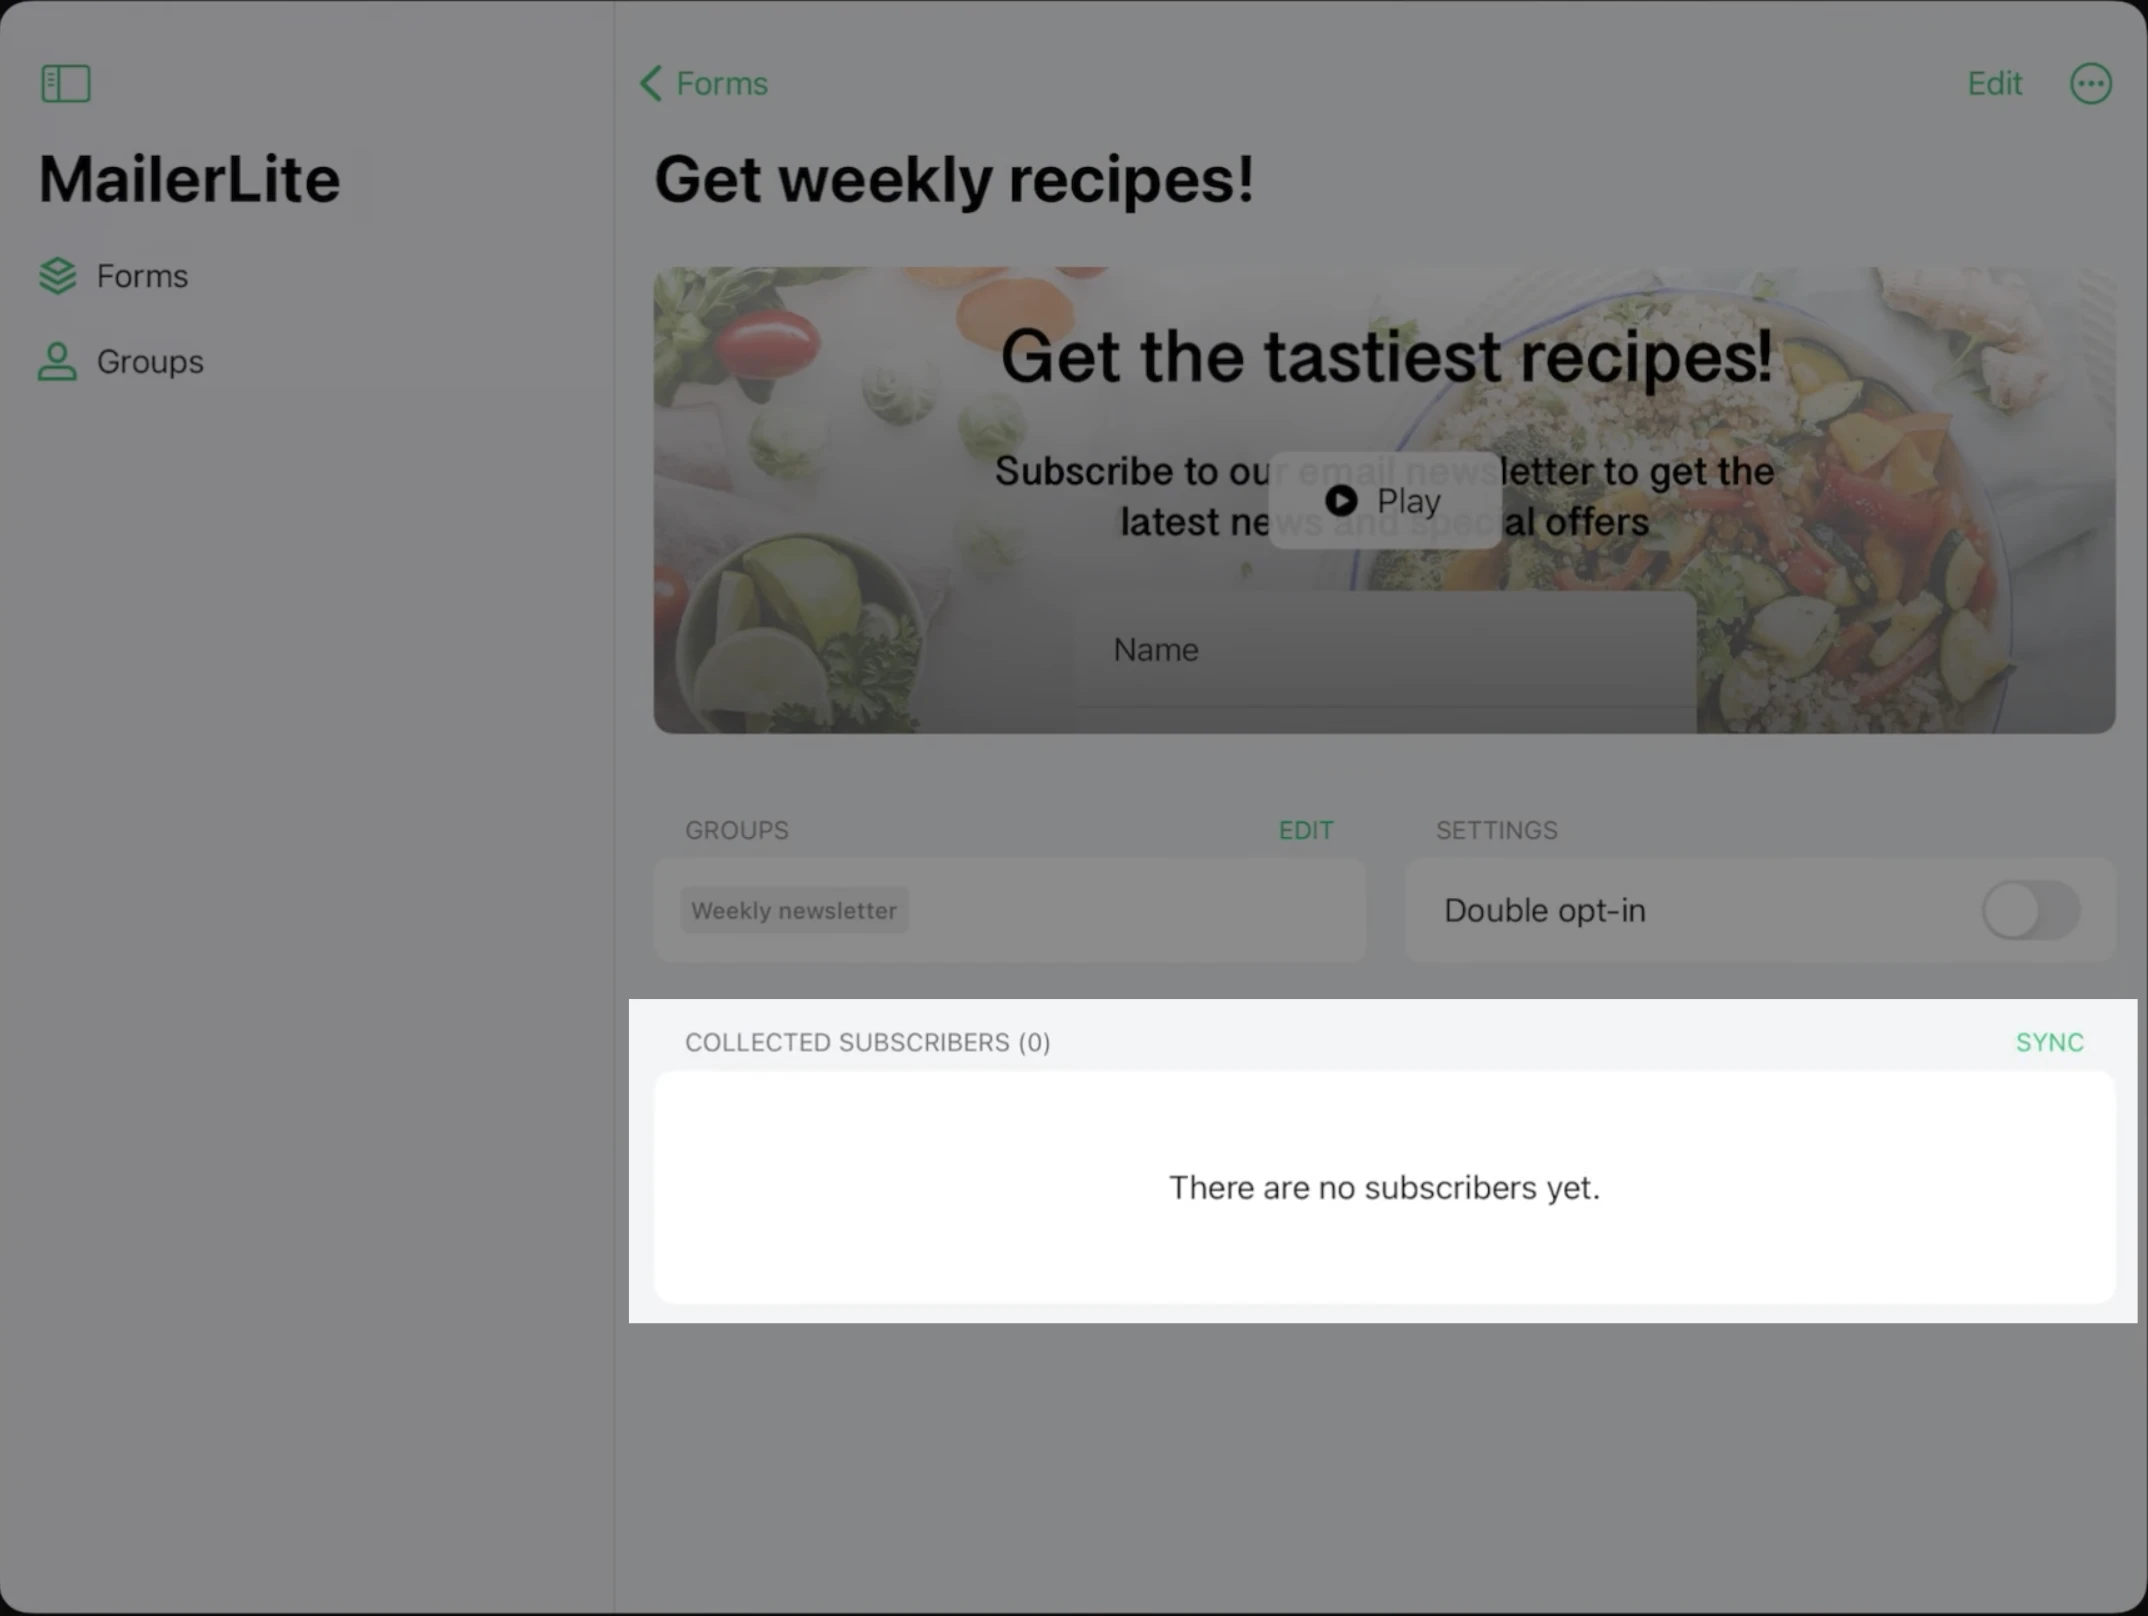
Subscribers who were collected offline and any information they submitted will be added to your MailerLite account and will be added to the group(s) assigned in the form settings within the Subscribe App.
App authentication
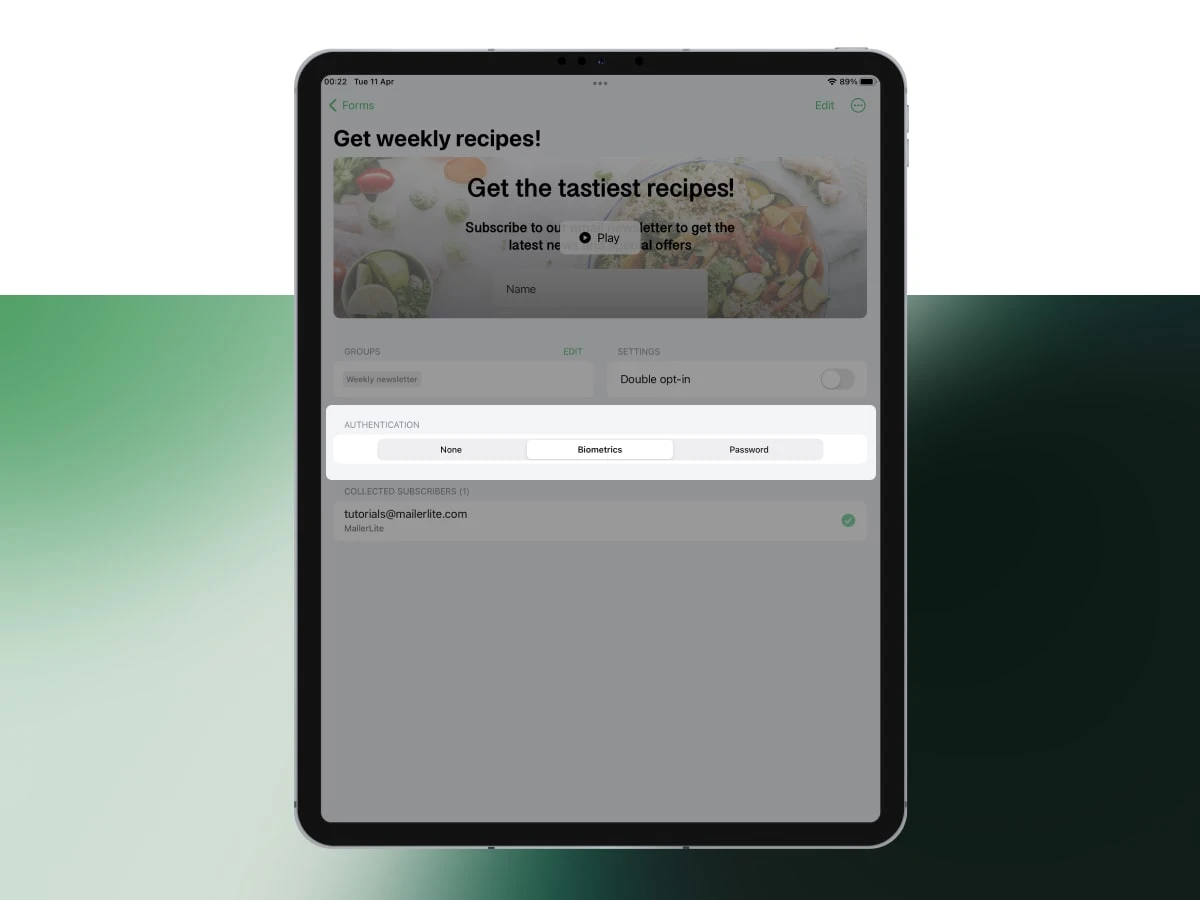
There are a variety of app authentication options to ensure that while you are using a form in live mode to collect subscribers, only authorized individuals can access the rest of the app and your device. Three authentication options are available: None, Biometrics, and Password.
If None is selected, no authentication is required, allowing anyone with access to the iPad to access the app while they are filling out a form.
Biometrics requires users to authenticate themselves using the iPad's built-in biometric authentication feature, such as Touch ID or Face ID.
Password requires users to enter a password before they can access the app.
To configure authentication settings:
Navigate to the Forms tab.
Select your form and set it to Live mode.
You will be able to select between the three authentication options that will apply to the current form.
How to edit subscriber’s data
The Collected Subscribers section provides an overview of all the subscribers that have been collected through your form. From here, you can view, edit, or delete individual subscribers, as well as export the list of subscribers as a CSV file.
To edit subscriber details submitted through the form app:
Navigate to the Forms tab.
Select your form and locate the Collected Subscribers section.
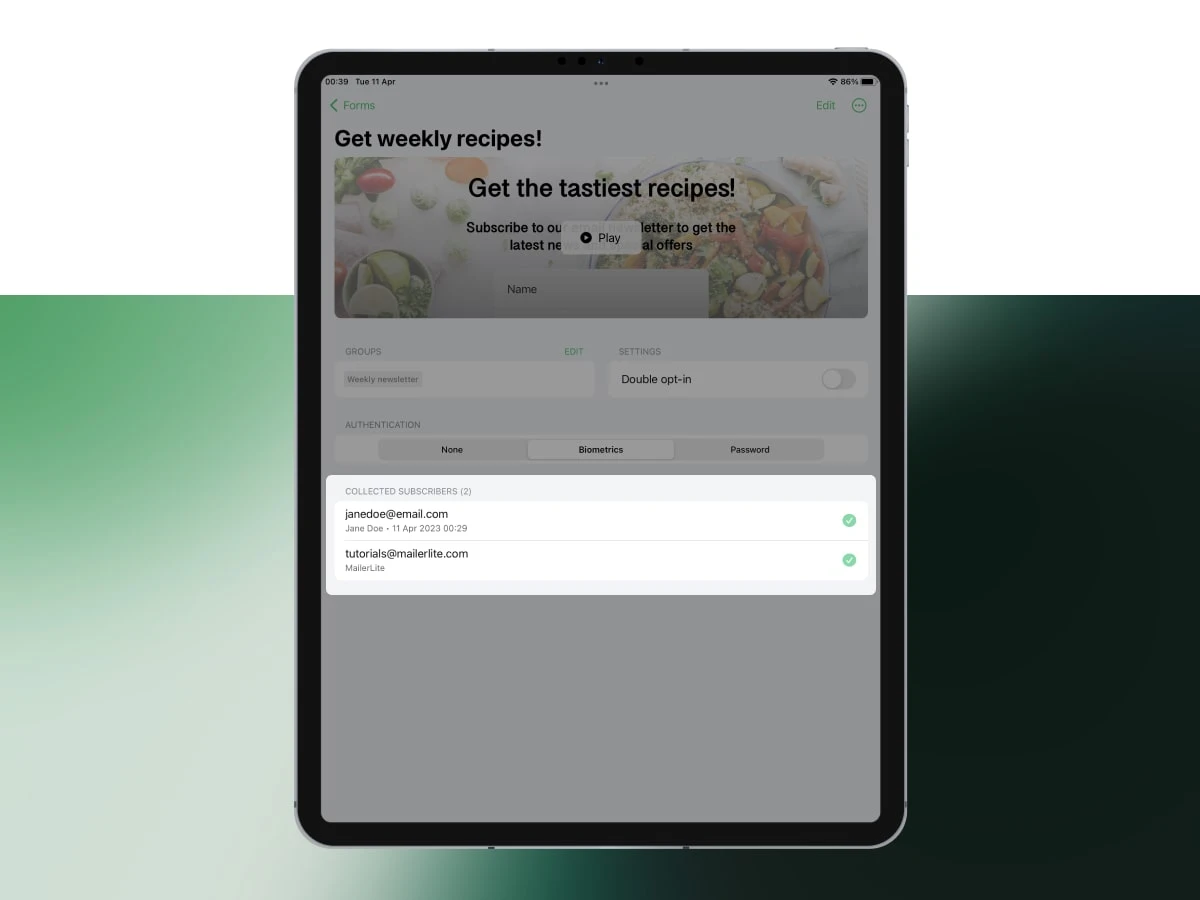
3. Find the subscriber whose details you wish to edit and click to open their subscriber profile.
4. Click the Edit button to make changes to their details, such as their name, email address, or custom fields.
5. Click Save.
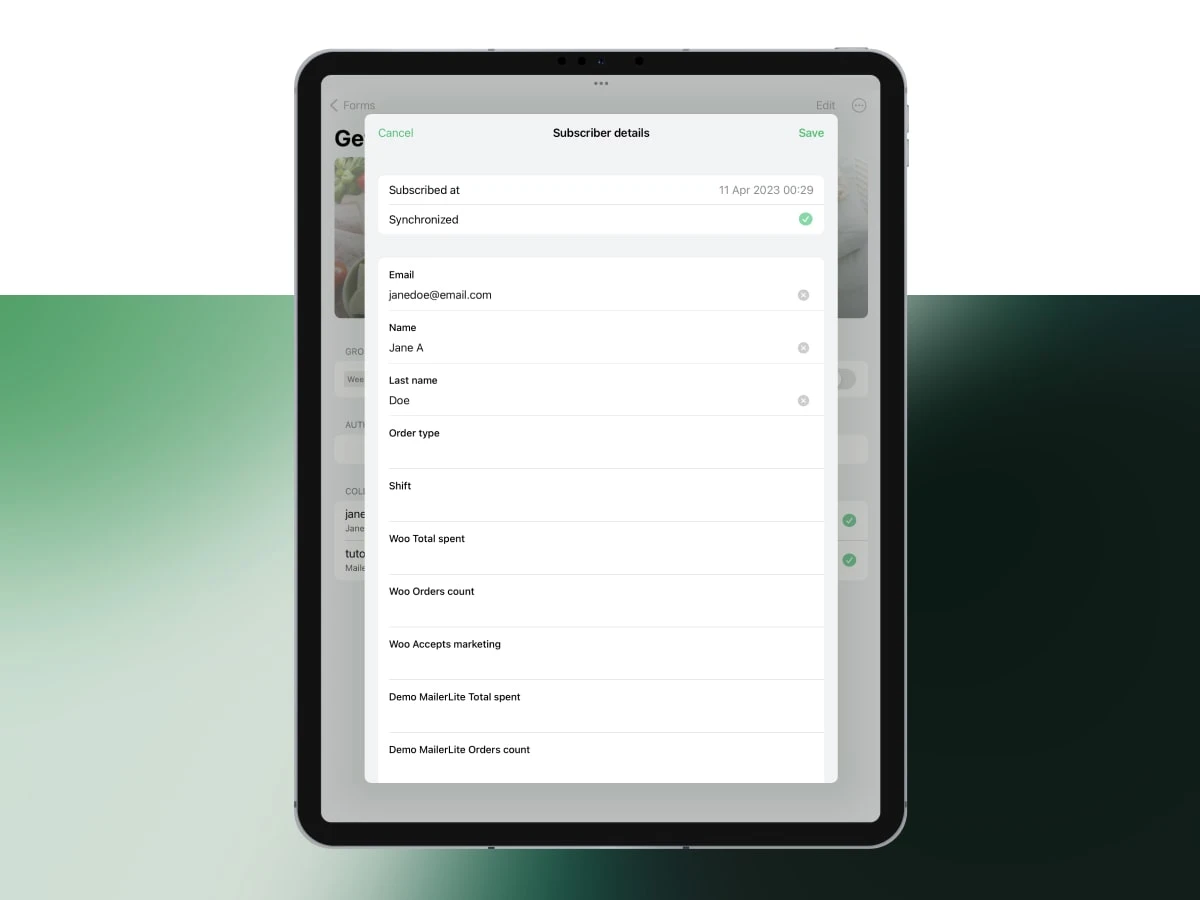
Keep in mind that any changes made to a subscriber's details in the Collected Subscribers section will be synced with your MailerLite account. This means that the updated details will be reflected across all lists and segments that the subscriber is a part of.