Webhooks are a way for applications to communicate with each other automatically and in real-time. They are essentially automated messages sent from one application to another when a specific event occurs.
Unlike polling, a method of app communication that checks for updates at fixed intervals, webhooks push the updates to you, allowing for instant notifications.
Example use case
Imagine you run an e-commerce site and you want to update your inventory system every time a new order is placed. Without webhooks, you would need to frequently check your orders database to see if any new orders have come in.
With webhooks, your e-commerce platform can automatically notify your inventory system of a new order as soon as it happens, allowing your inventory to be updated in real-time.
How webhooks work
An event occurs in MailerLite
This event could be any significant action from a new email being sent to a new subscriber joining a mailing list or a bounce notification.
⇩
HTTP POST request is sent
When this event happens, MailerLite sends an HTTP POST request to a specified URL (the webhook endpoint). This request contains data about the event.
⇩
Data is received
MailerLite sends this request to your specified webhook endpoint URL. Your server or application then processes the data contained in the payload and triggers appropriate actions based on the event.
⇩
Instant notification
Because the data is pushed to you immediately when the event occurs, you receive instant notifications without the need to constantly check for updates.
Setting up webhooks in MailerLite
To set up webhooks:
Navigate to Integrations.
Under MailerLite API, locate Webhooks.
Click Use.

4. Scroll down and click Generate webhook.
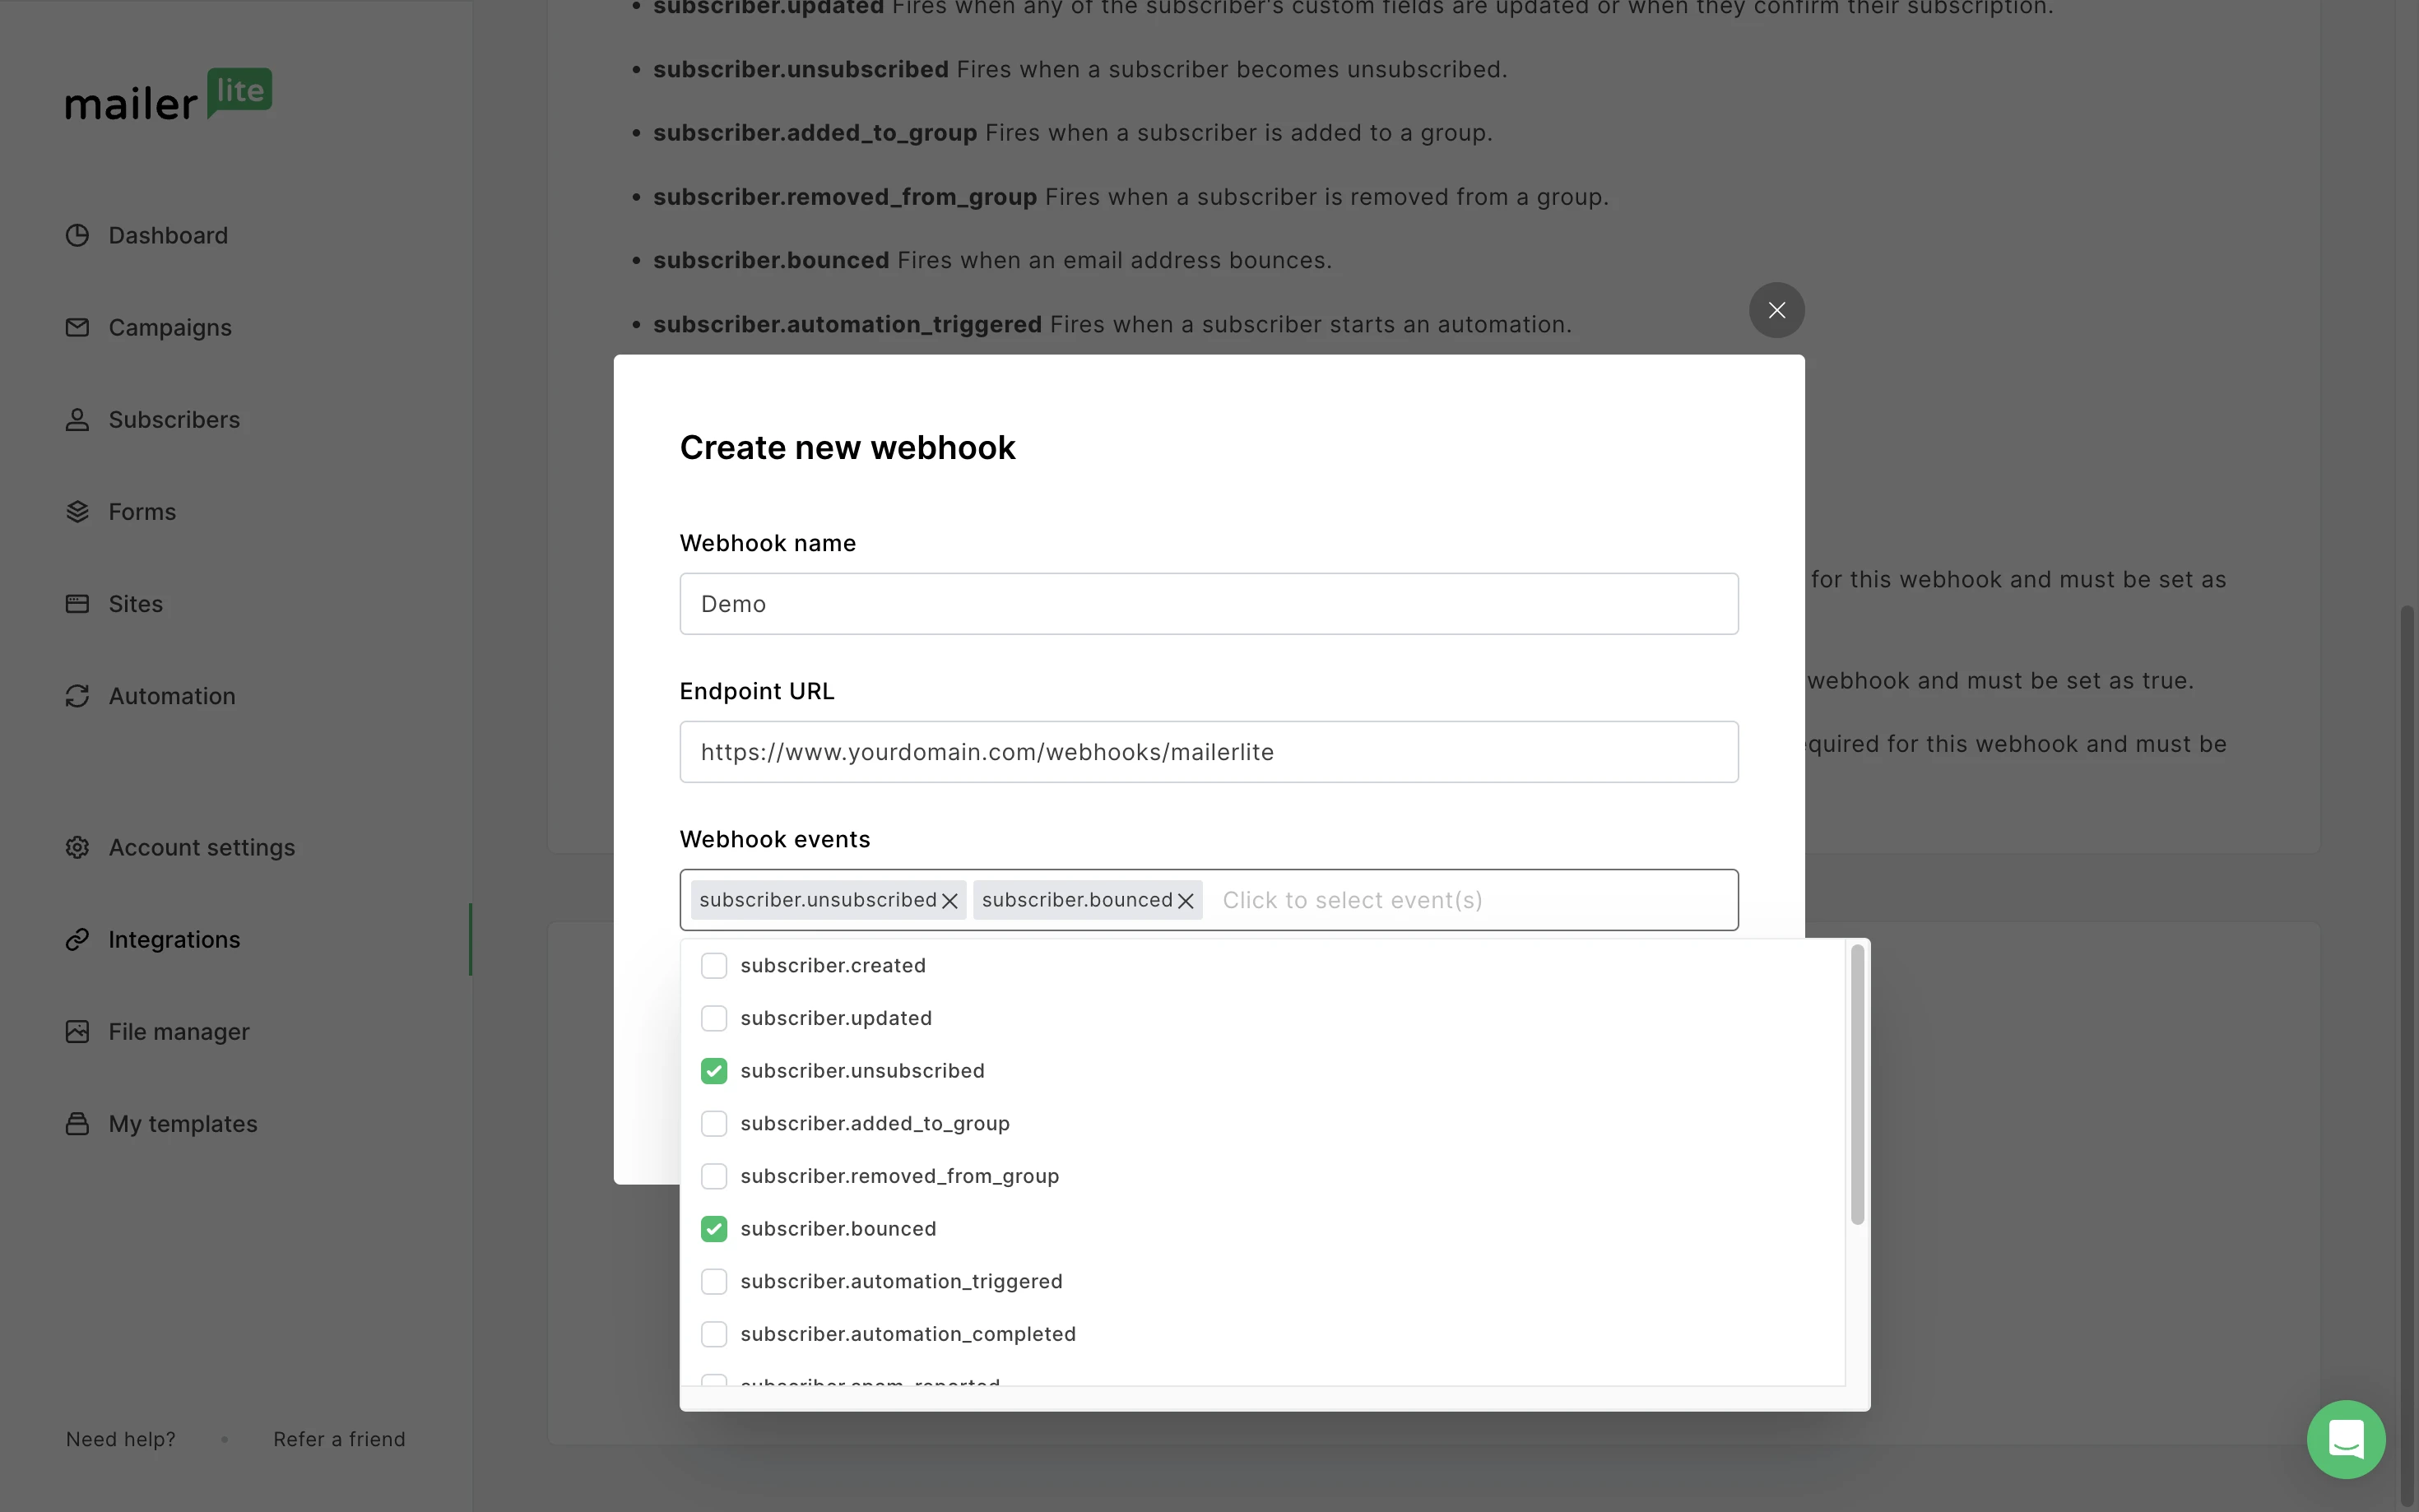
5. Give the webhook a name.
6. Enter the Endpoint URL.
7. Choose the Webhook events to subscribe to.

We offer a variety of event triggers to keep you informed about important activities in your account.
Next, choose to enable event batching.

What is event batching? 🤔
This is a technique used in webhook systems to group multiple event notifications together and send them in a single request, which can be particularly useful in reducing the number of HTTP requests and managing the load on your server.
Click Create Webhook.
All created webhooks will be shown in the Webhooks list. Use the Manage button to control the webhook settings.

Webhooks in automations
To use webhooks in your MailerLite workflows:
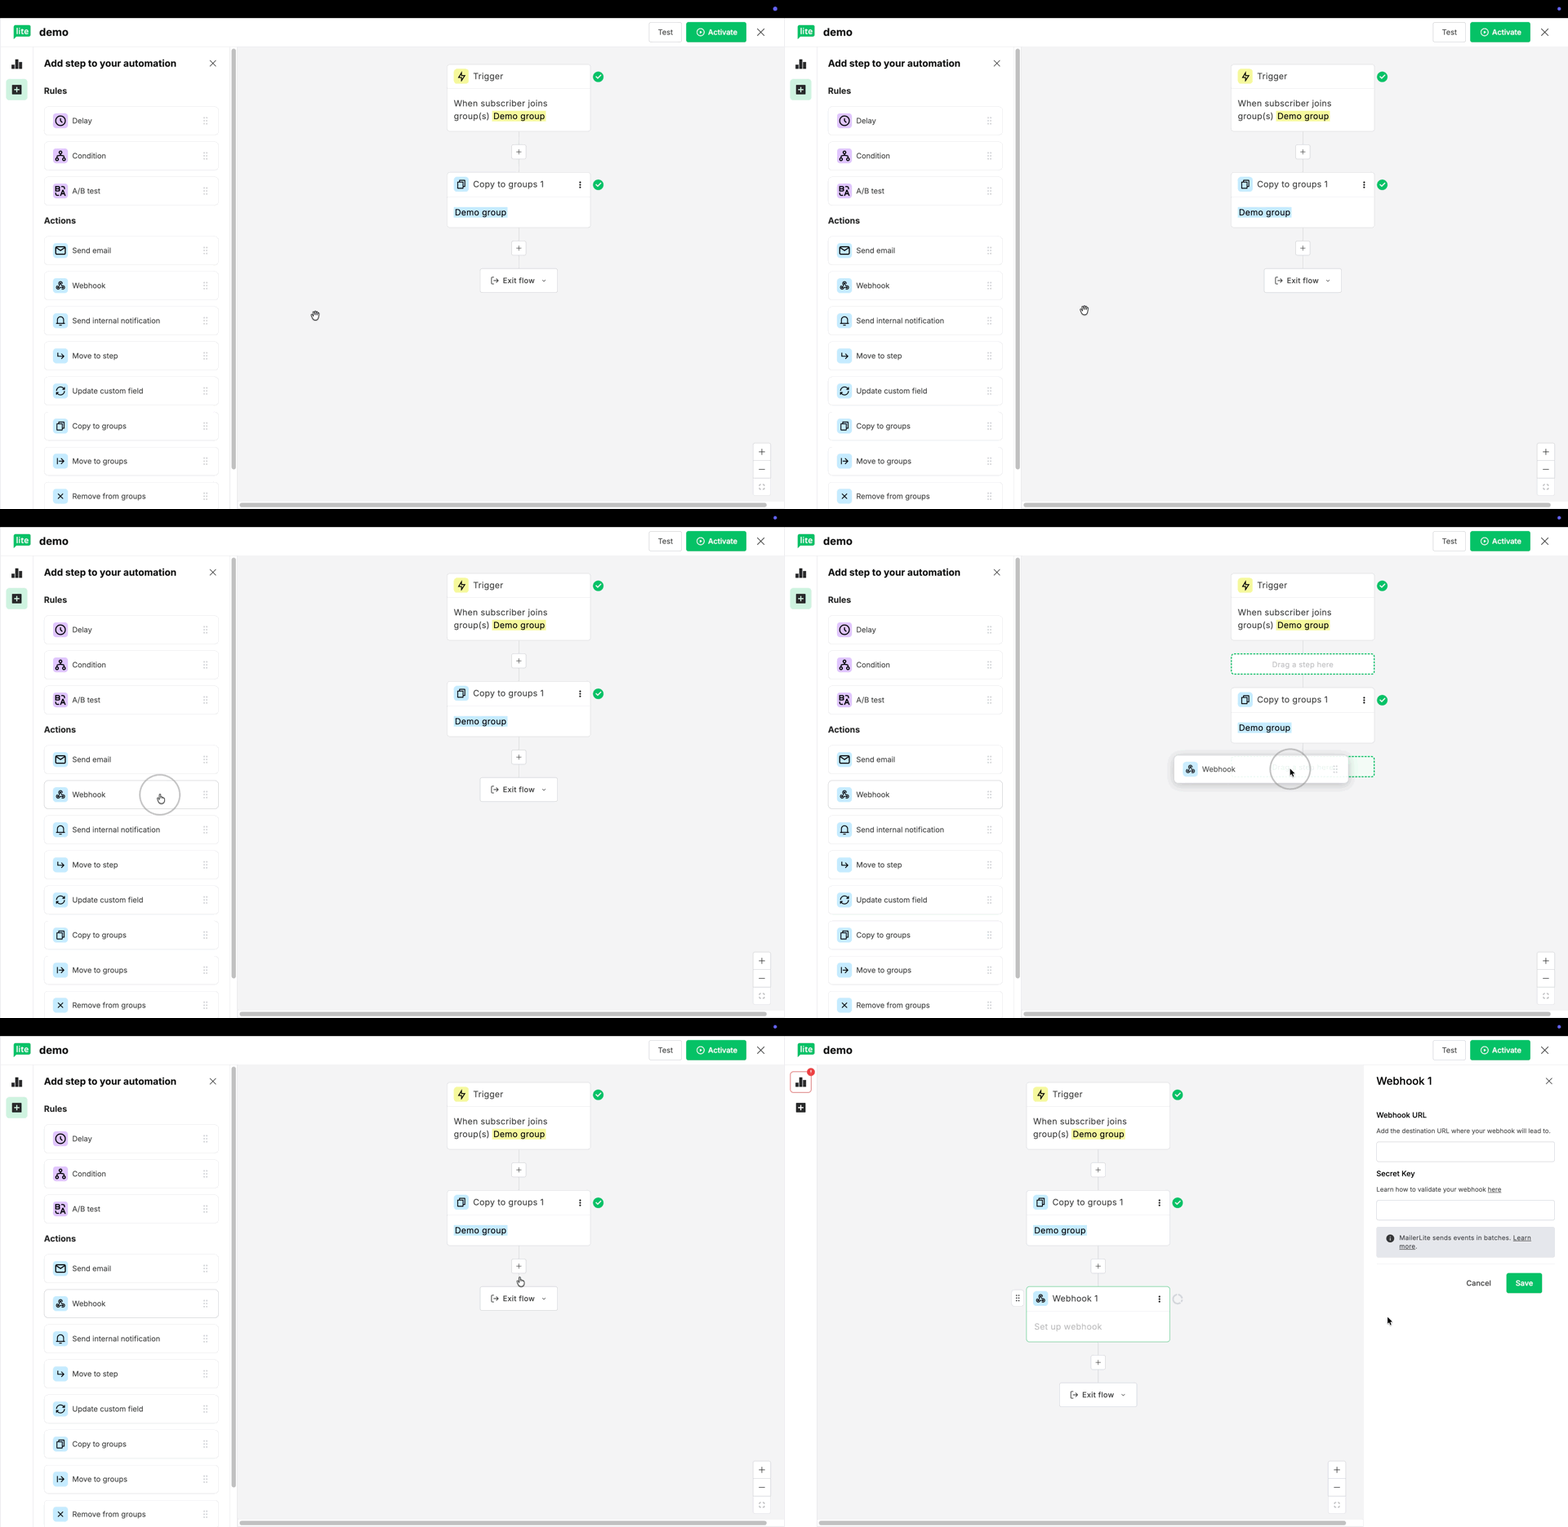
Navigate to Automation.
Choose New automation.
In the automation editor, define your workflow trigger to begin creating.
Click the + sign to add another step.
Drag and drop the Webhook action from the left side panel into an available space in your automation.

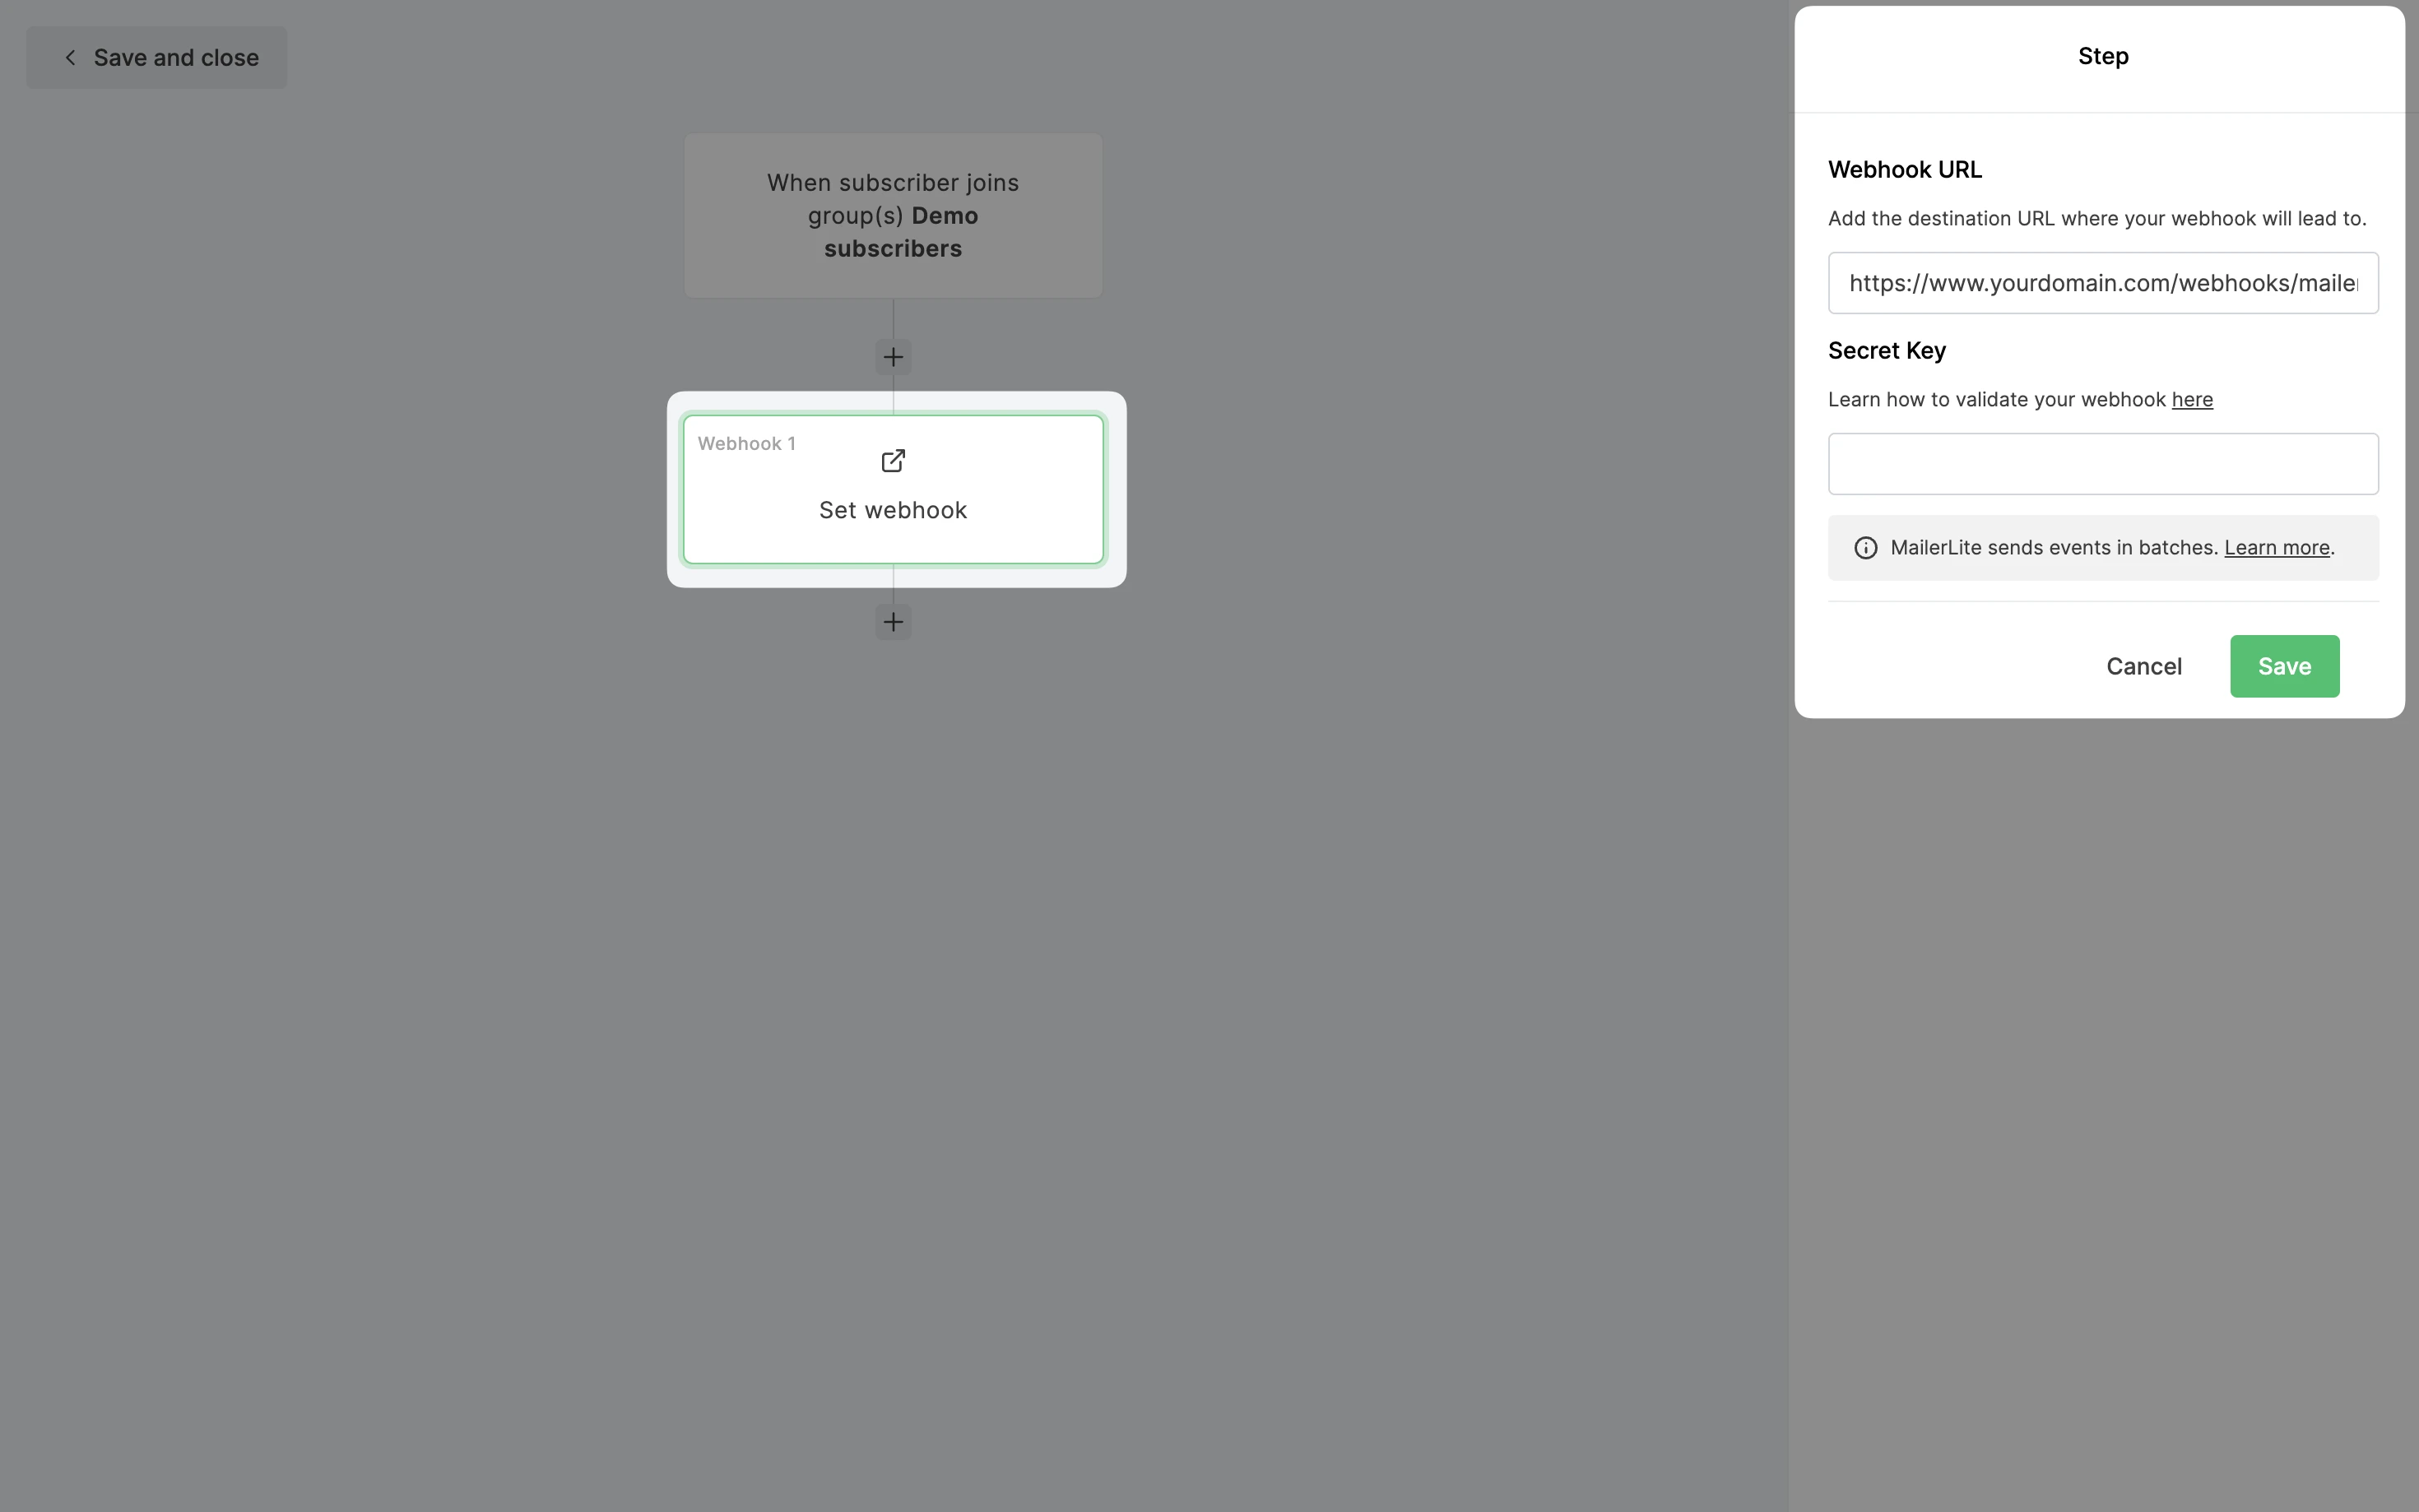
6. In the right side-bar, enter the Webhook URL and the Secret Key.

The Secret Key can be found in the Webhook settings, in the Integrations page.
