Automation steps are the building blocks with which you create your automation workflow. Each step contains an event that will occur when a subscriber reaches that step.
Steps available in MailerLite automations
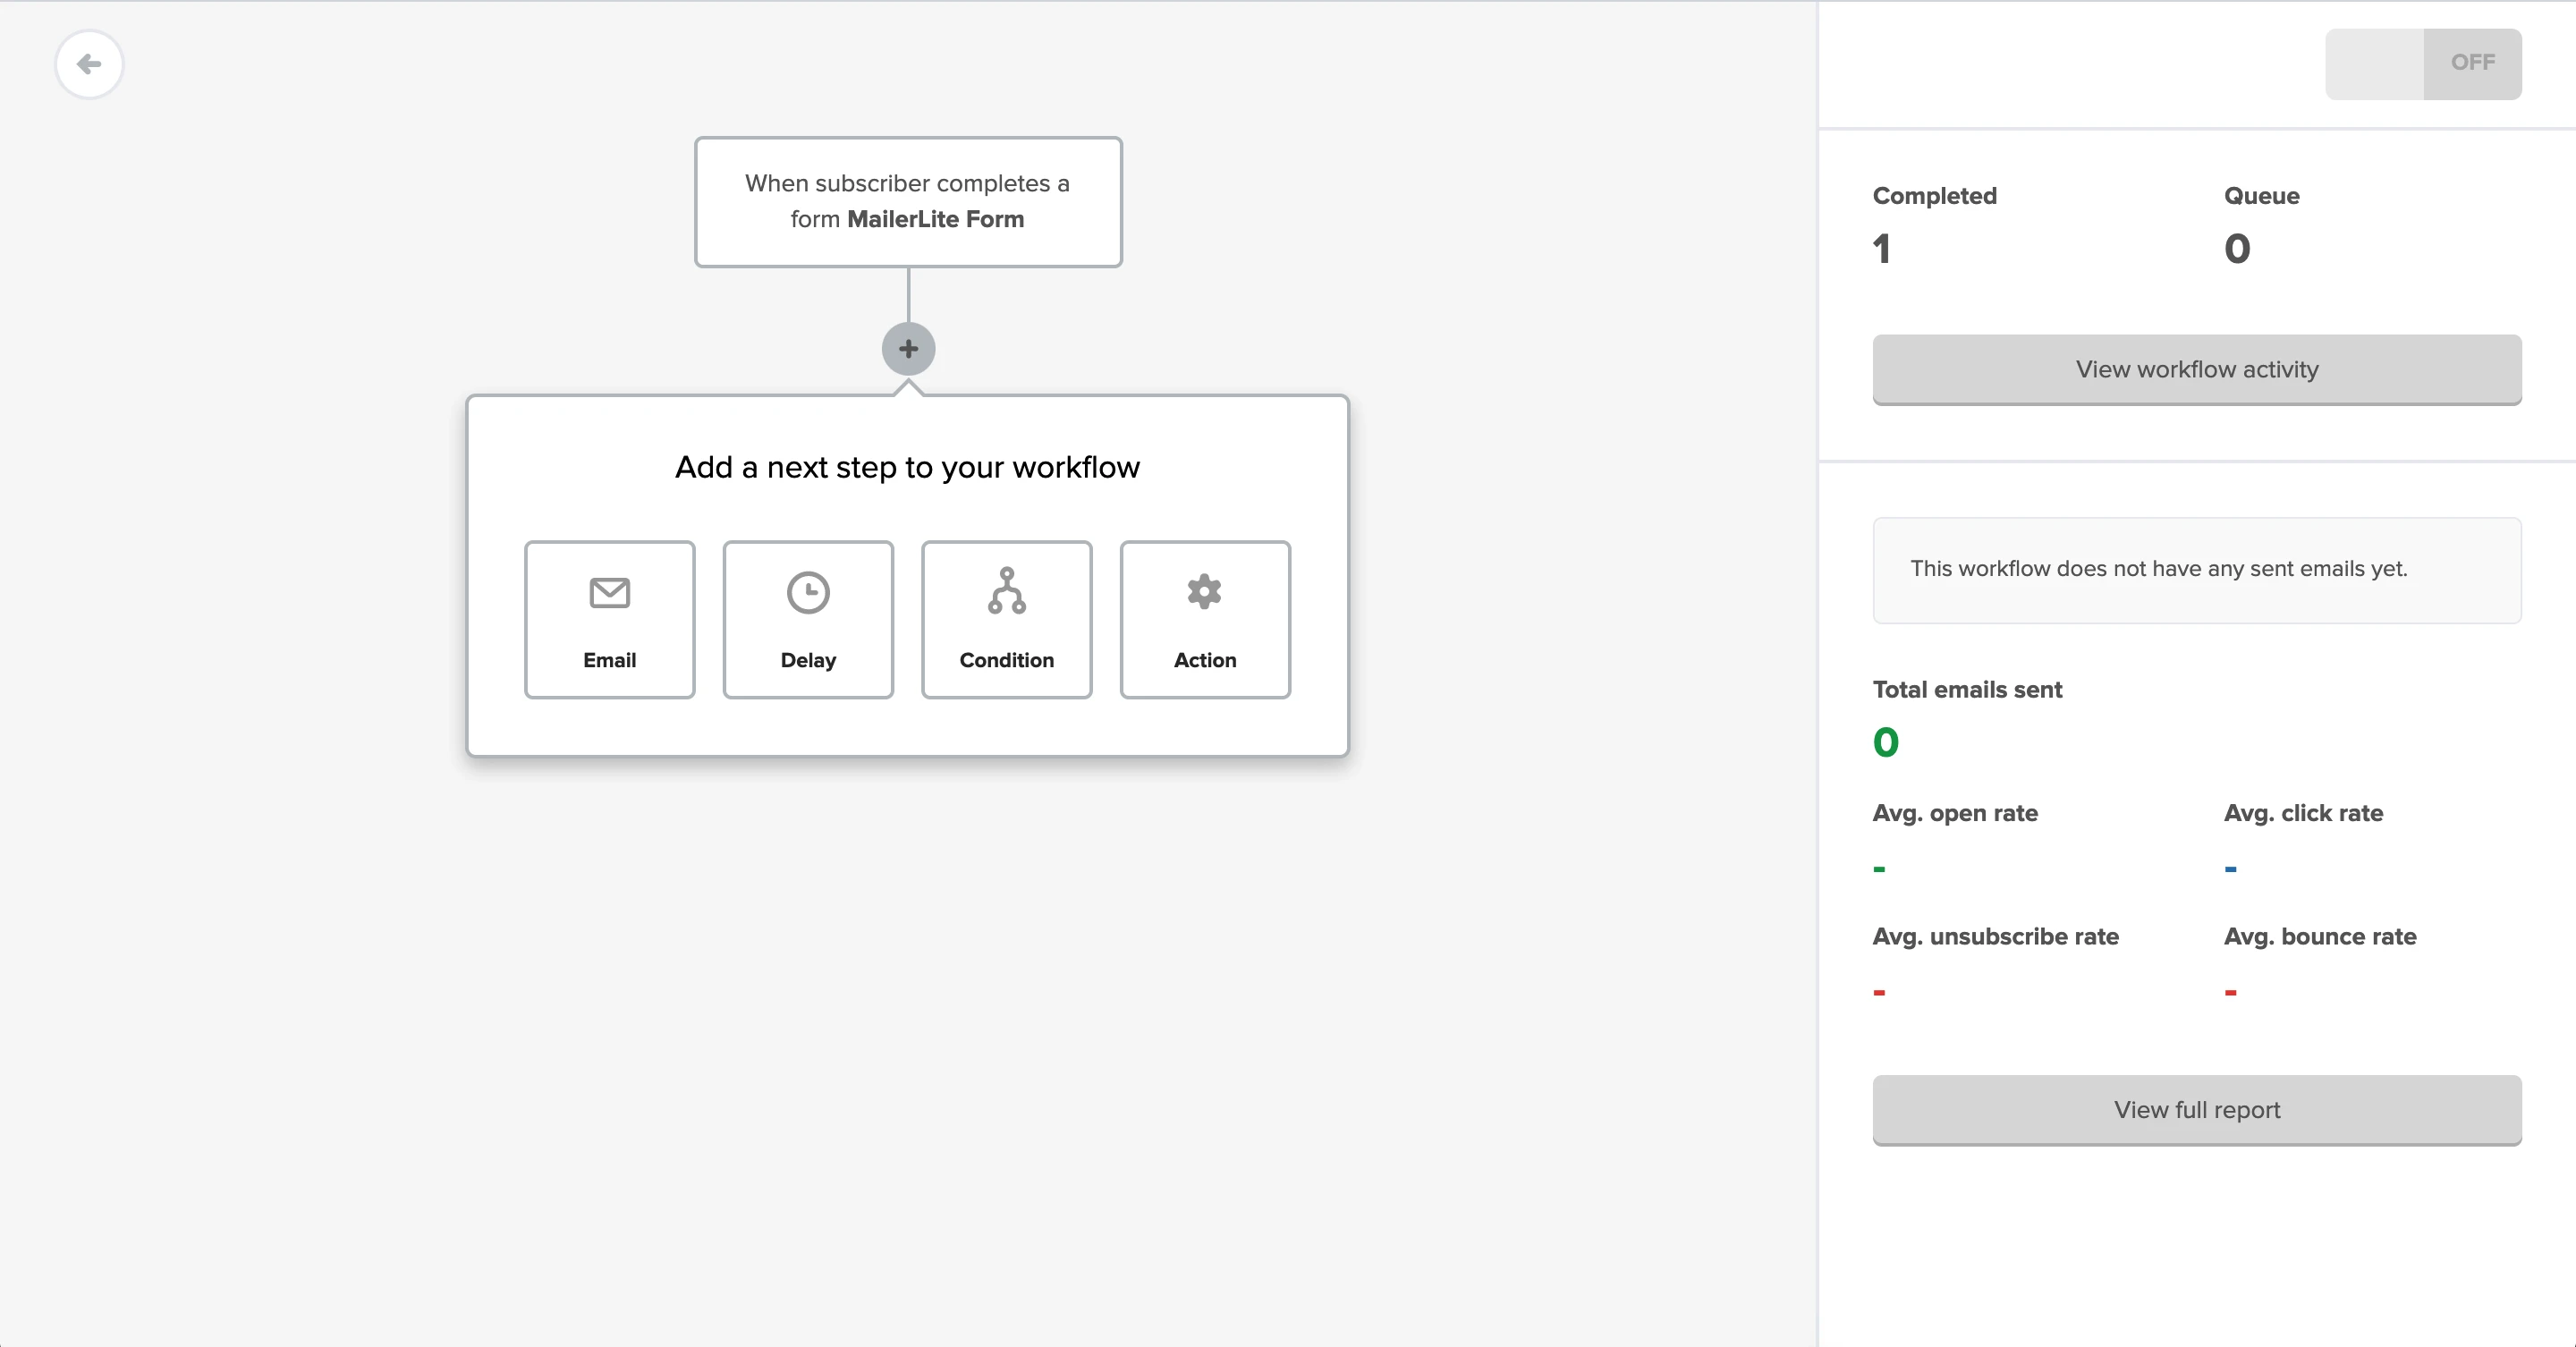
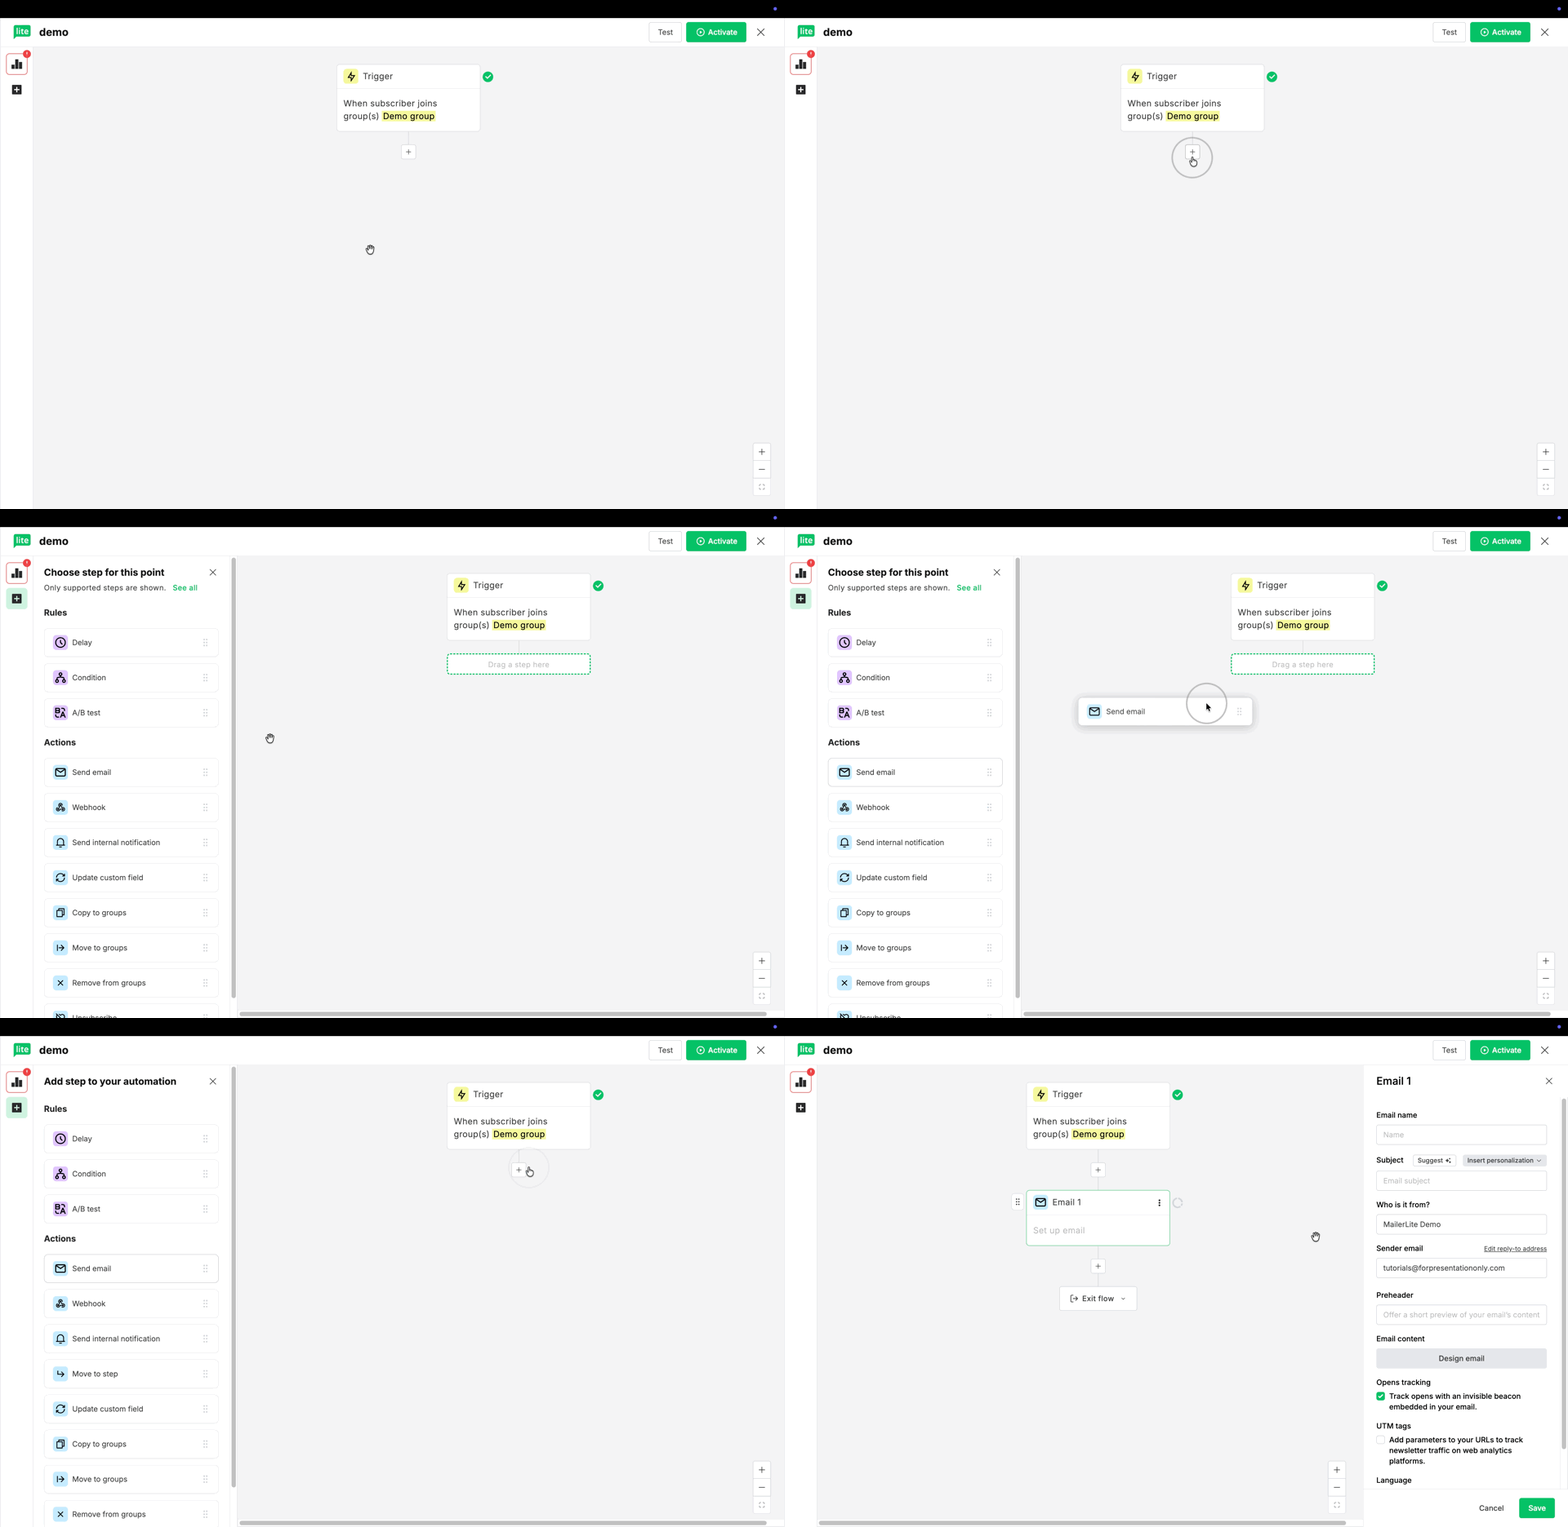
To add a step to your workflow:
Click the plus (+) icon beneath your workflow trigger.
The left side panel will open, showing various options for Rules and Actions.
Rules help you control how subscribers move through your workflow, while Actions define what happens to subscribers as they move through the workflow.
Simply drag and drop a step into an available space. Each step can be customized to fit the journey you want your subscribers to go through.
Delay step
The Delay step is the most commonly used automation step after the Email step and a vital part of any automation that contains more than one email.
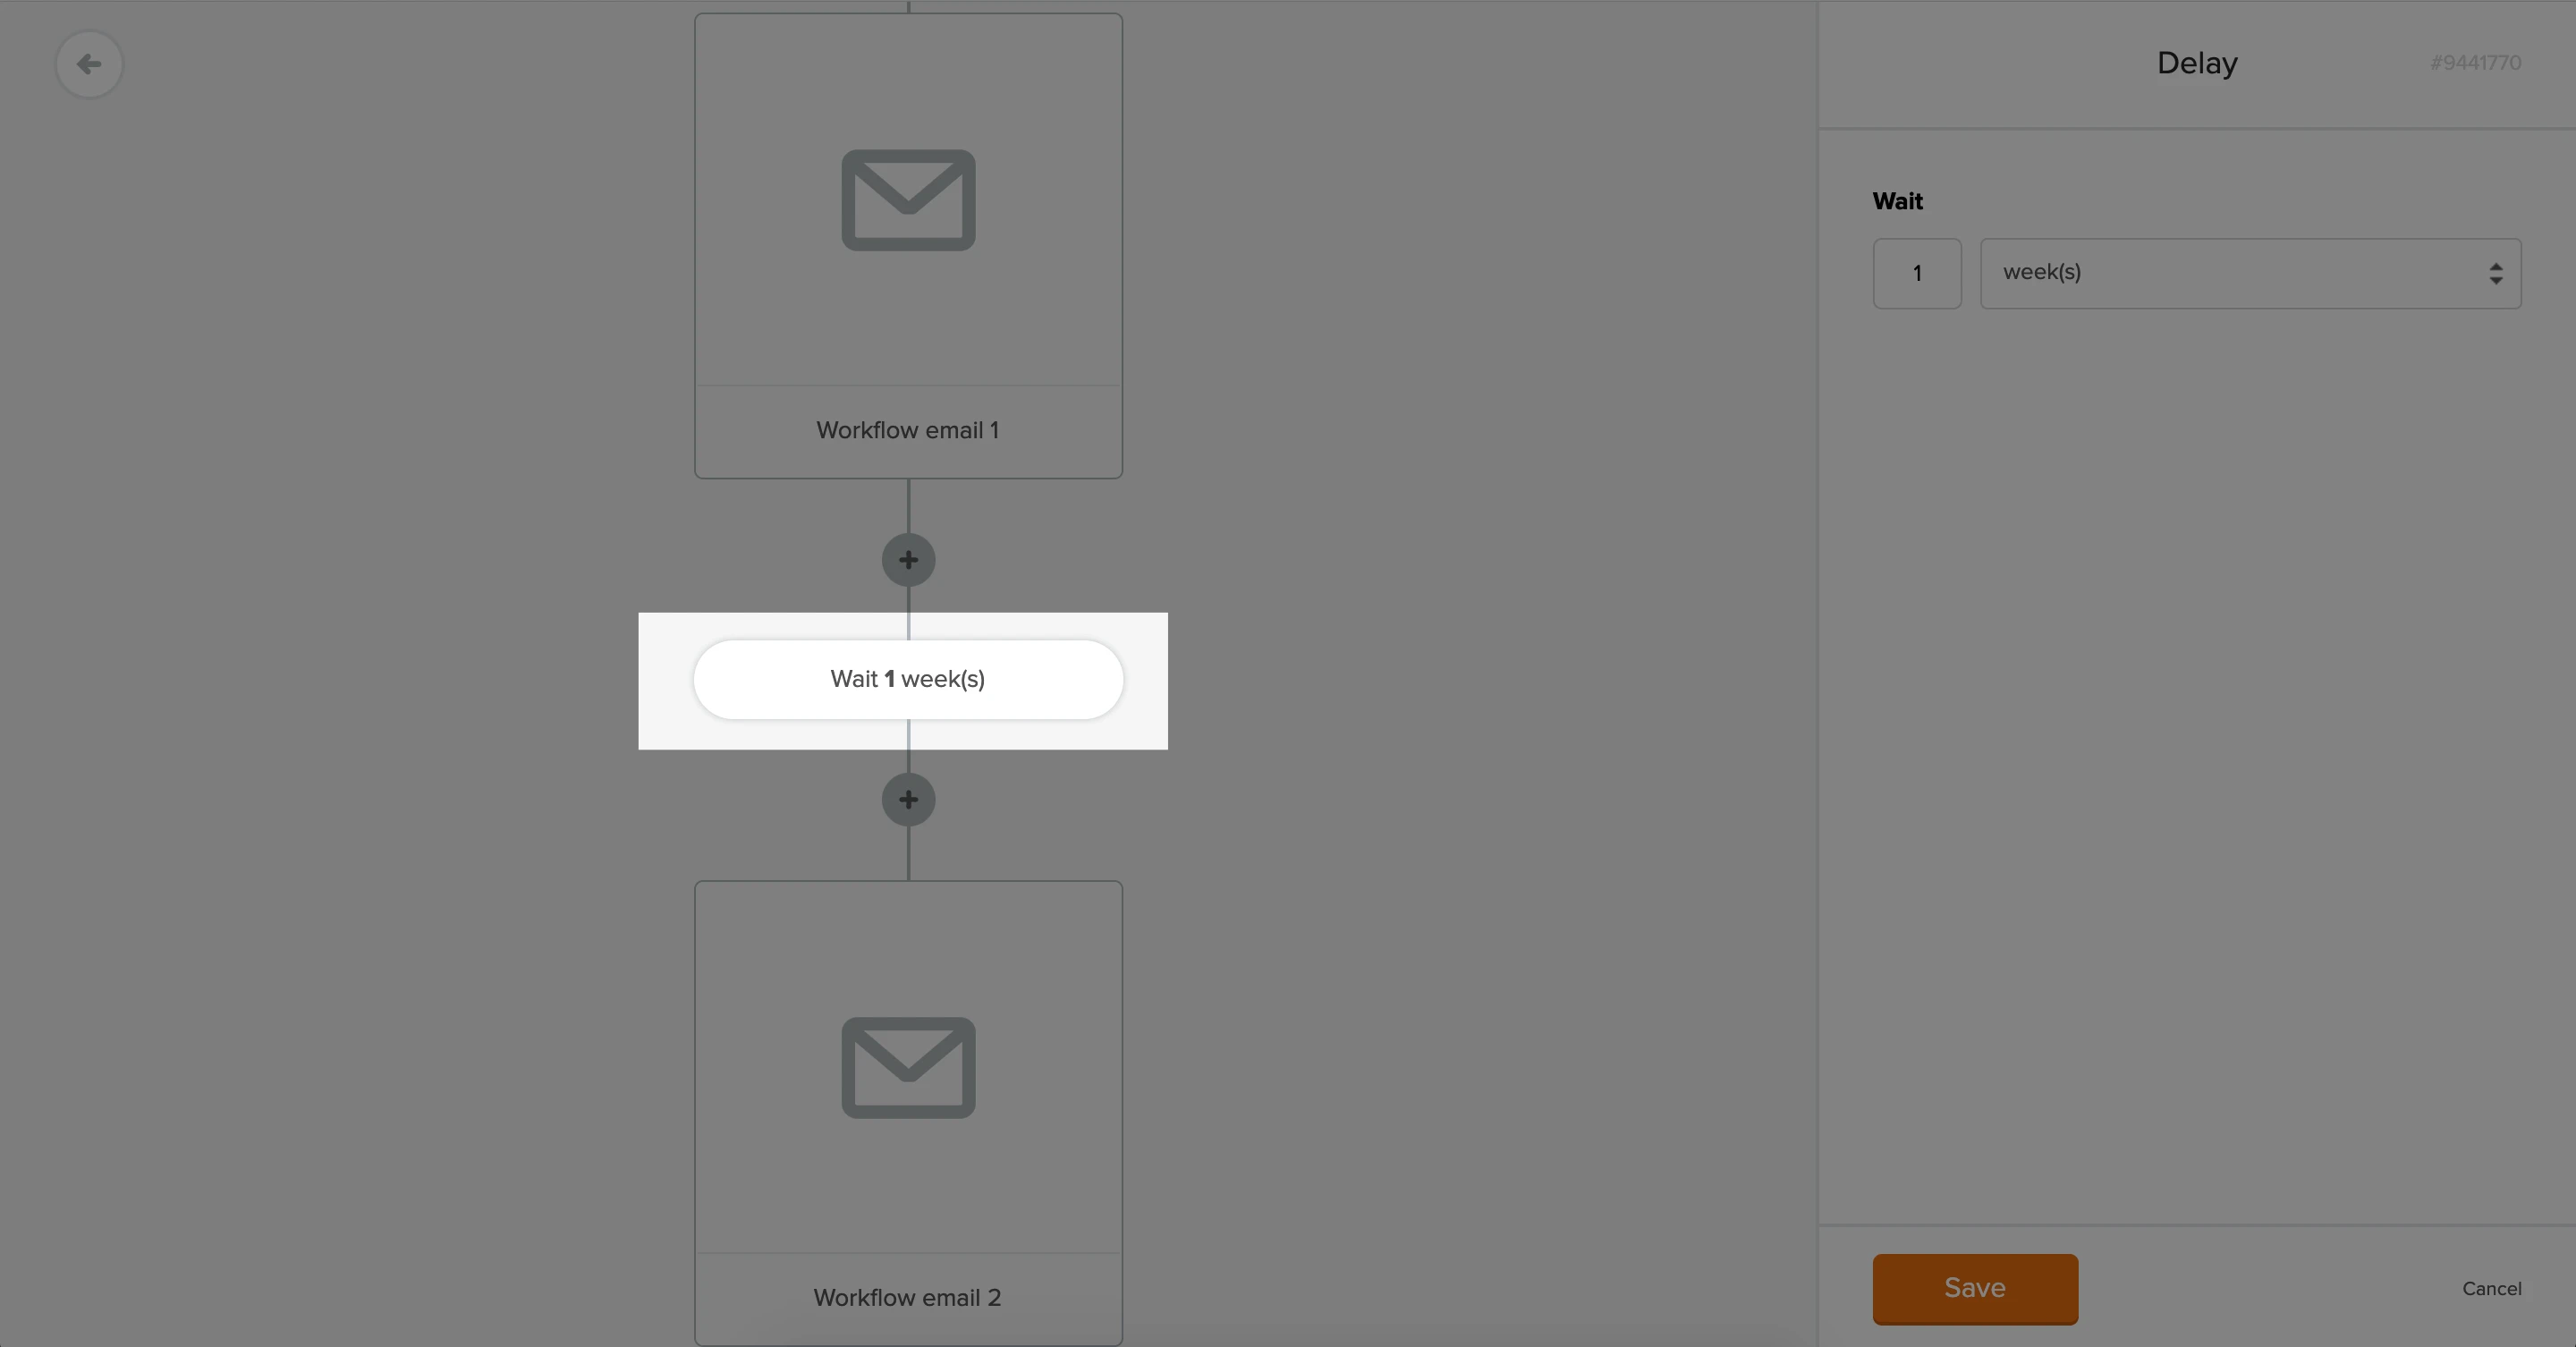
It allows you to add breaks before or between steps. For example, if you have three emails in your workflow and you want them each to be sent one week apart, you would add a Delay step of one week between each Email step.

You can also delay automation steps until a specific date and time with one of the following options:
Specific time of the day - This indicator instructs the workflow to wait to perform the next step until a specific time of the day.
If you set a delay to wait until 10am, the next step will not be processed until 10am on the following day. Subscribers added before 10am will be processed at 10am the same day. All subscribers added after 10am will be processed at 10am the following day.
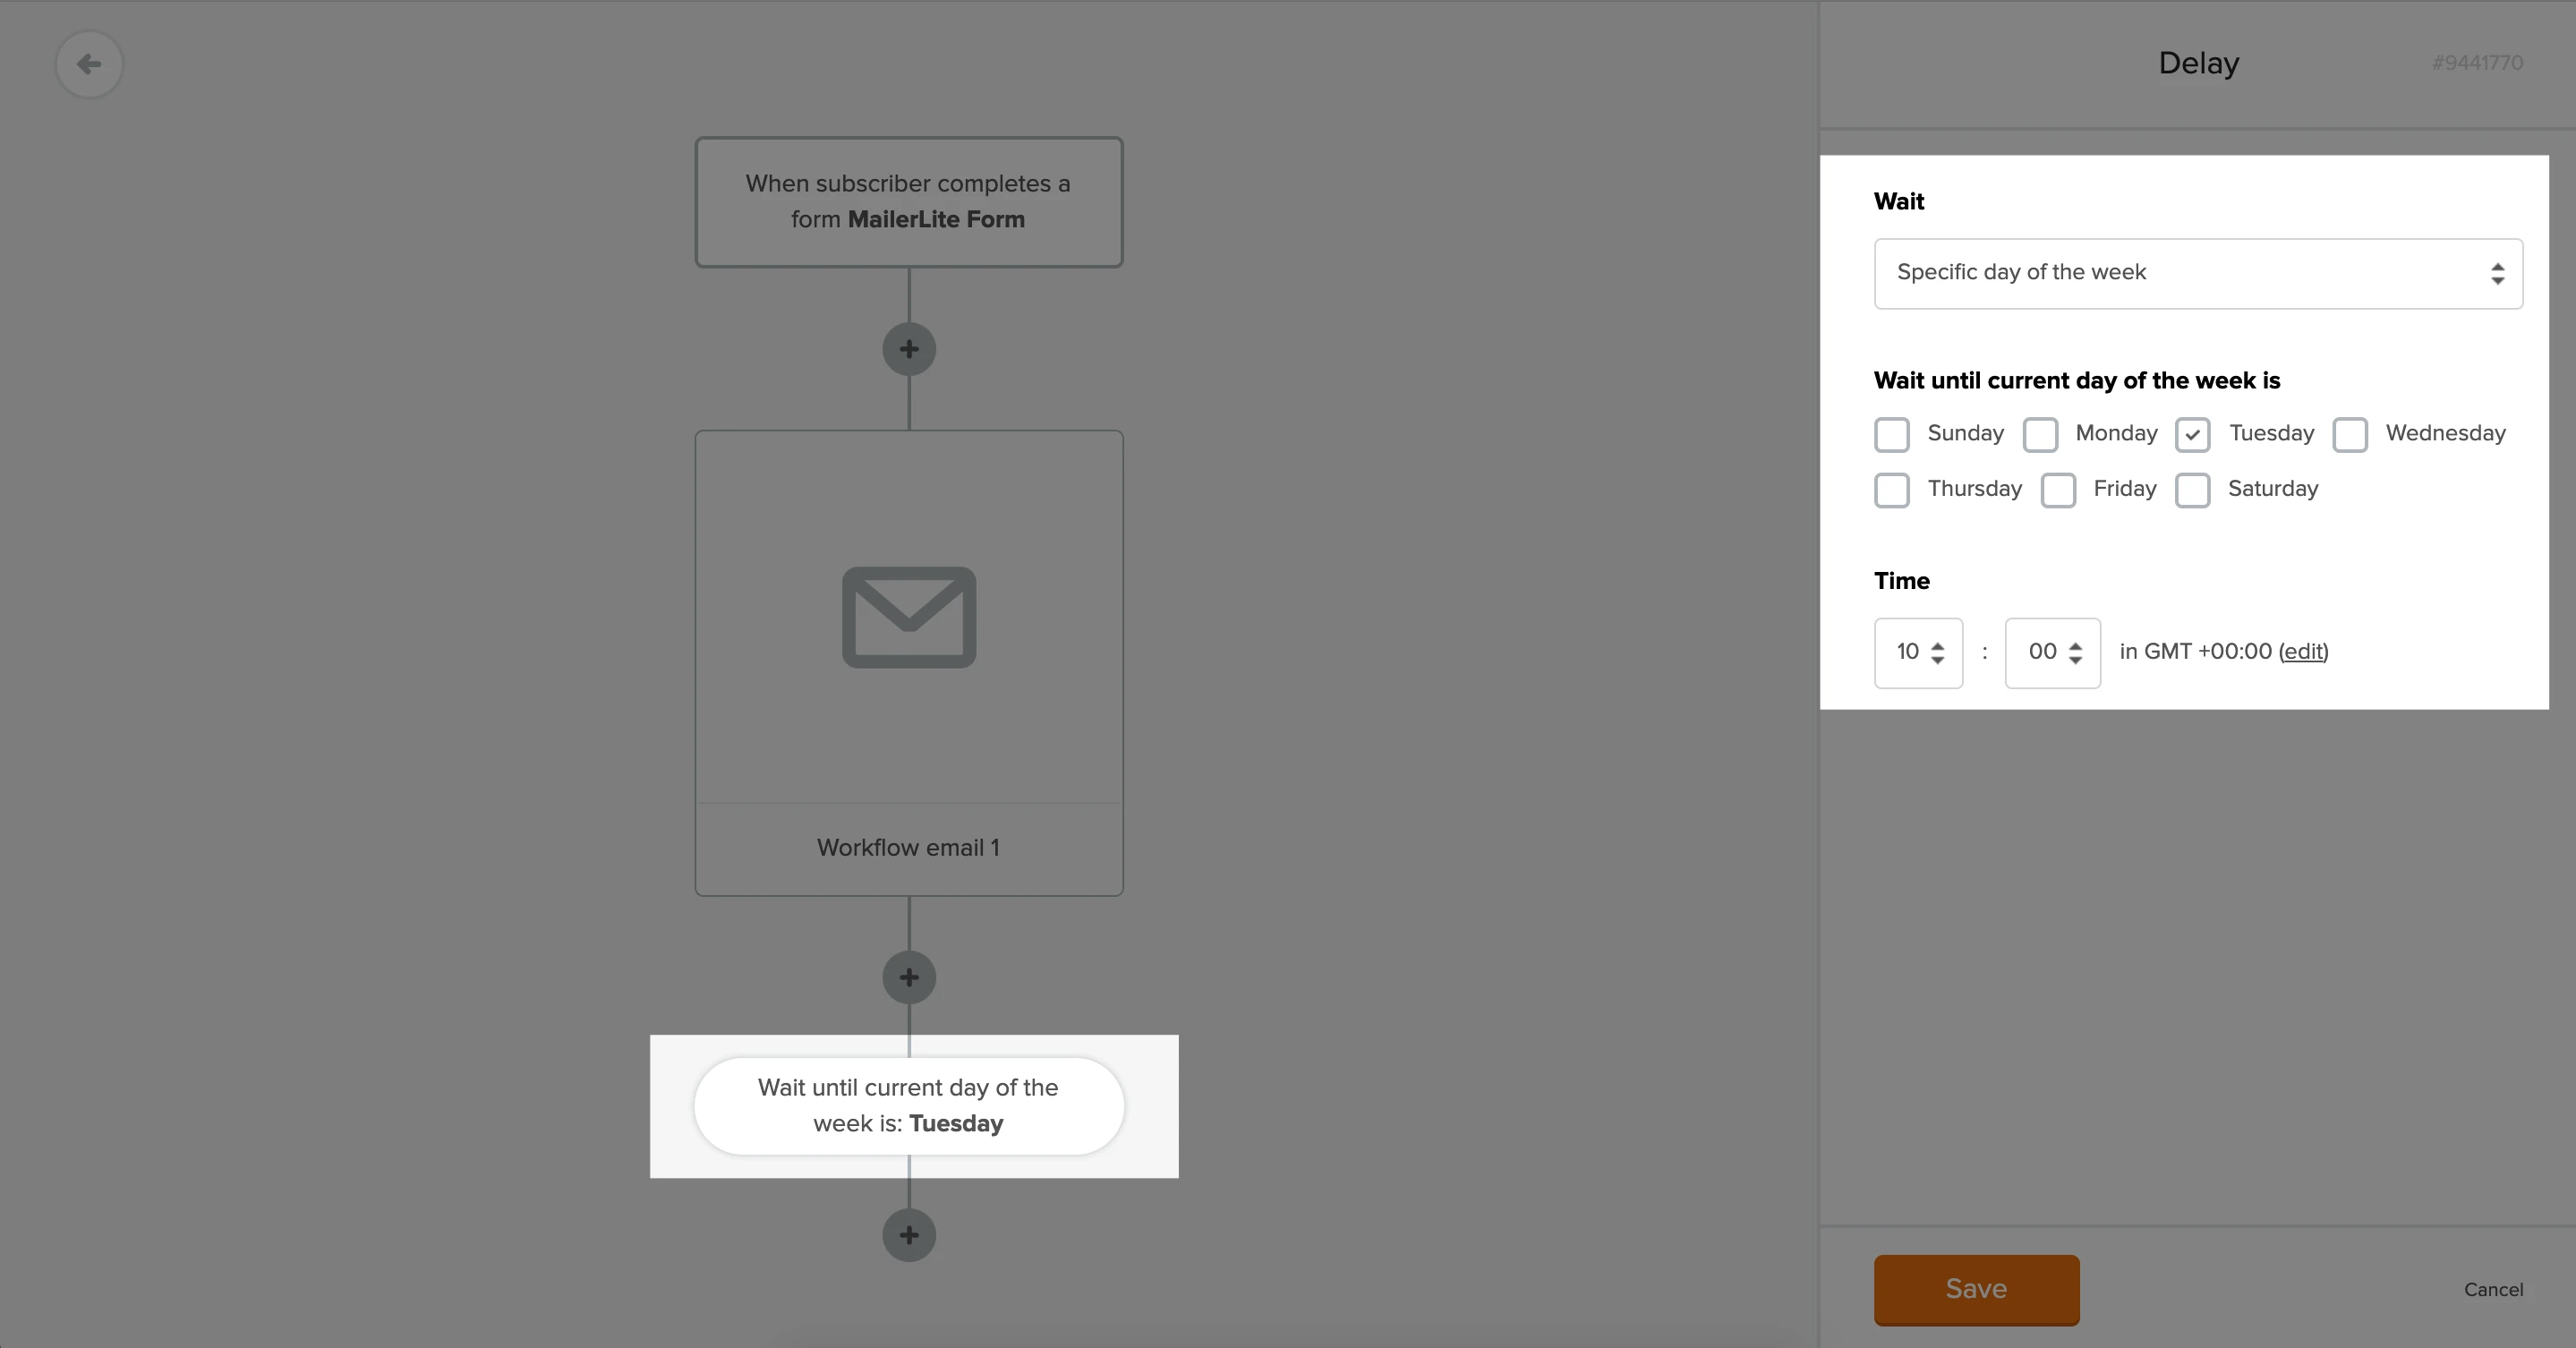
Specific day of the week - This indicator instructs the workflow to wait until the current day of the week. You can choose any day of the week.
Subscribers added on the selected day will not be processed. If the delay is set to "wait until the current day of the week is Monday", even subscribers added before 10am on the current Monday will be delayed until the following Monday.
Specific day of the month - This option allows you to wait until an exact day of the month or until the last day of the month.
Only subscribers added to the workflow before the selected day will be processed. If the delay is set to wait until the 15th day of the month (time is set at 10am), subscribers added any time on the 15th day will be processed only on the 15th of the following month.
Specific date of the year - This setting delays your workflow steps until a specific day of a year.
Subscribers added on or before the selected date and time will be processed and triggered on that day. All subscribers added after the selected date and time, will not be processed or triggered at all.
To set up a Delay step:
Add the Delay step to your workflow.
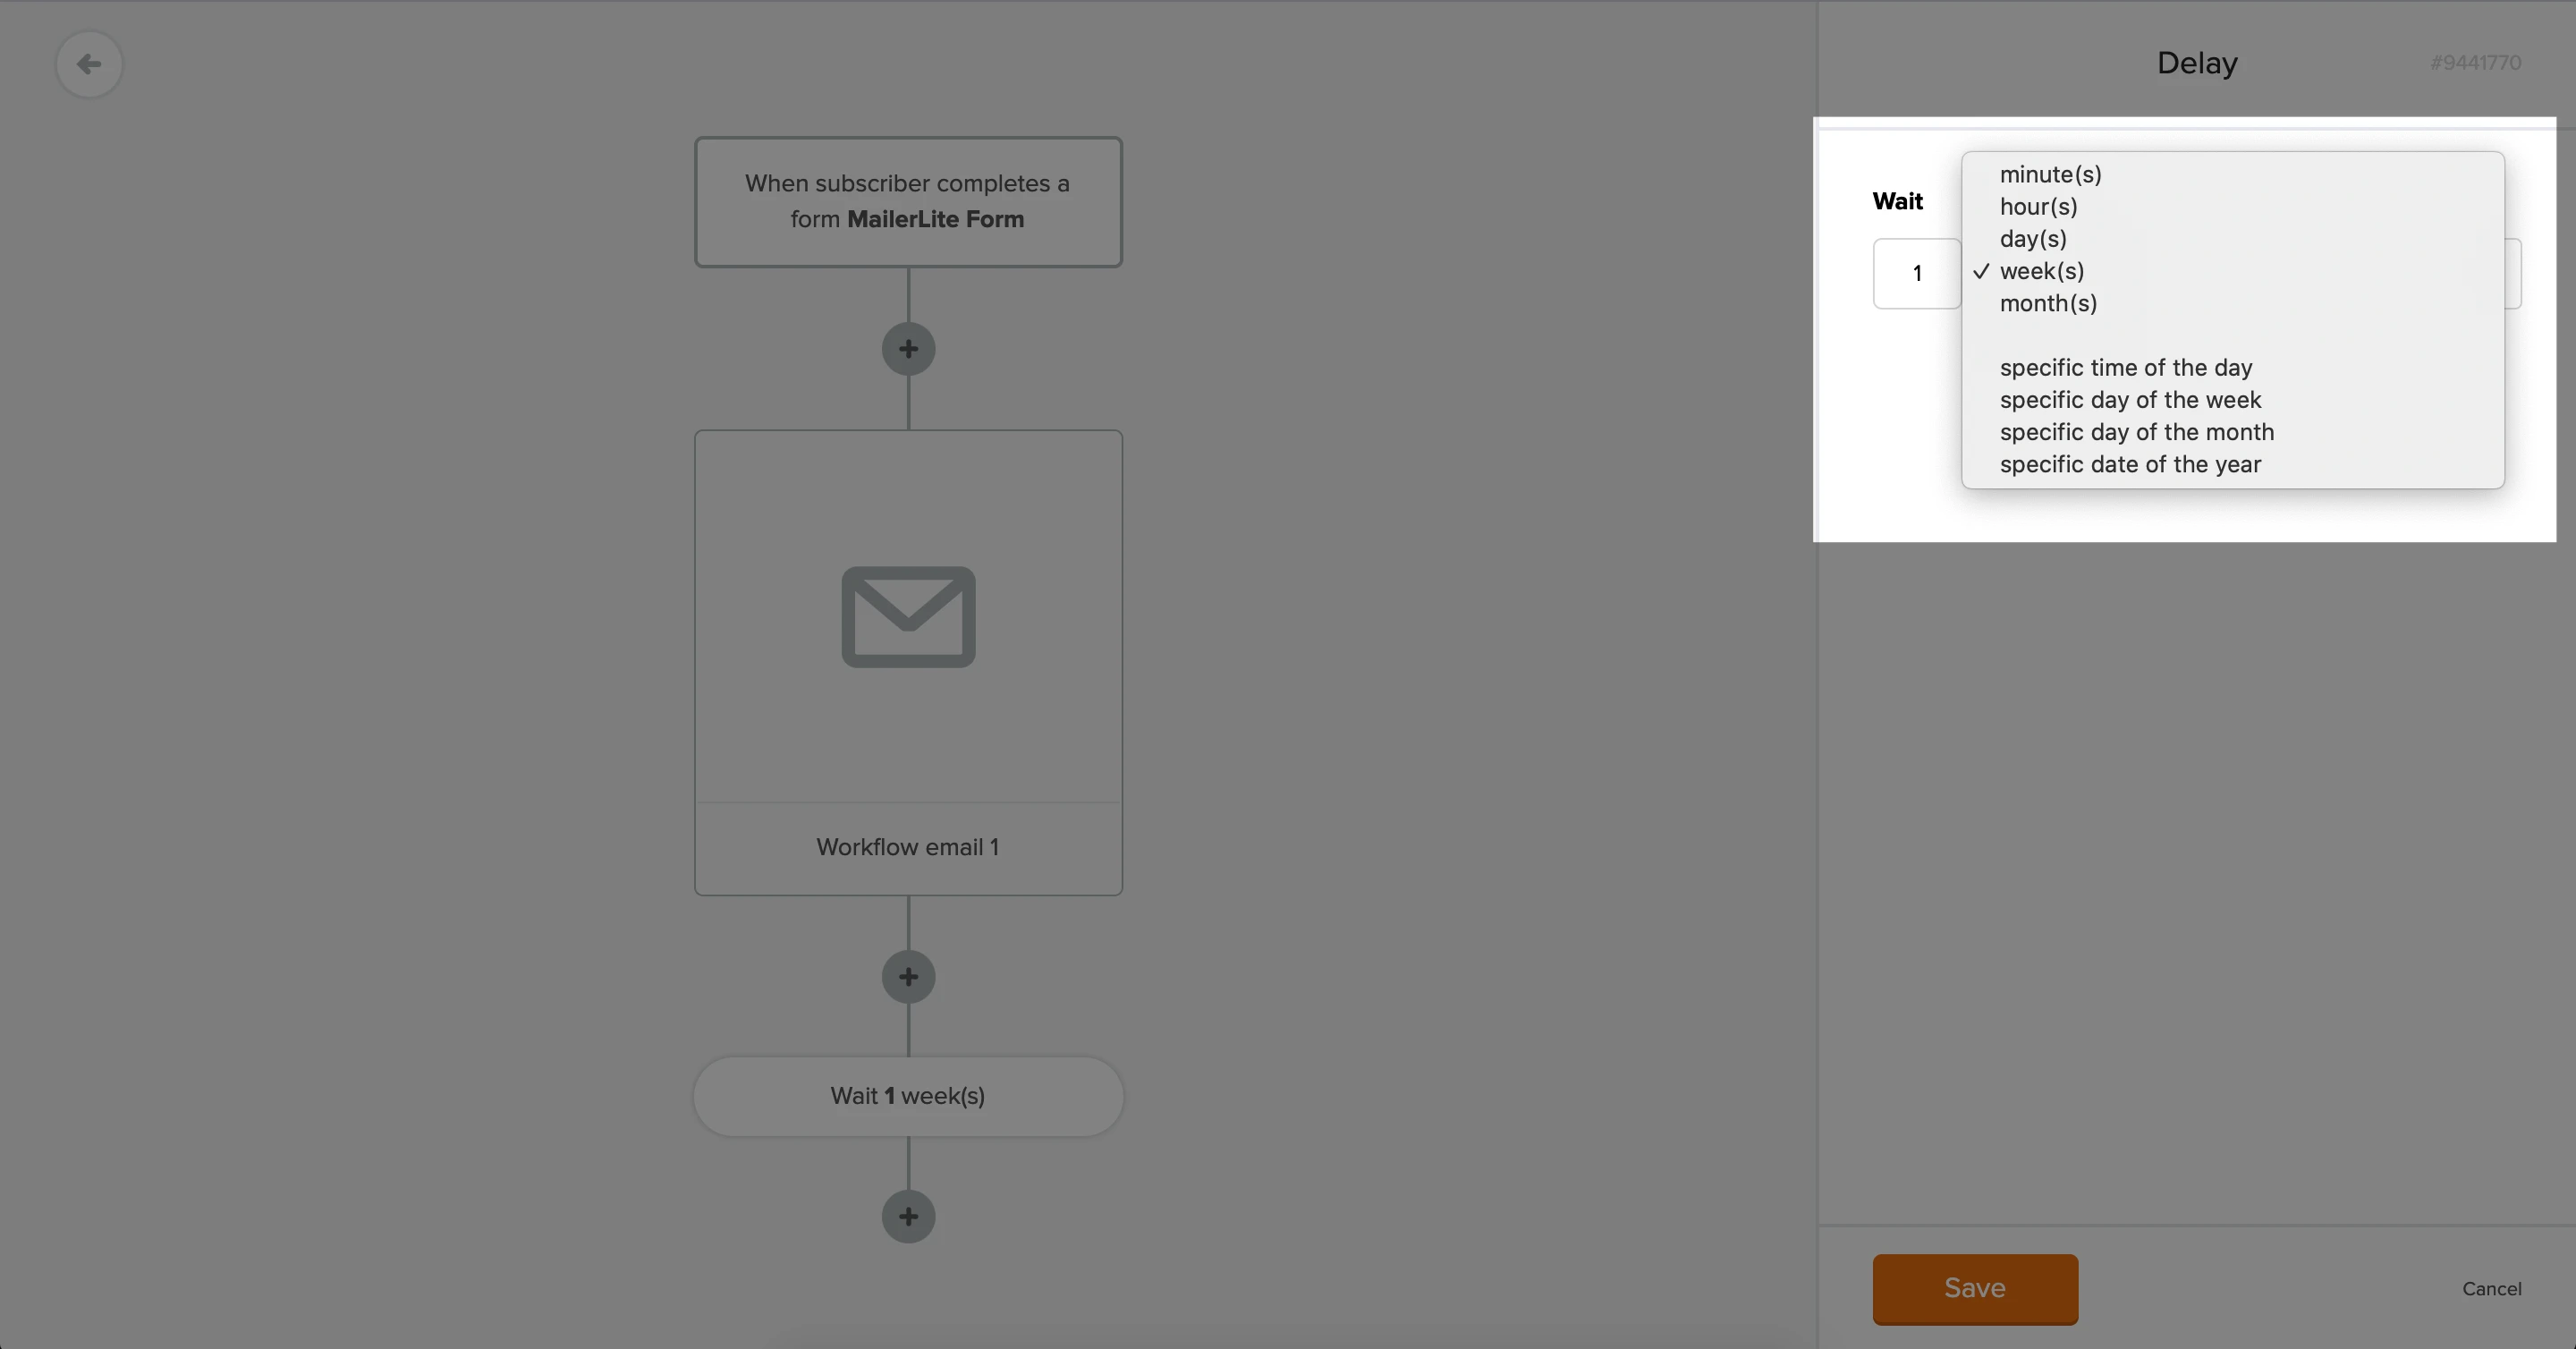
In the sidebar, use the drop-down menu to determine the length of the Delay step.
You can choose any number of minutes, hours, weeks, or months; or you can opt to delay the following step until a specific time of the day, day of the week, day of the month, or date of the year.
For example, if you want your subscribers to receive their automation emails on Tuesdays only, you can add a specific day of the week: Tuesday Delay step before each email.
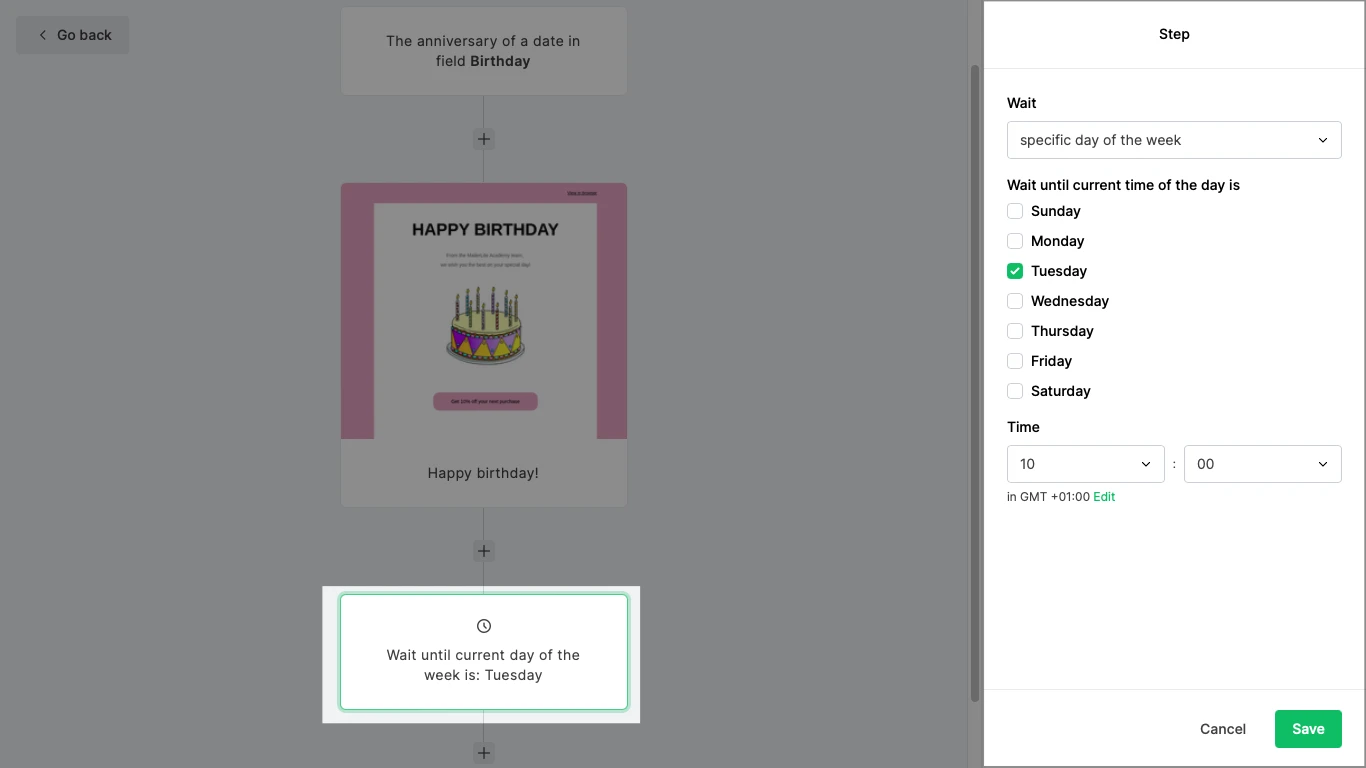
Note: When a subscriber reaches a Delay step in your active workflow, they will sit on the Delay step for the predetermined amount of time before moving on to the next step.
If you need to change the length of your Delay step after your workflow is already activated, you can do so. However, subscribers that are already queued for that step will adhere to the previous delay time. New subscribers entering the workflow will comply with the new delay time.
If you simply wish to skip the Delay step for some subscribers, you can do so from the automation activity tab.
The number of queued subscribers is displayed on each respective delay step, even when multiple consecutive delays are added.
Clicking on the delay step will show more information, and selecting View automation activity will take you to the automation's Activity tab, filtered by the Queued subscribers.

Condition step
The Condition step is a powerful function that allows you to split your workflow into two different branches based on a rule determined by you.
You might use a Condition step if you want subscribers who clicked a link in your previous email to receive a different follow-up email than those who didn’t click that same link.
To set up a Condition step:
Add the Condition step to your workflow.
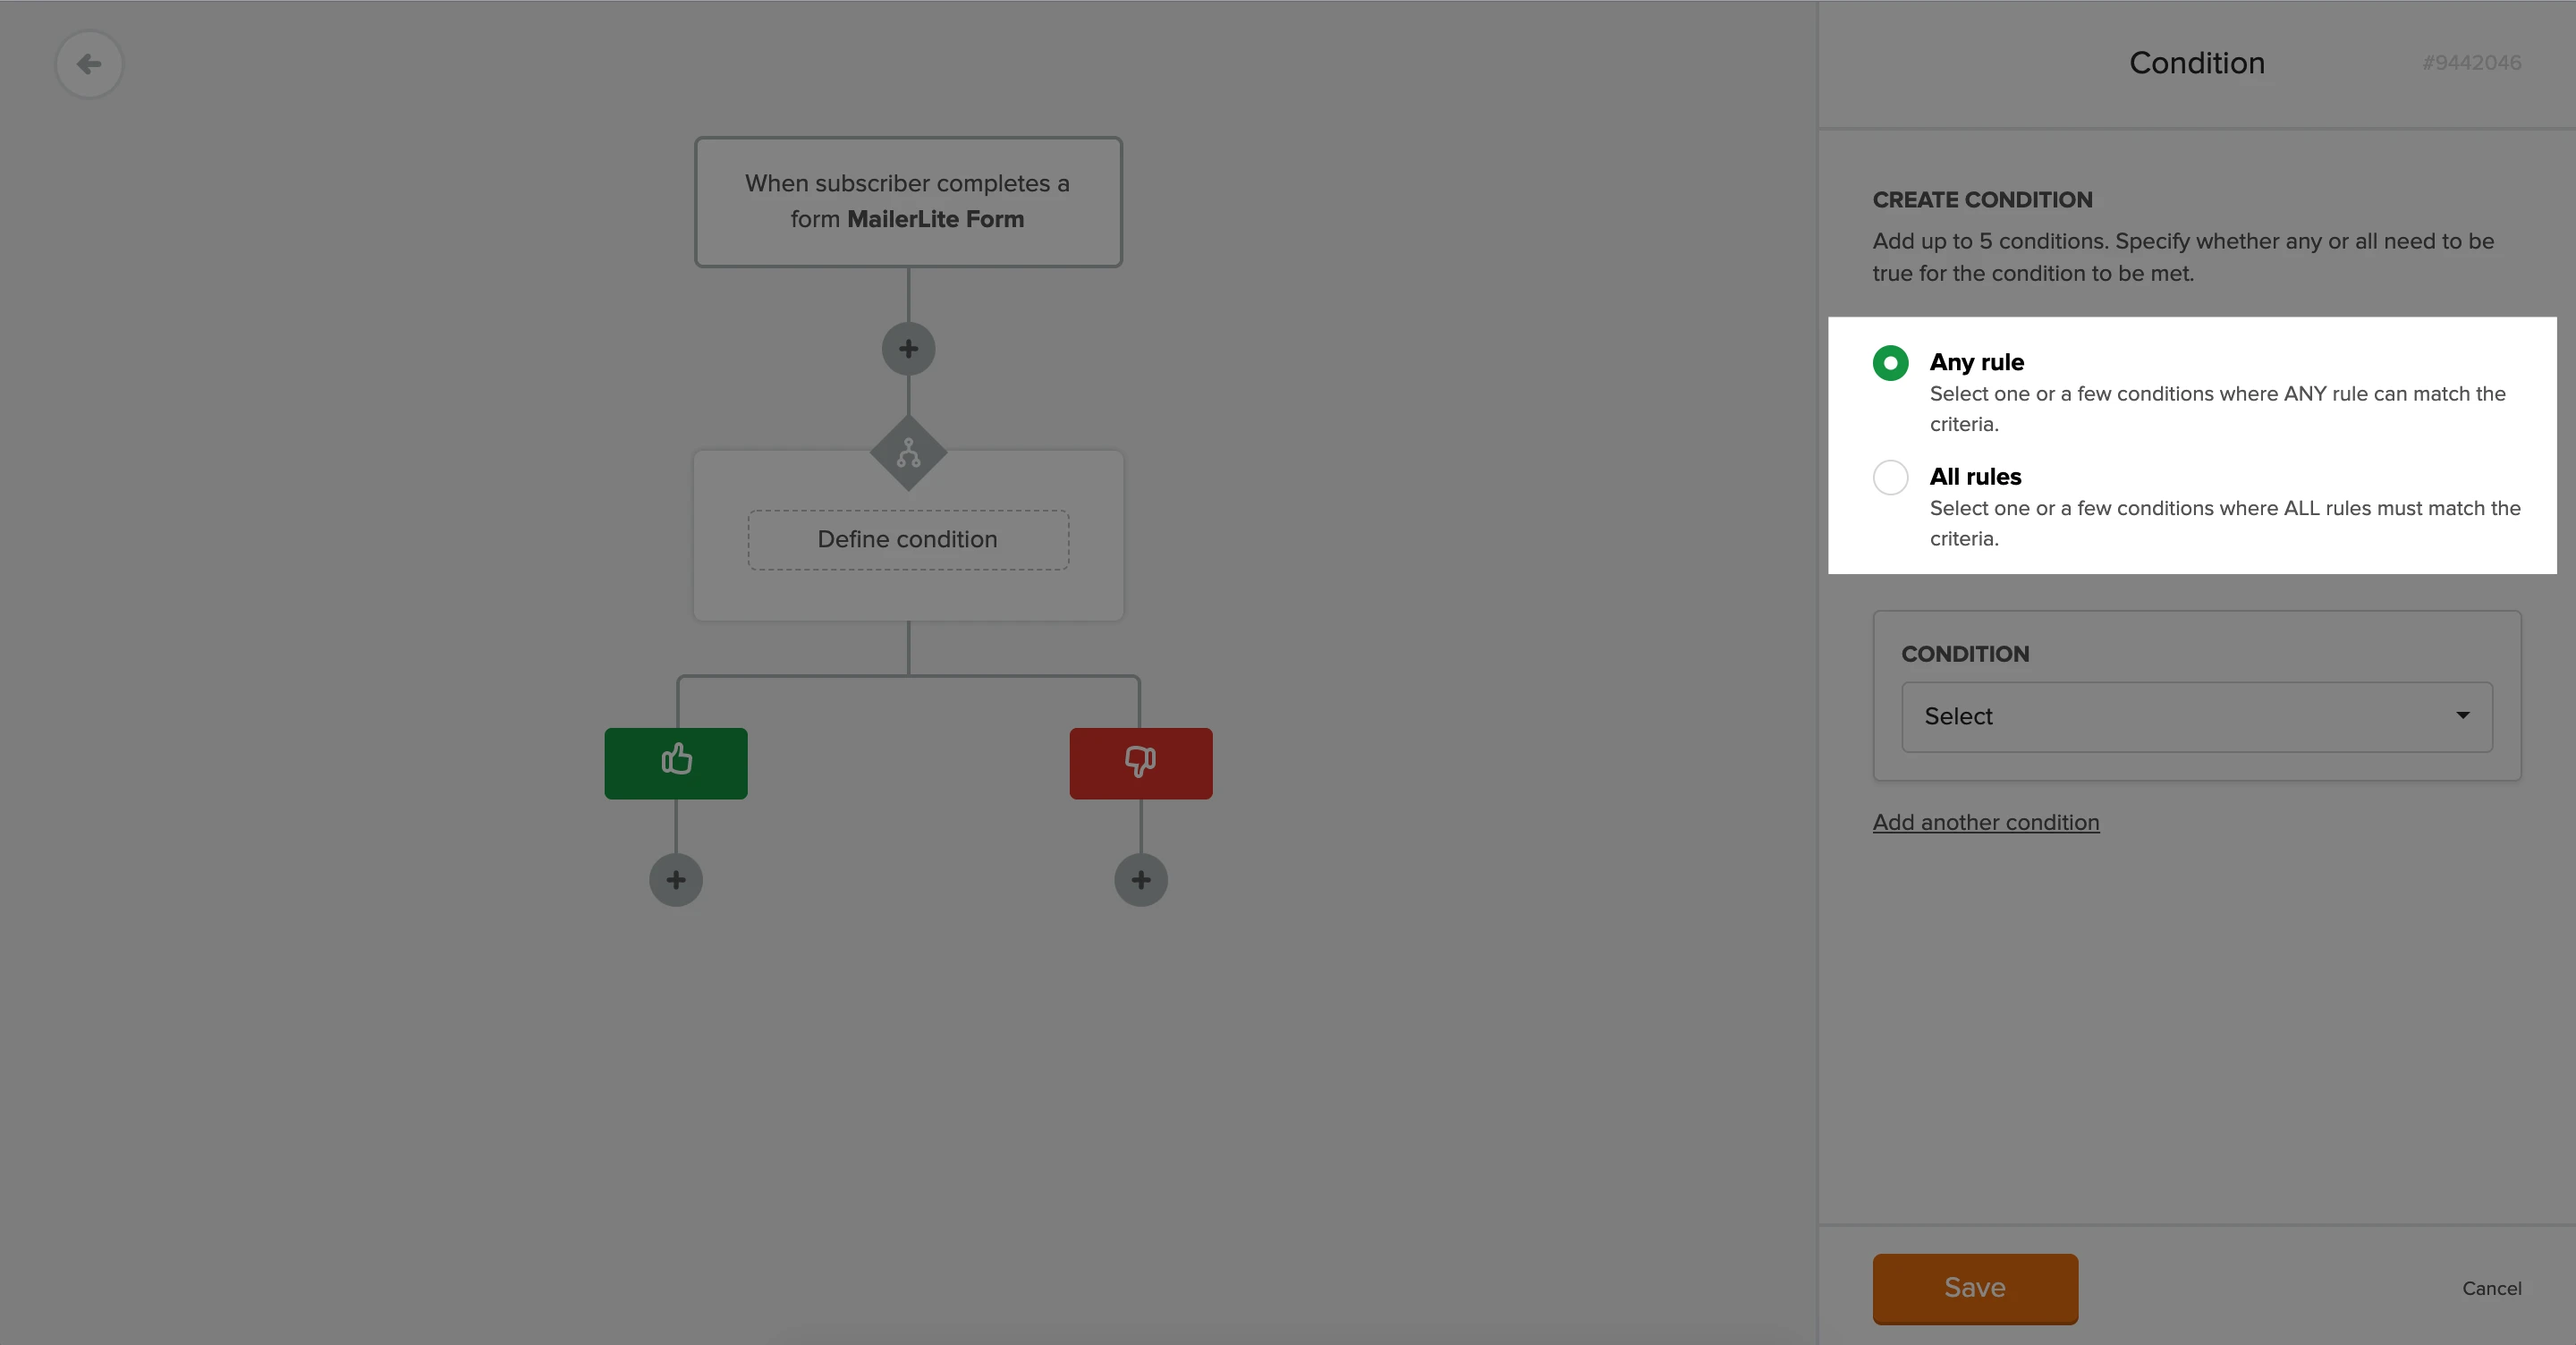
In the sidebar, select whether you want subscribers to adhere to All rules or Any rule in order to meet the requirements of the condition.
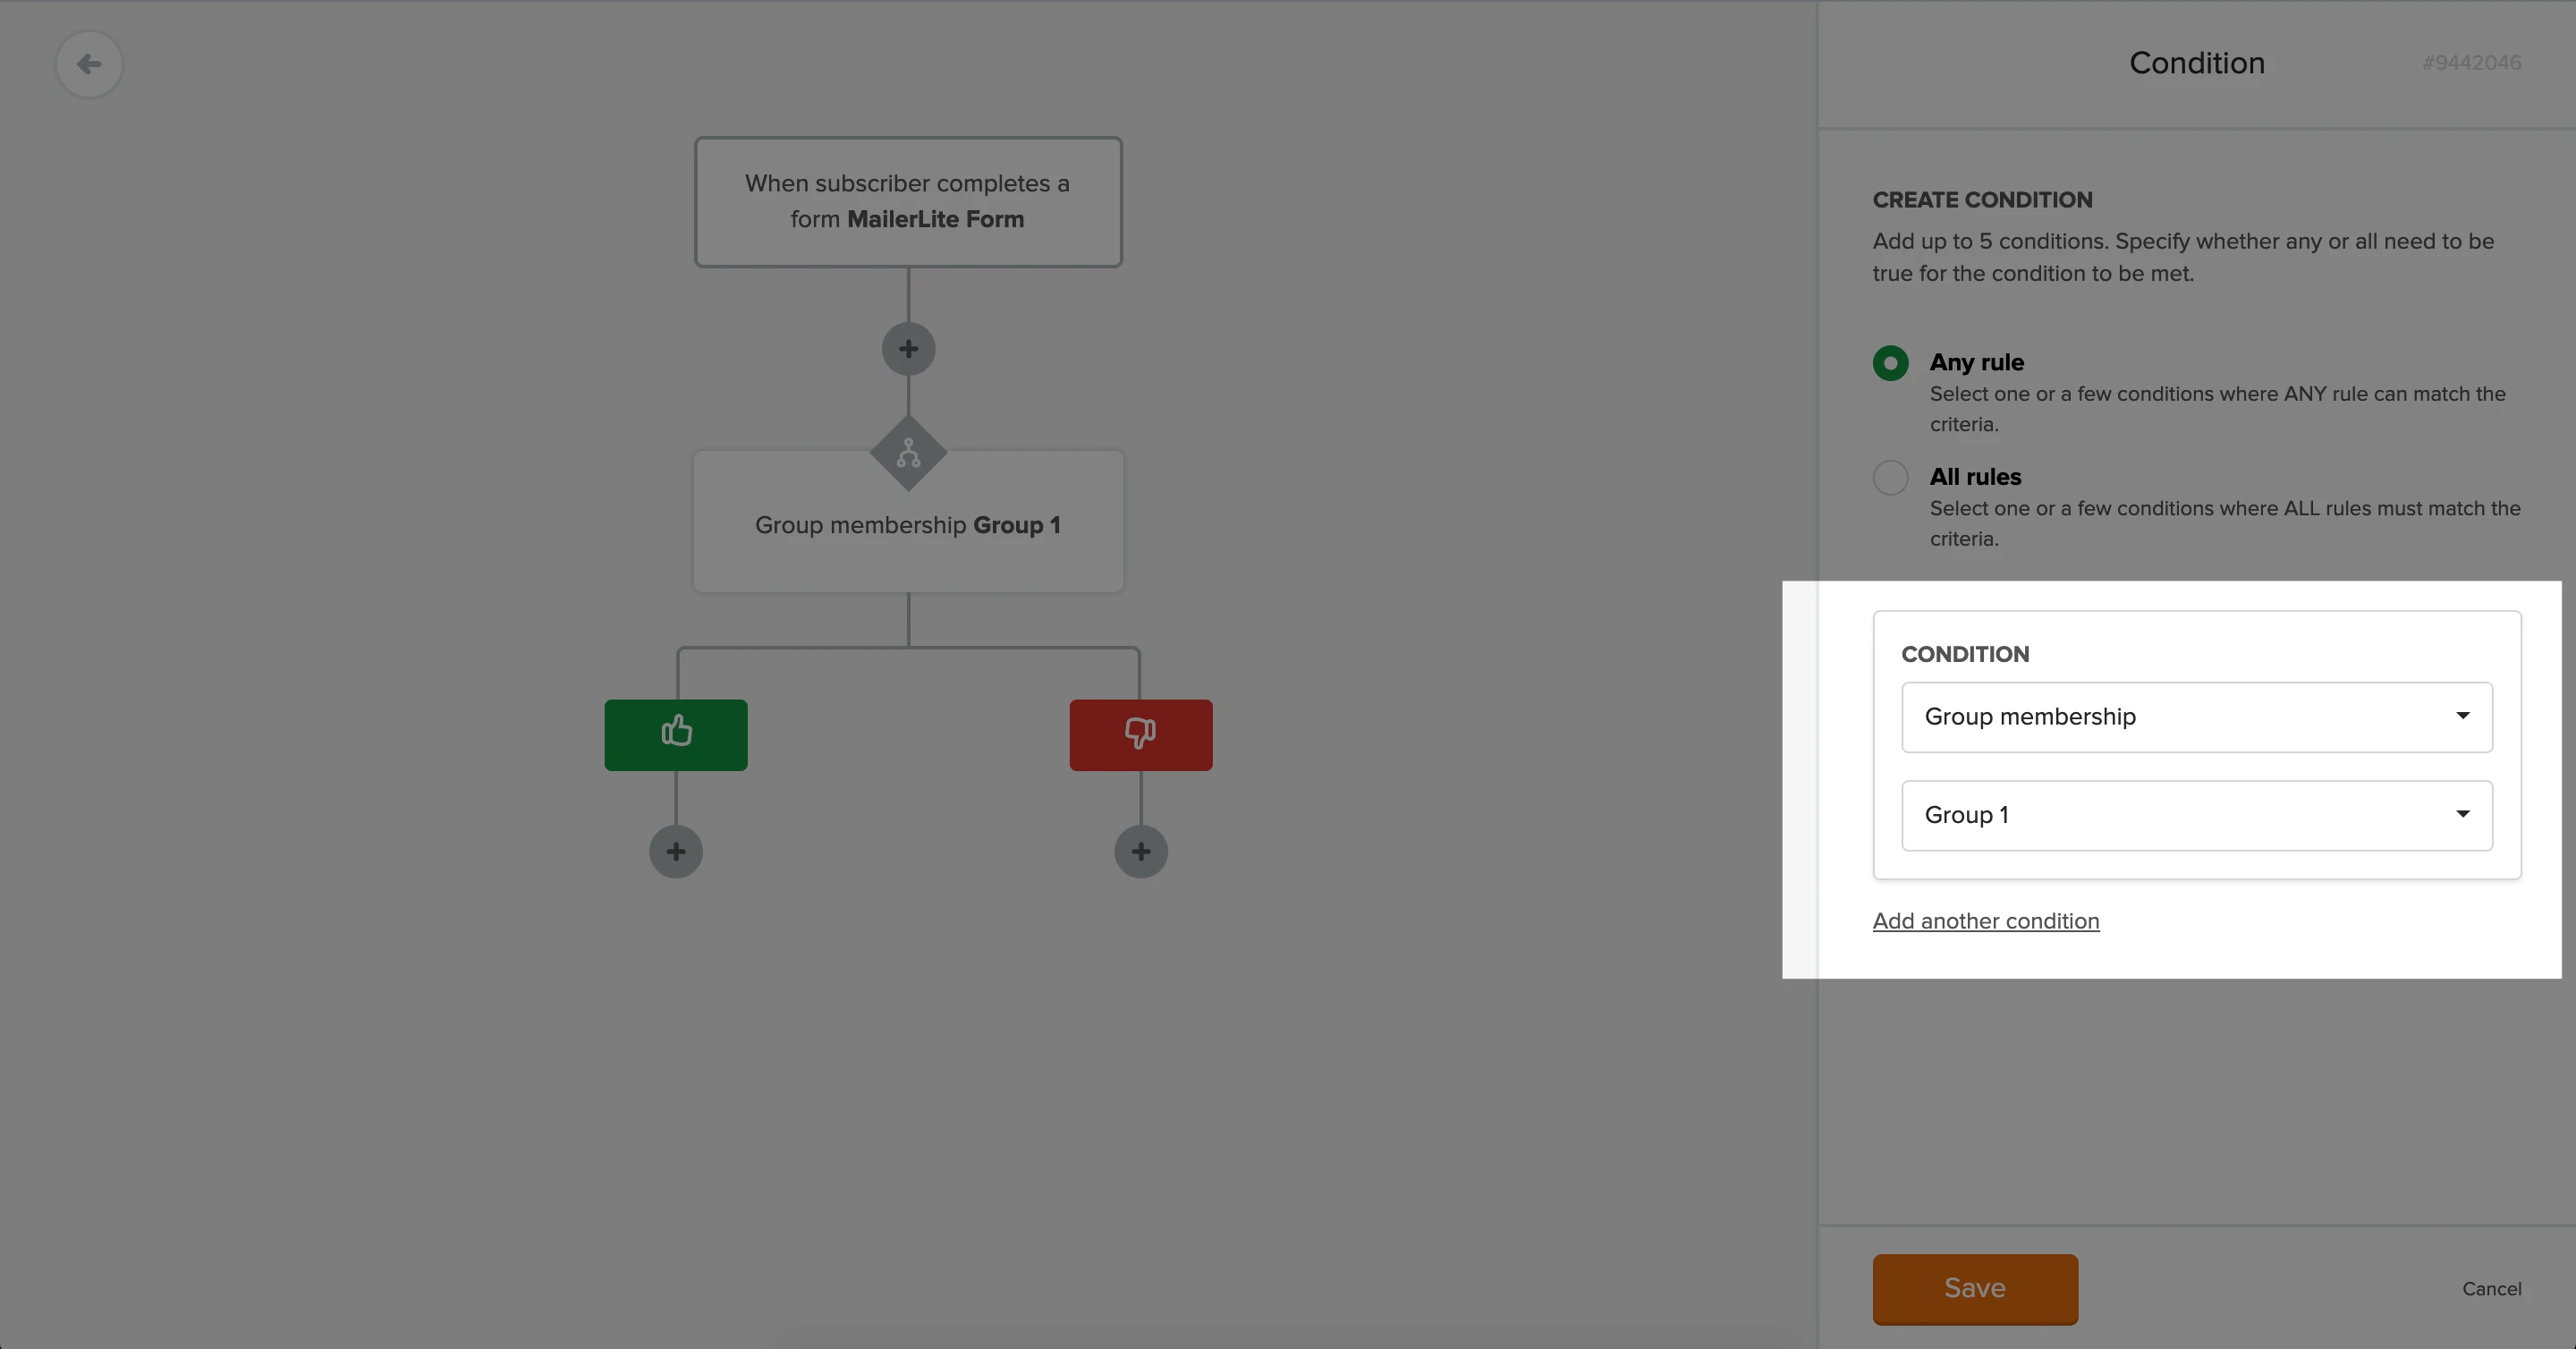
Create your conditions (rules).
You can set up to five conditions (rules) within a Condition step. If you select Any rule, then a subscriber only needs to adhere to at least one of those rules in order to successfully meet the requirements of this step.
If you select All rules, then subscribers must adhere to every rule you set in order to successfully meet the requirements of the Condition step.

When creating your conditions, you can choose from the following options:
Campaign activity -Create rules based on engagement with your campaigns; for example, if a campaign was opened, clicked or not clicked, etc.
Workflow activity - Create rules based on engagement with the emails in the current workflow.
Custom fields - Create rules based on the value of any subscriber fields; for example, if you want to follow up with an email specific to US-based subscribers, you can create a condition that requires the subscribers country field to equal “United States”. When using custom fields as a condition, you can choose from the following rules:
Contains - The value must be present somewhere within the field
Does not contain - The value must NOT be present within the field
Is Equal - The value must be an exact match to the field value. (Labeled as Is on for dates)
Is not equal - The value does not directly match what is in the field
Is one of - Allows you to add more than a single value separated by a comma. To pass, one of the values must be present in the field
Is not one of - Allows you to add more than a single value separated by a comma. To pass, one of the values must NOT be present in the field
Is not set - the field is empty
Is set - the field contains any value
Group membership - Create rules based on whether or not subscribers are a member of a specific group.
Segment membership - Create rules based on whether or not subscribers are a member of a specific segment.
When you use a date or number field as your condition, you’ll also have additional options:
Date comparisons
Is on or before – The date is on or before the value you set.
Is on or after – The date is on or after the value you set.
Is not on – The date is anything except the value you set.
Is not set – No date has been provided.
Is in last interval – The date falls within a recent time period (e.g., last 7 days).
Is after interval – The date is after a specific number of days from the current date.
Numeric comparisons
Is less than – The number is smaller than the value you set.
Is less than or equal – The number is smaller than or exactly equal to the value you set.
Is greater than – The number is bigger than the value you set.
Is greater than or equal – The number is bigger than or exactly equal to the value you set.

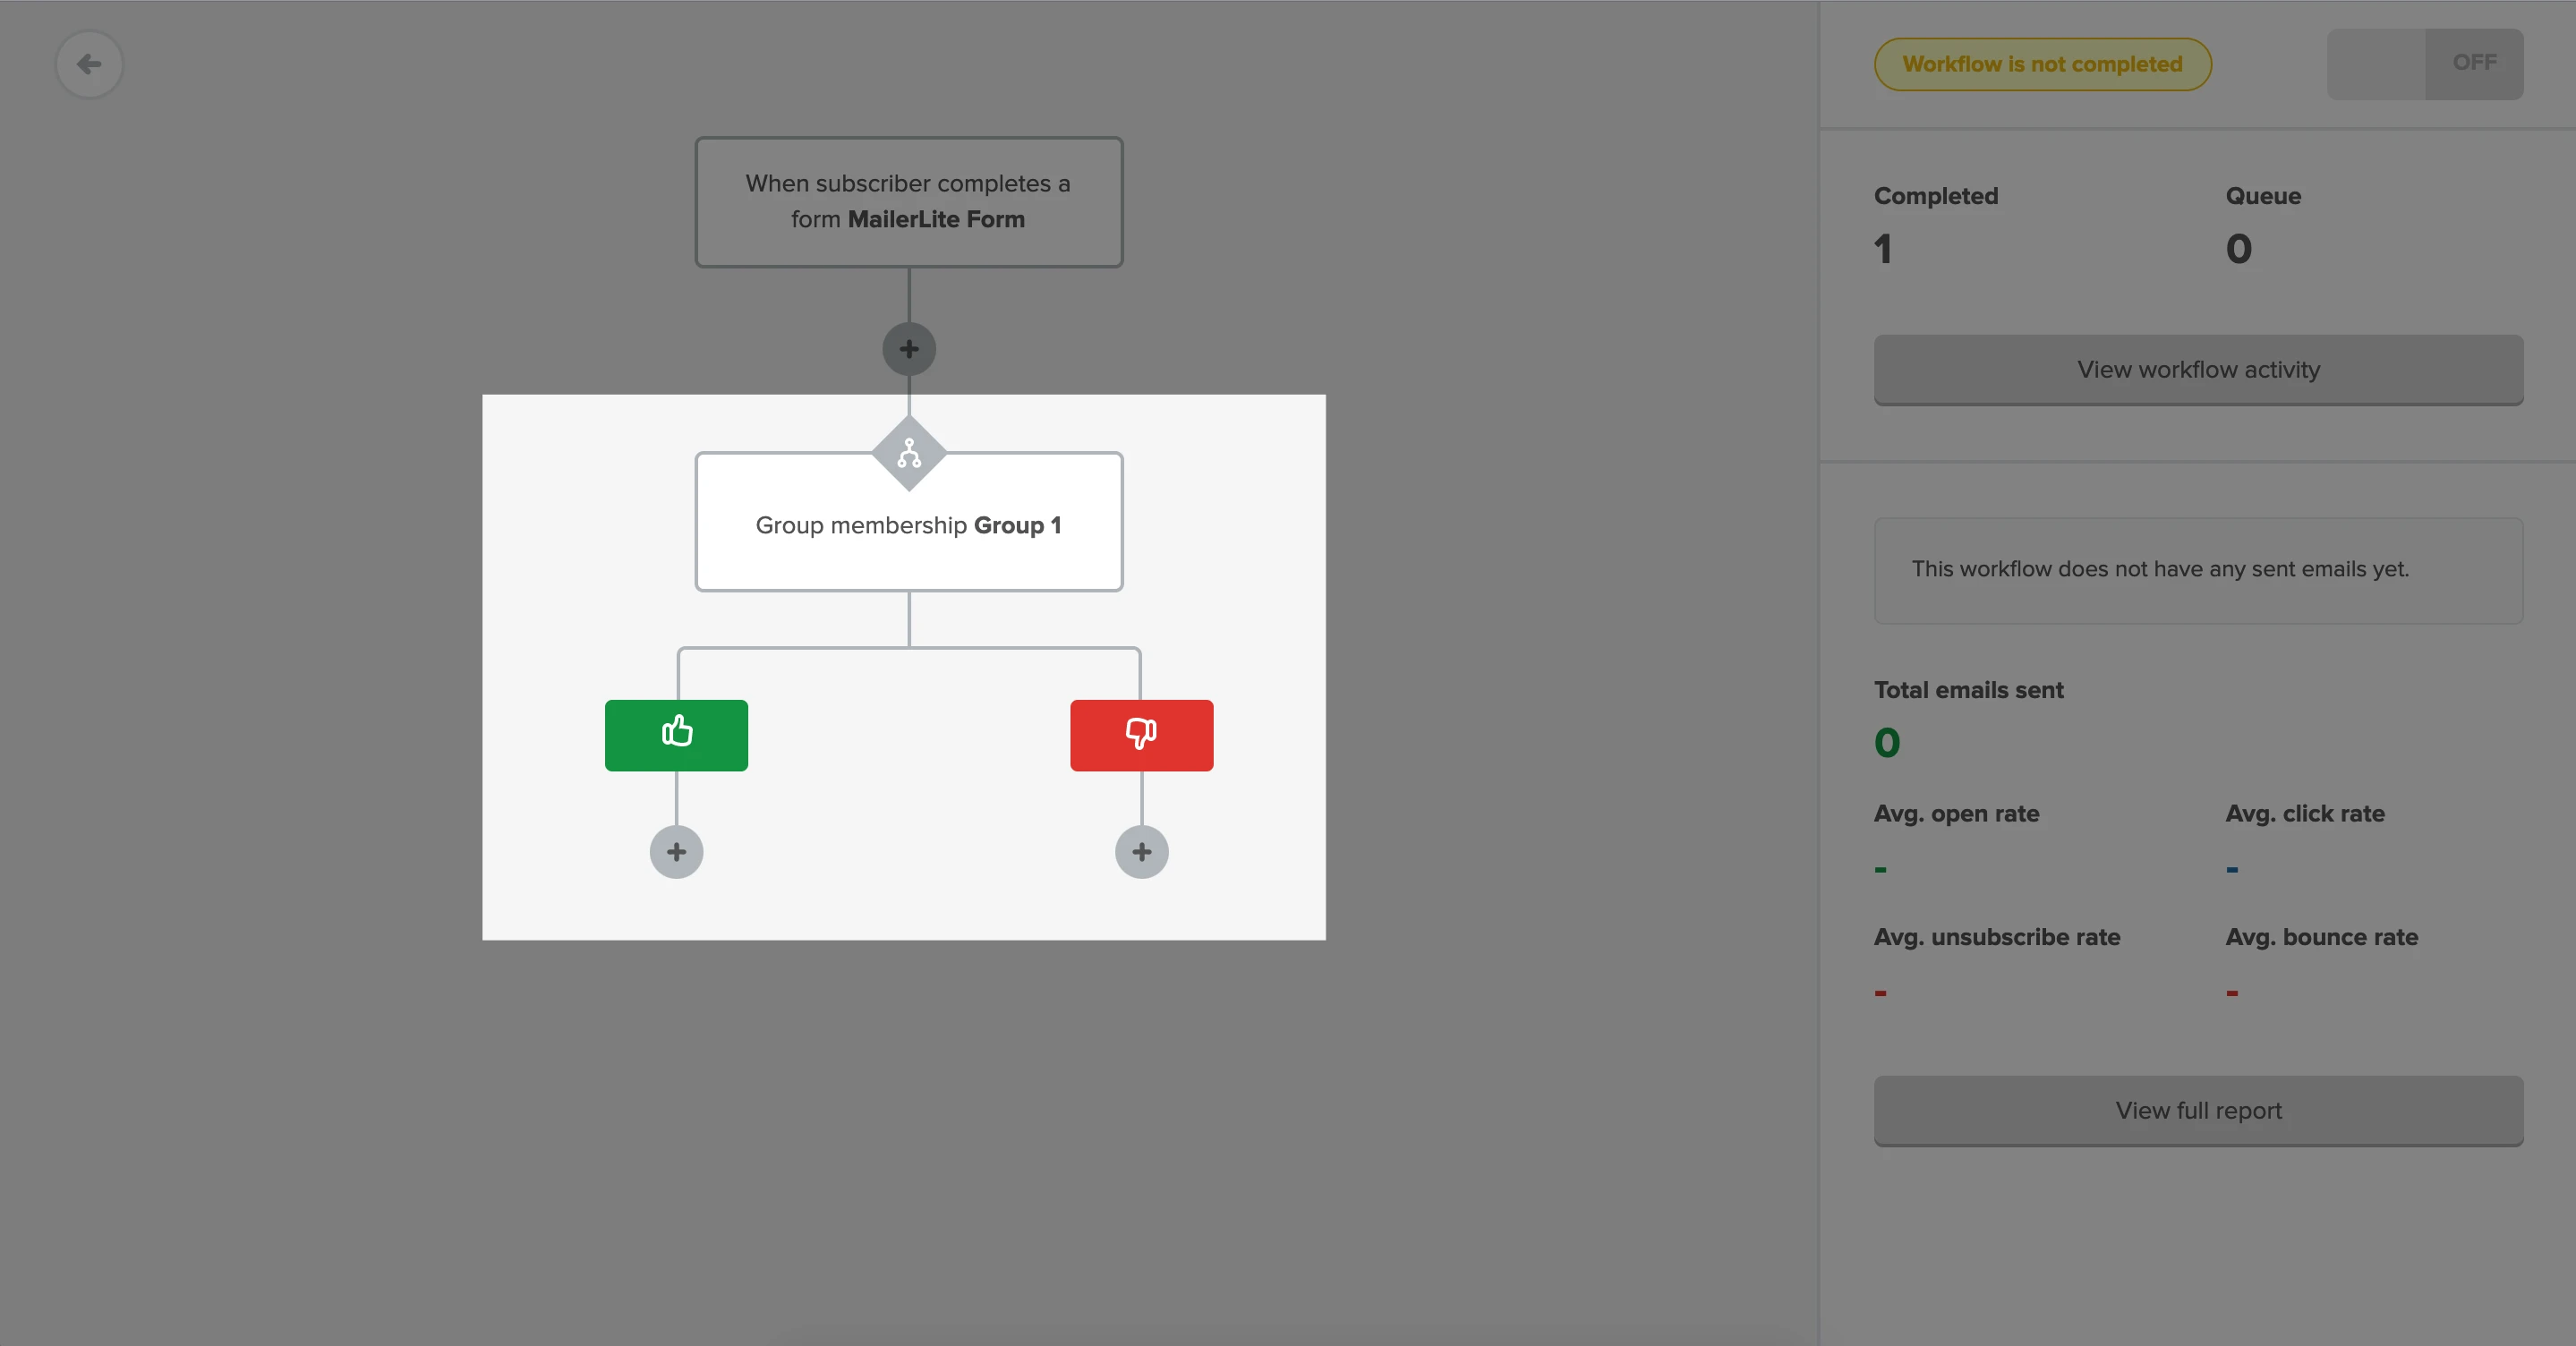
If the condition is true for subscribers, they will continue down the thumbs-up branch. If the condition is false for subscribers, they will continue down the thumbs-down branch. Each branch will have its own plus (+) icon that you can click to add more steps.
Note: Conditions are checked immediately. That means if your Condition step is based on the Email step before it, you will need to add a Delay step before the condition to give subscribers enough time to meet the condition requirements.
A/B split testing step
The A/B split testing step allows Growing business and Advanced plan users to split-test certain elements of their workflows. With A/B testing for automation, you can test up to 3 versions of Delay and Email steps.
To add a split test to your automation workflow:
1. Open your automation in the workflow editor.
2. Click the + icon and select A/B split testing.
3. In the sidebar, give your split test a name and use the slider to select the percentage of which you’d like to distribute traffic.

There is no limit to the number of A/B tests you can add to a single workflow. However, we do highly recommend naming each split test so that it’s easy to differentiate each one in your automation overview.
4. If required, add a third variable by clicking + Add path C.
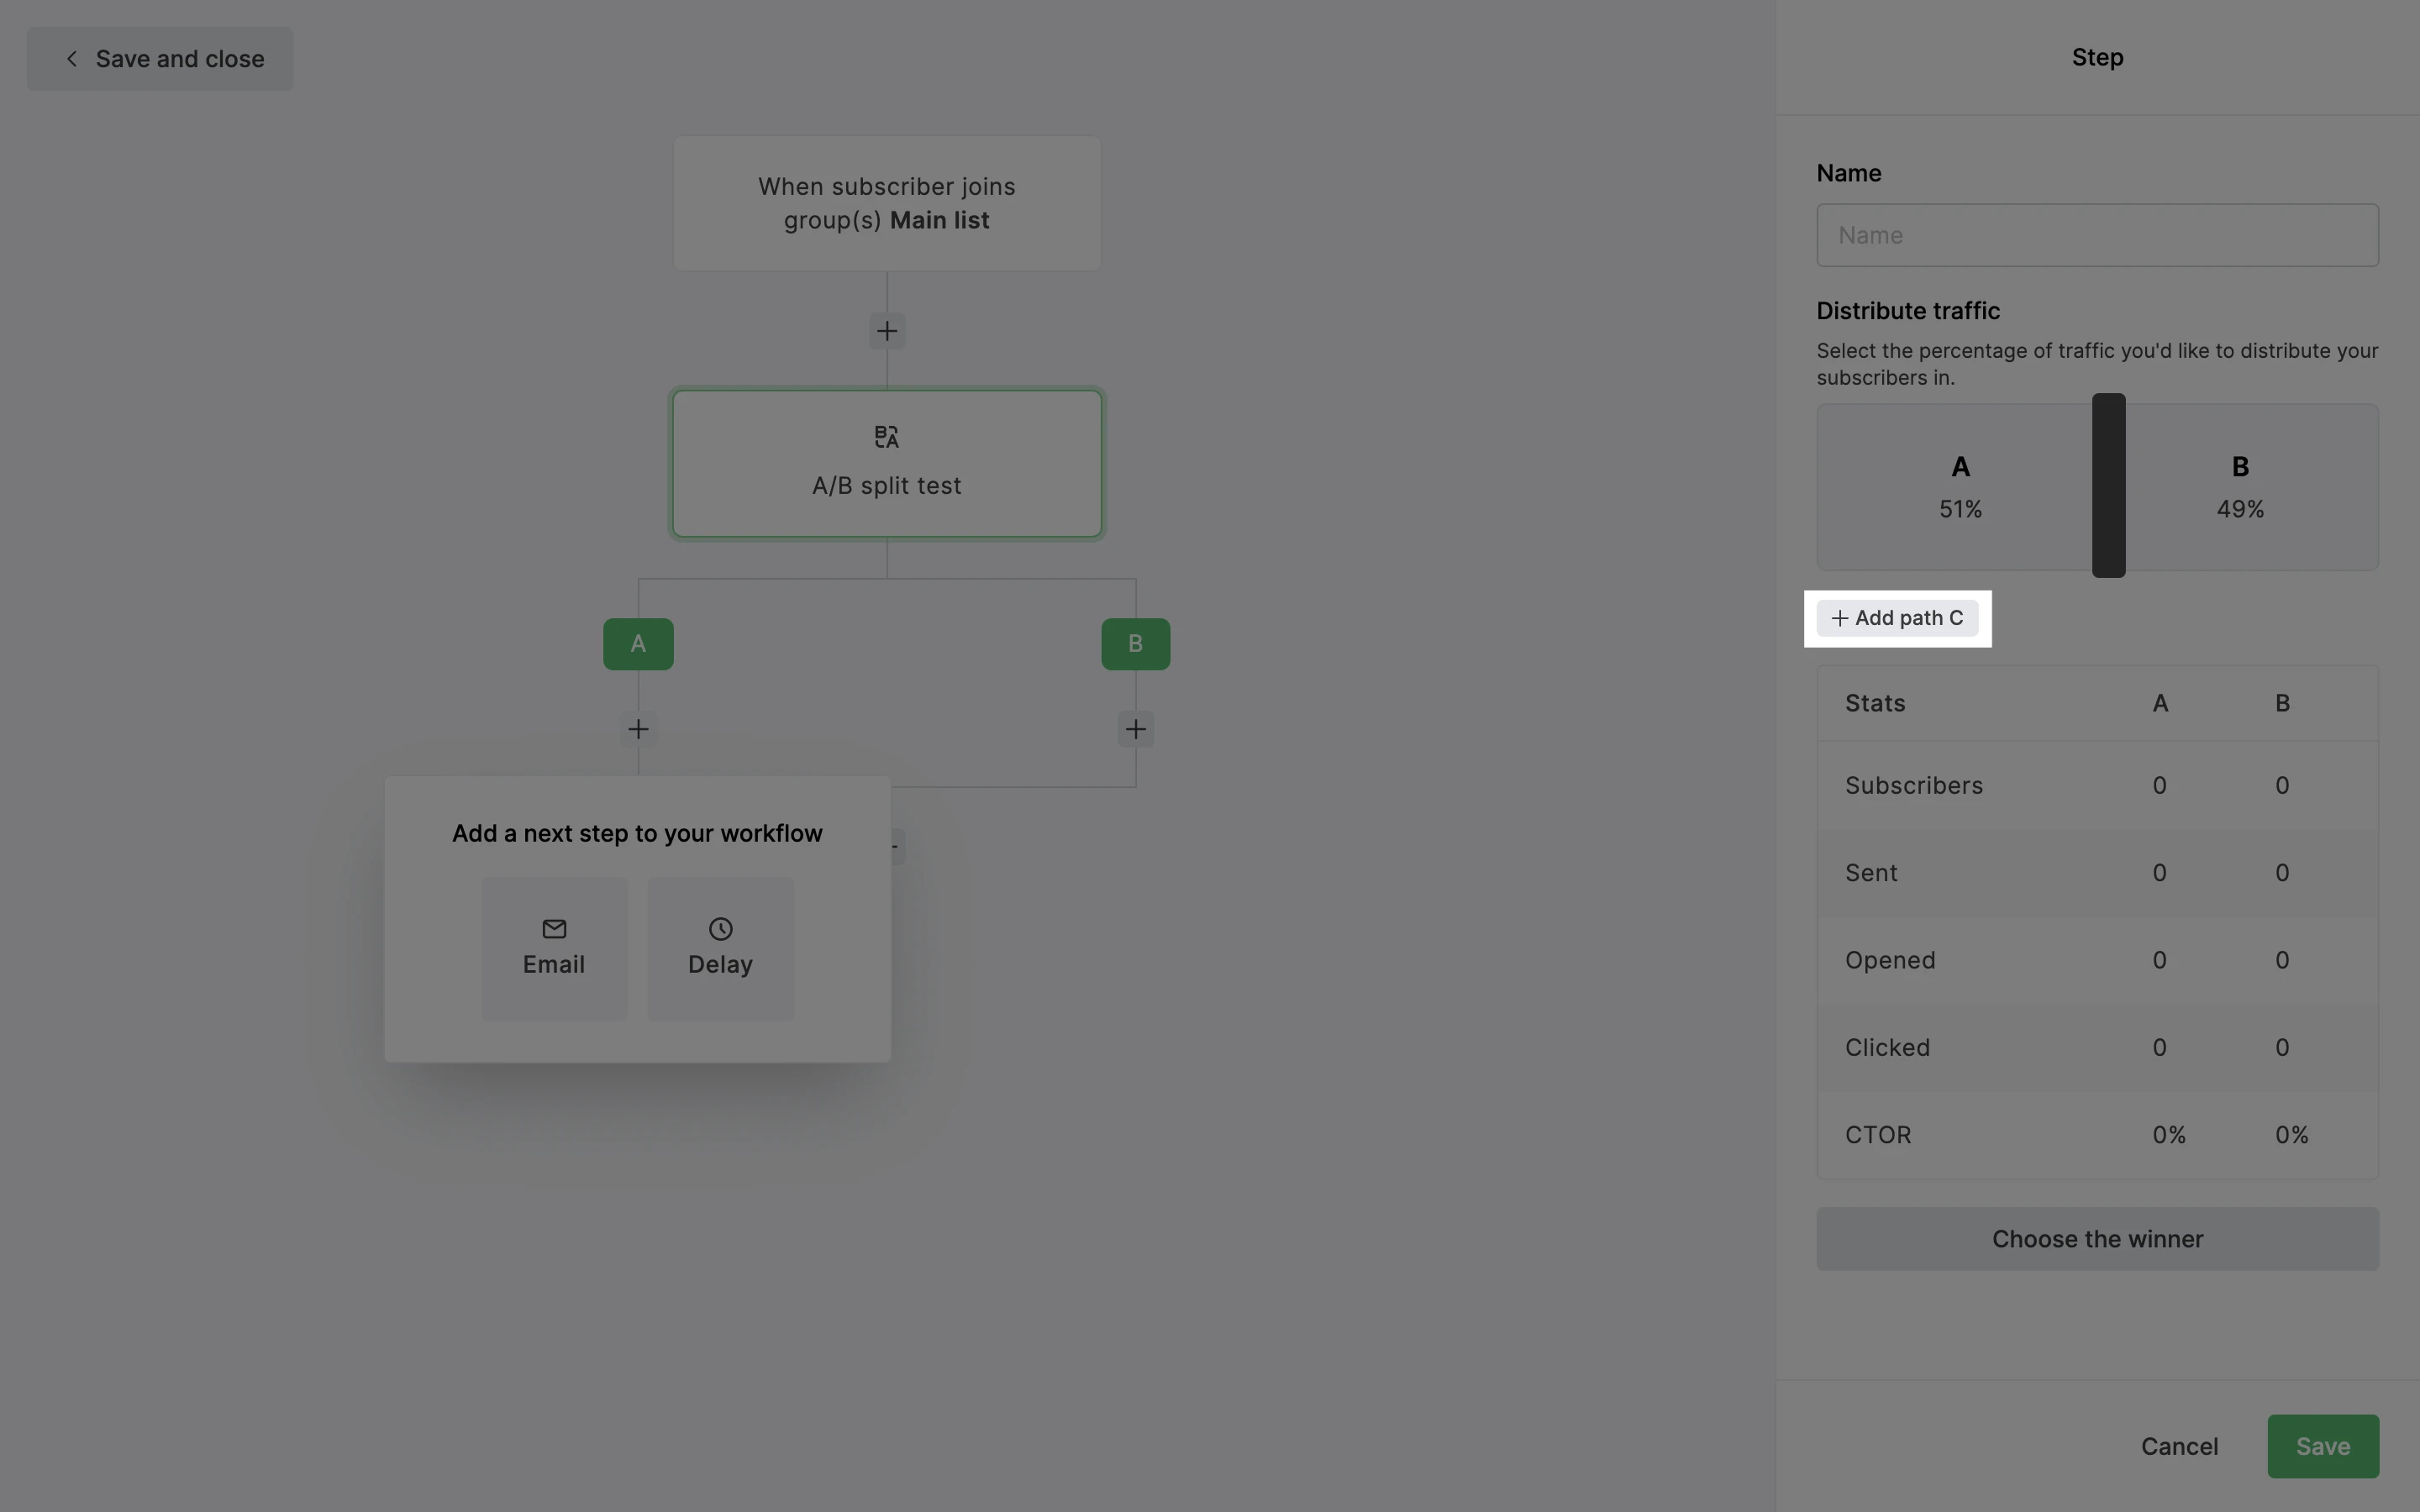
5. Click each + icon to add your variables. You can choose to test Delay steps, Email steps, or a combination of both.
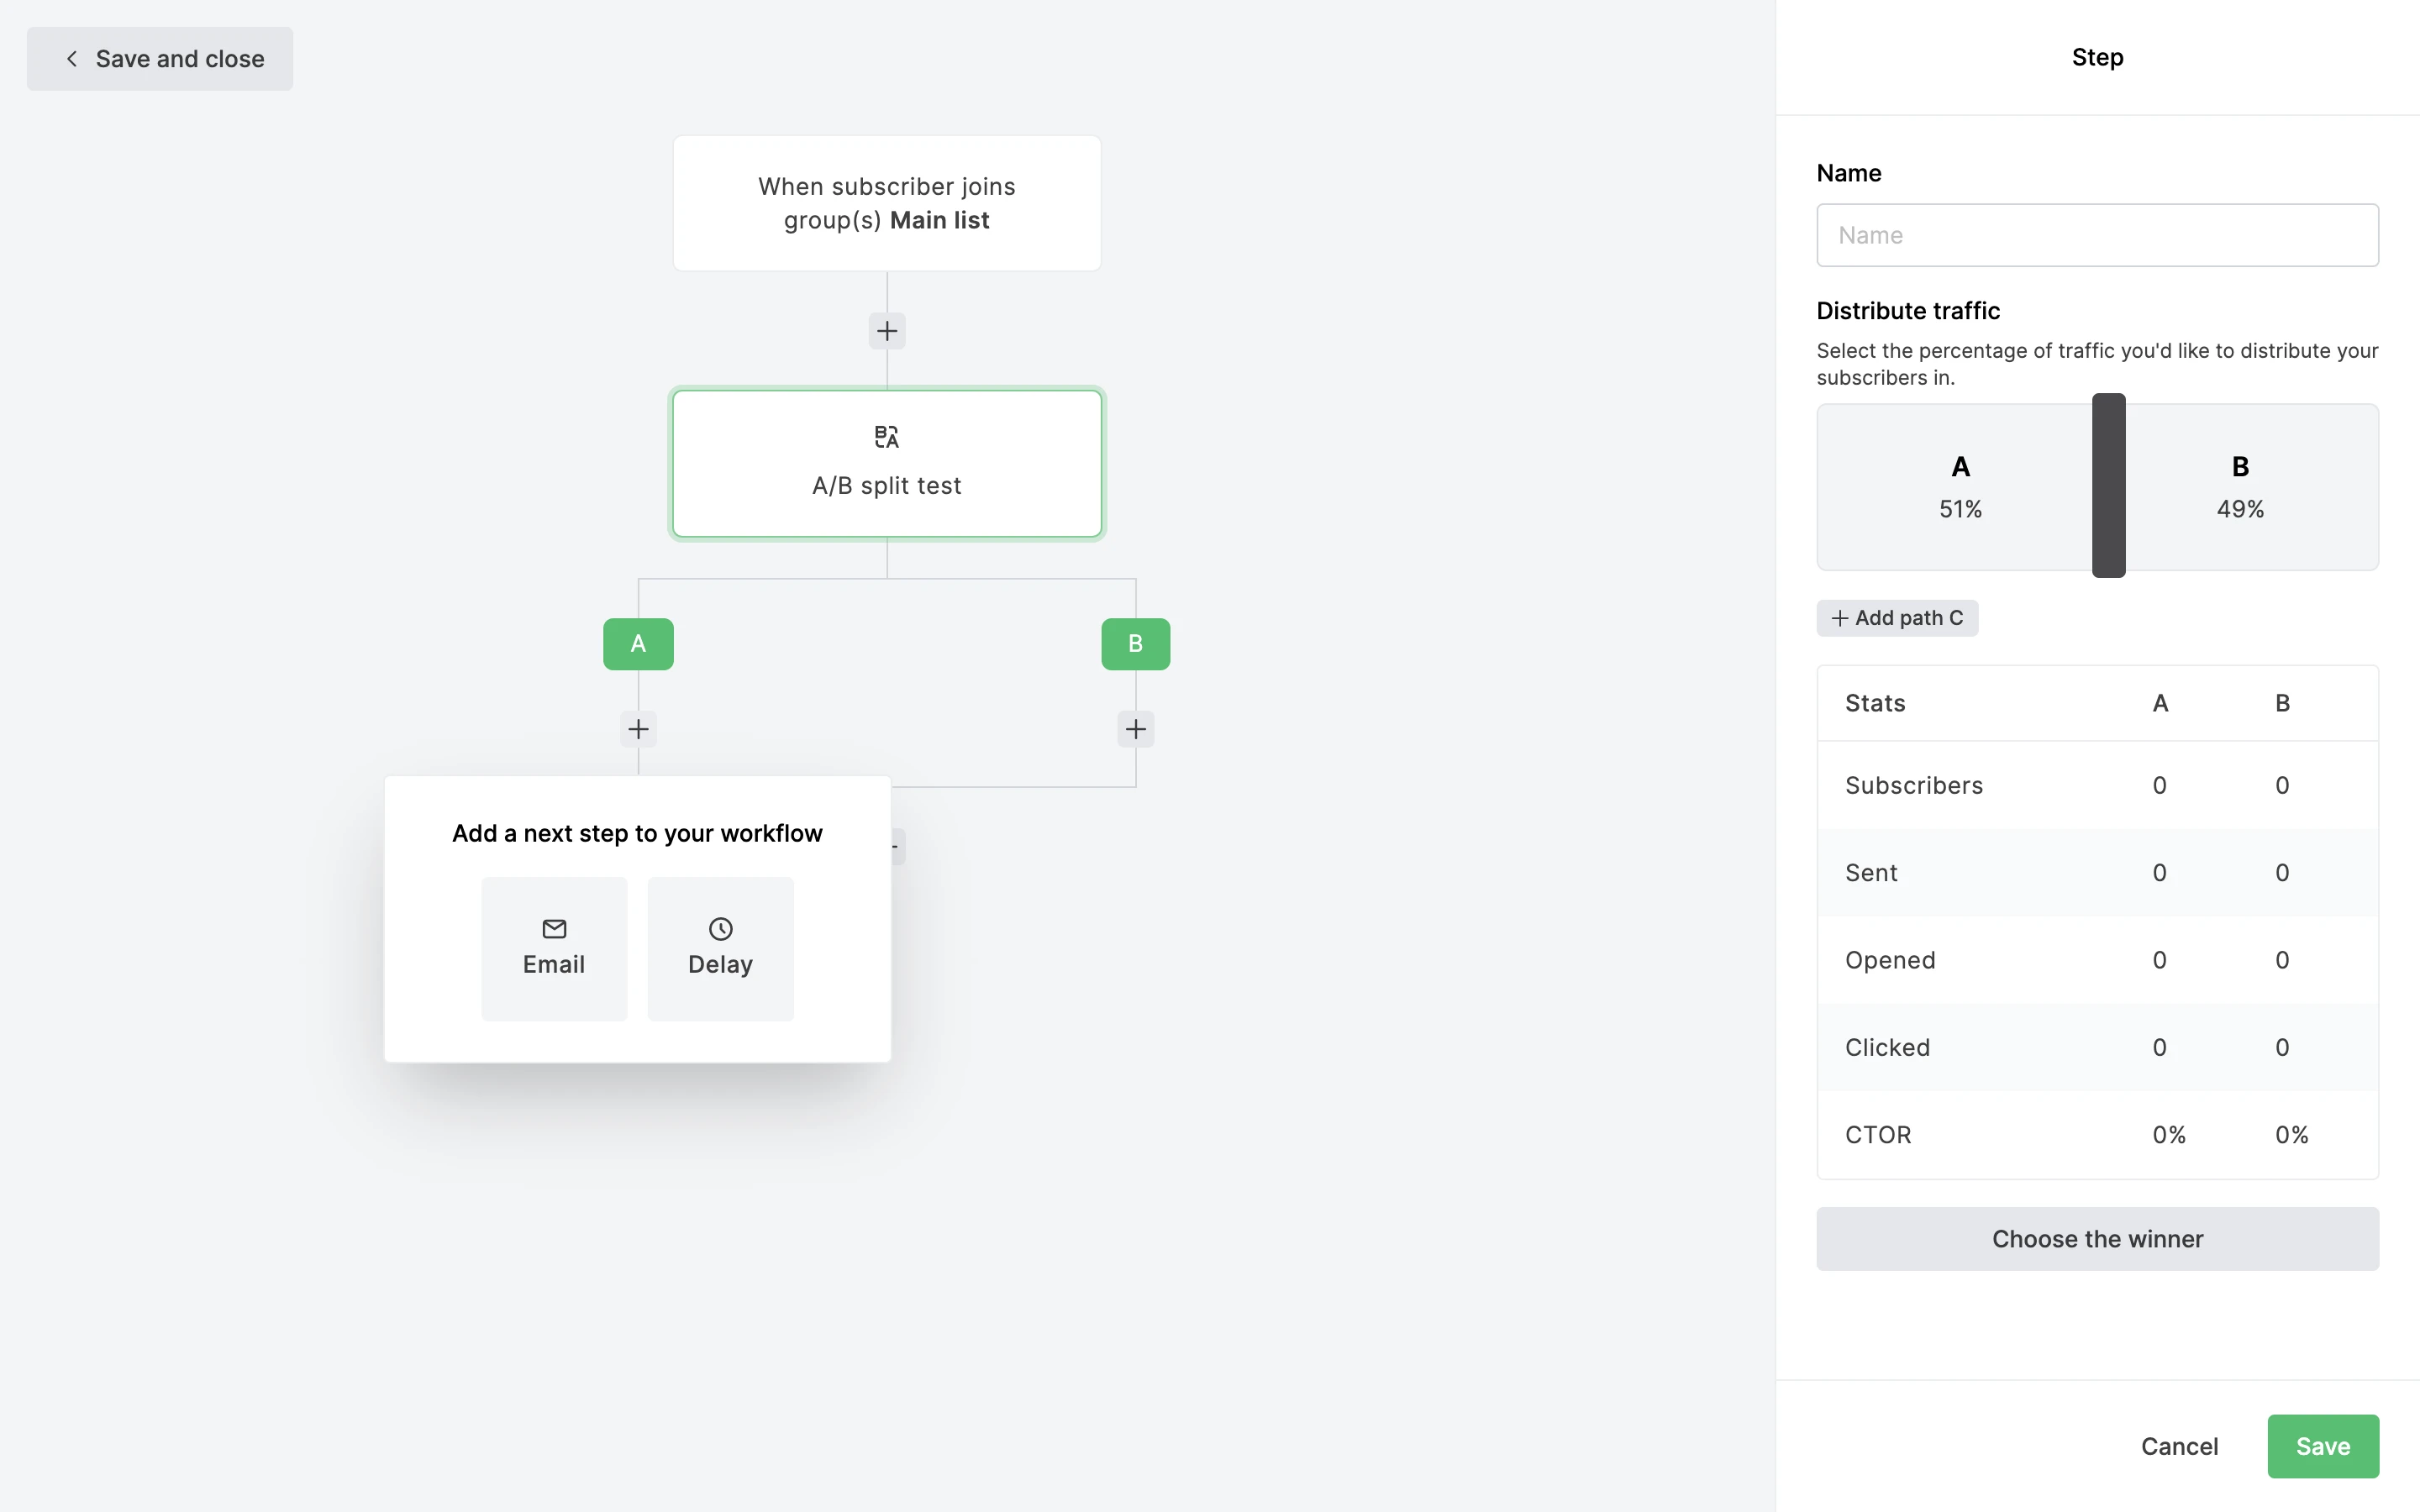
6. Once you’re happy with your split test, click the single + icon to continue building your workflow.
Learn more about the A/B split testing step in this article on how to use A/B split testing for automations.
Actions
Actions define what happens to subscribers as they move through the workflow. These steps are initiated immediately when a subscriber reaches that step.

Send email: Deliver an automated email to subscribers at this point in the workflow.
Webhook: Send subscriber data to an external app or service.
Send internal notification: Notify yourself or your team by email when subscribers reach this step.
Move to step: Redirect subscribers to another step within the same workflow.
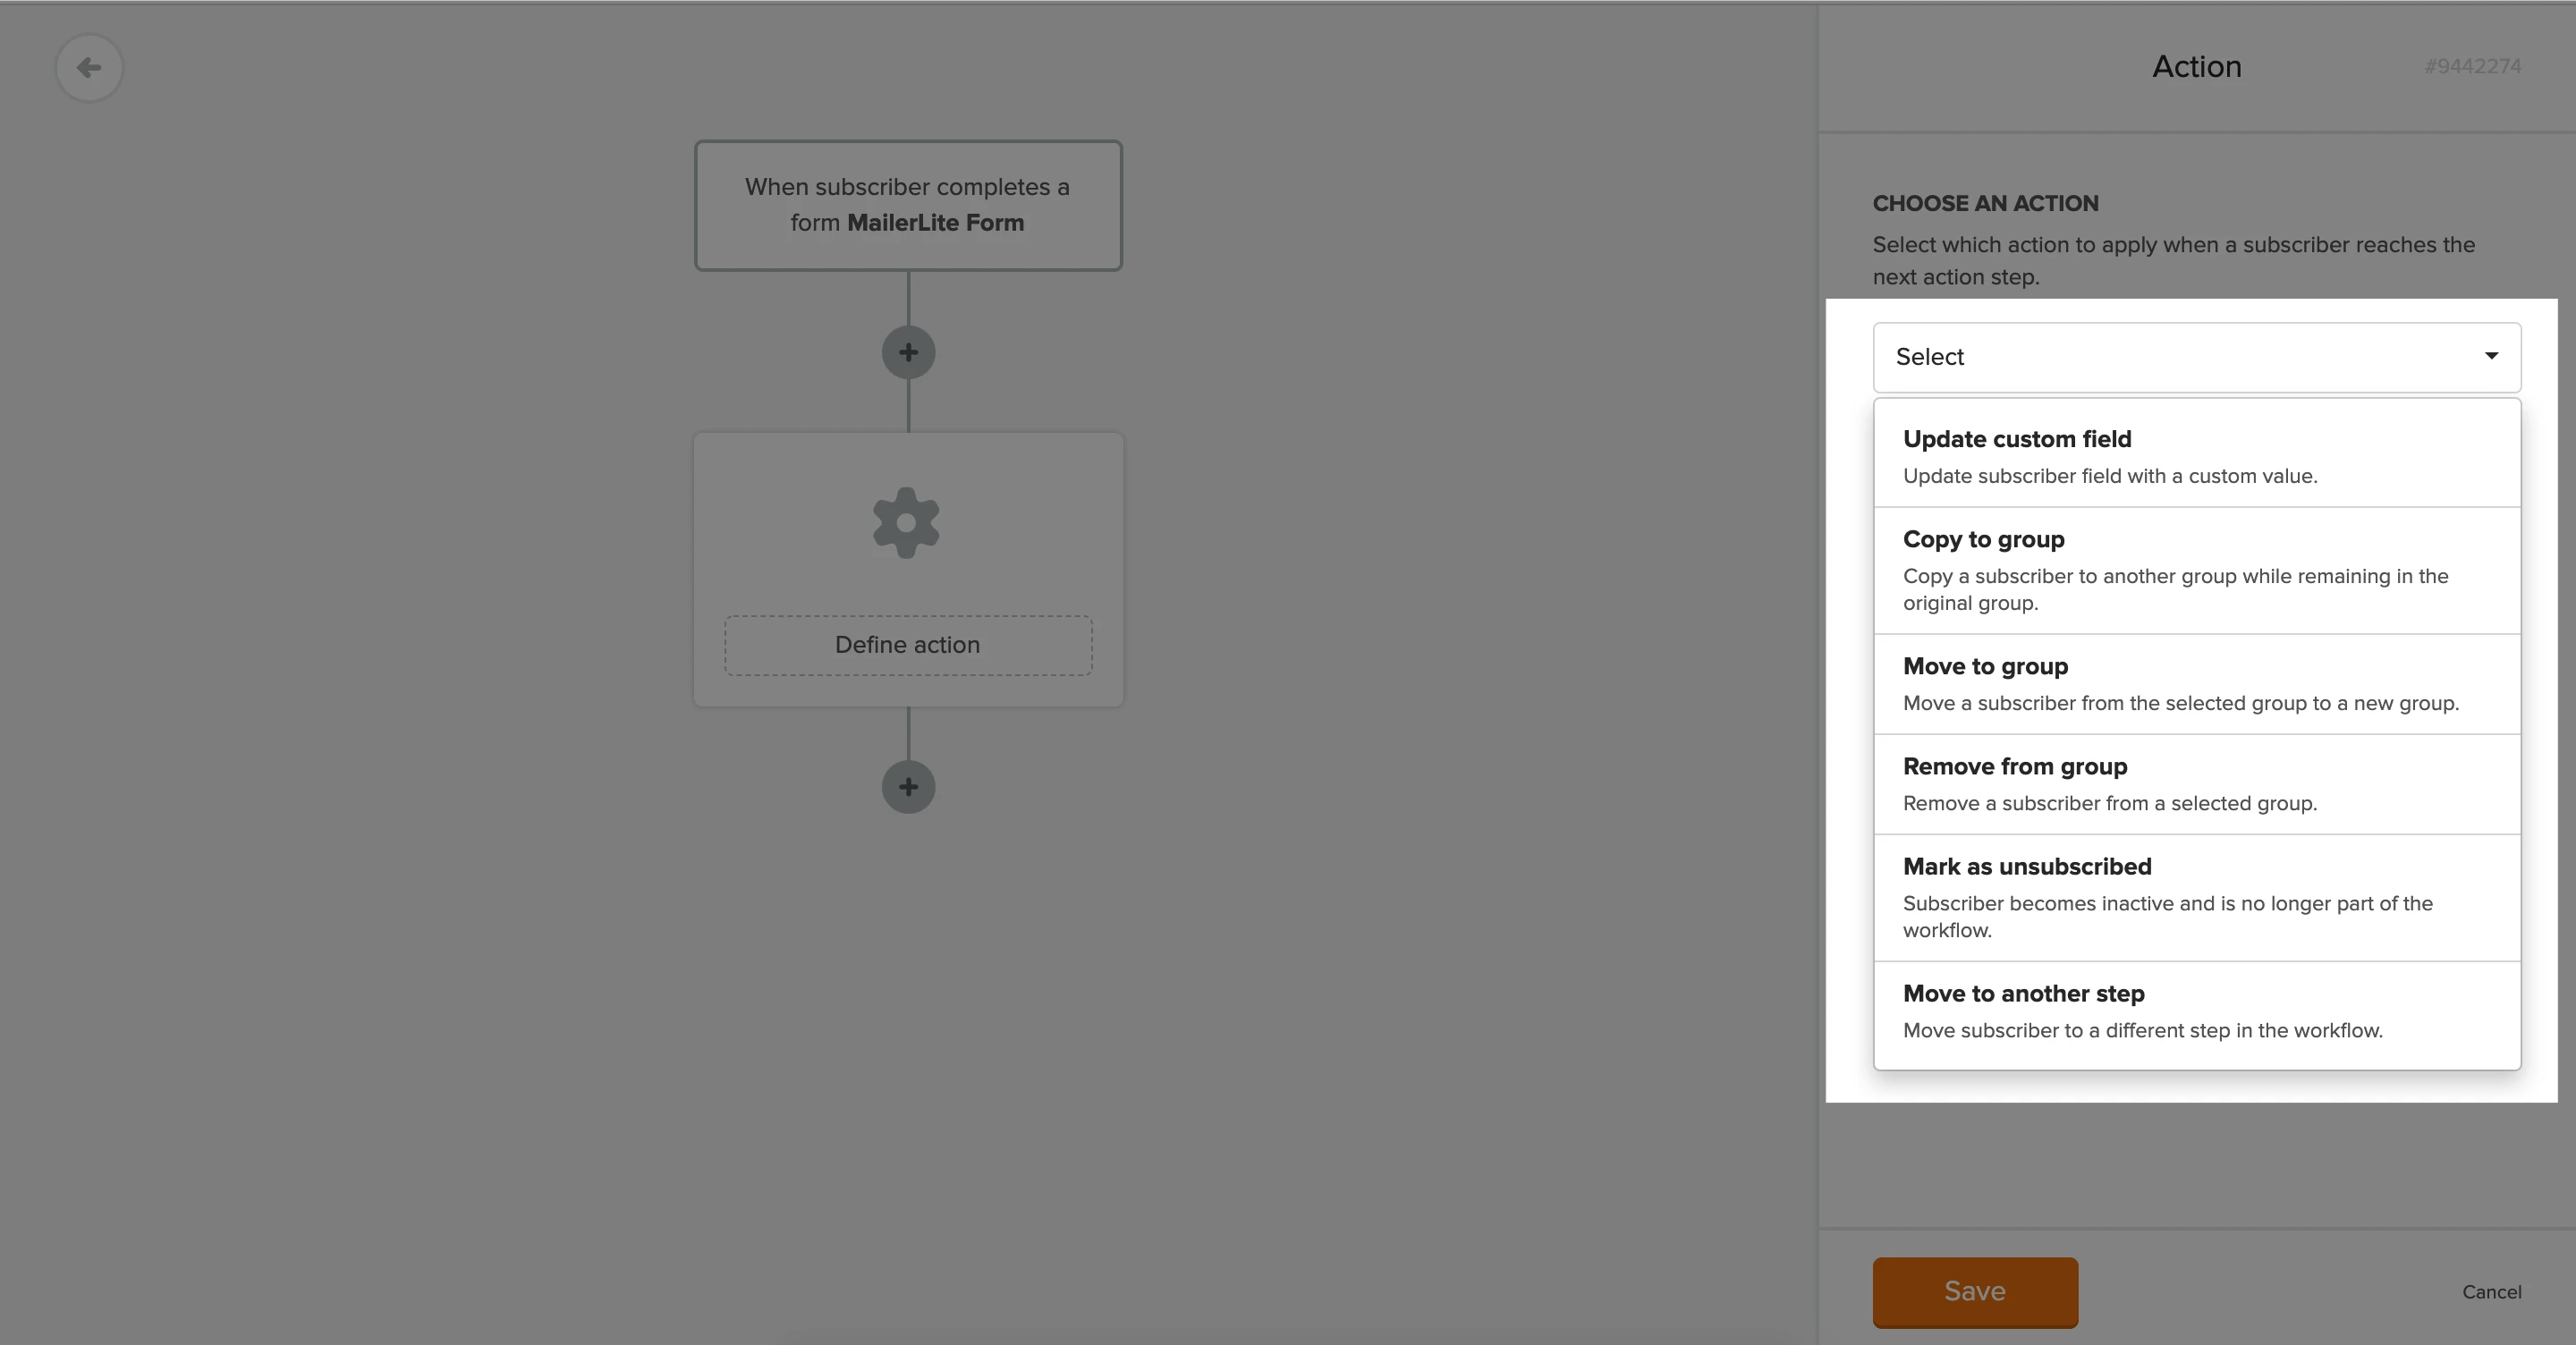
Update custom field: Change the value of a subscriber’s custom field.
Copy to groups: Add subscribers to one or more groups while keeping them in their current group(s).
Move to groups: Add subscribers to new groups and remove them from their current group(s).
Remove from groups: Take subscribers out of one or more groups.
Unsubscribe: Remove subscribers from your list so they no longer receive emails.
To set up an Action step, simply drag type of action you want to perform and drop it into an available space in the automation.
Send email action
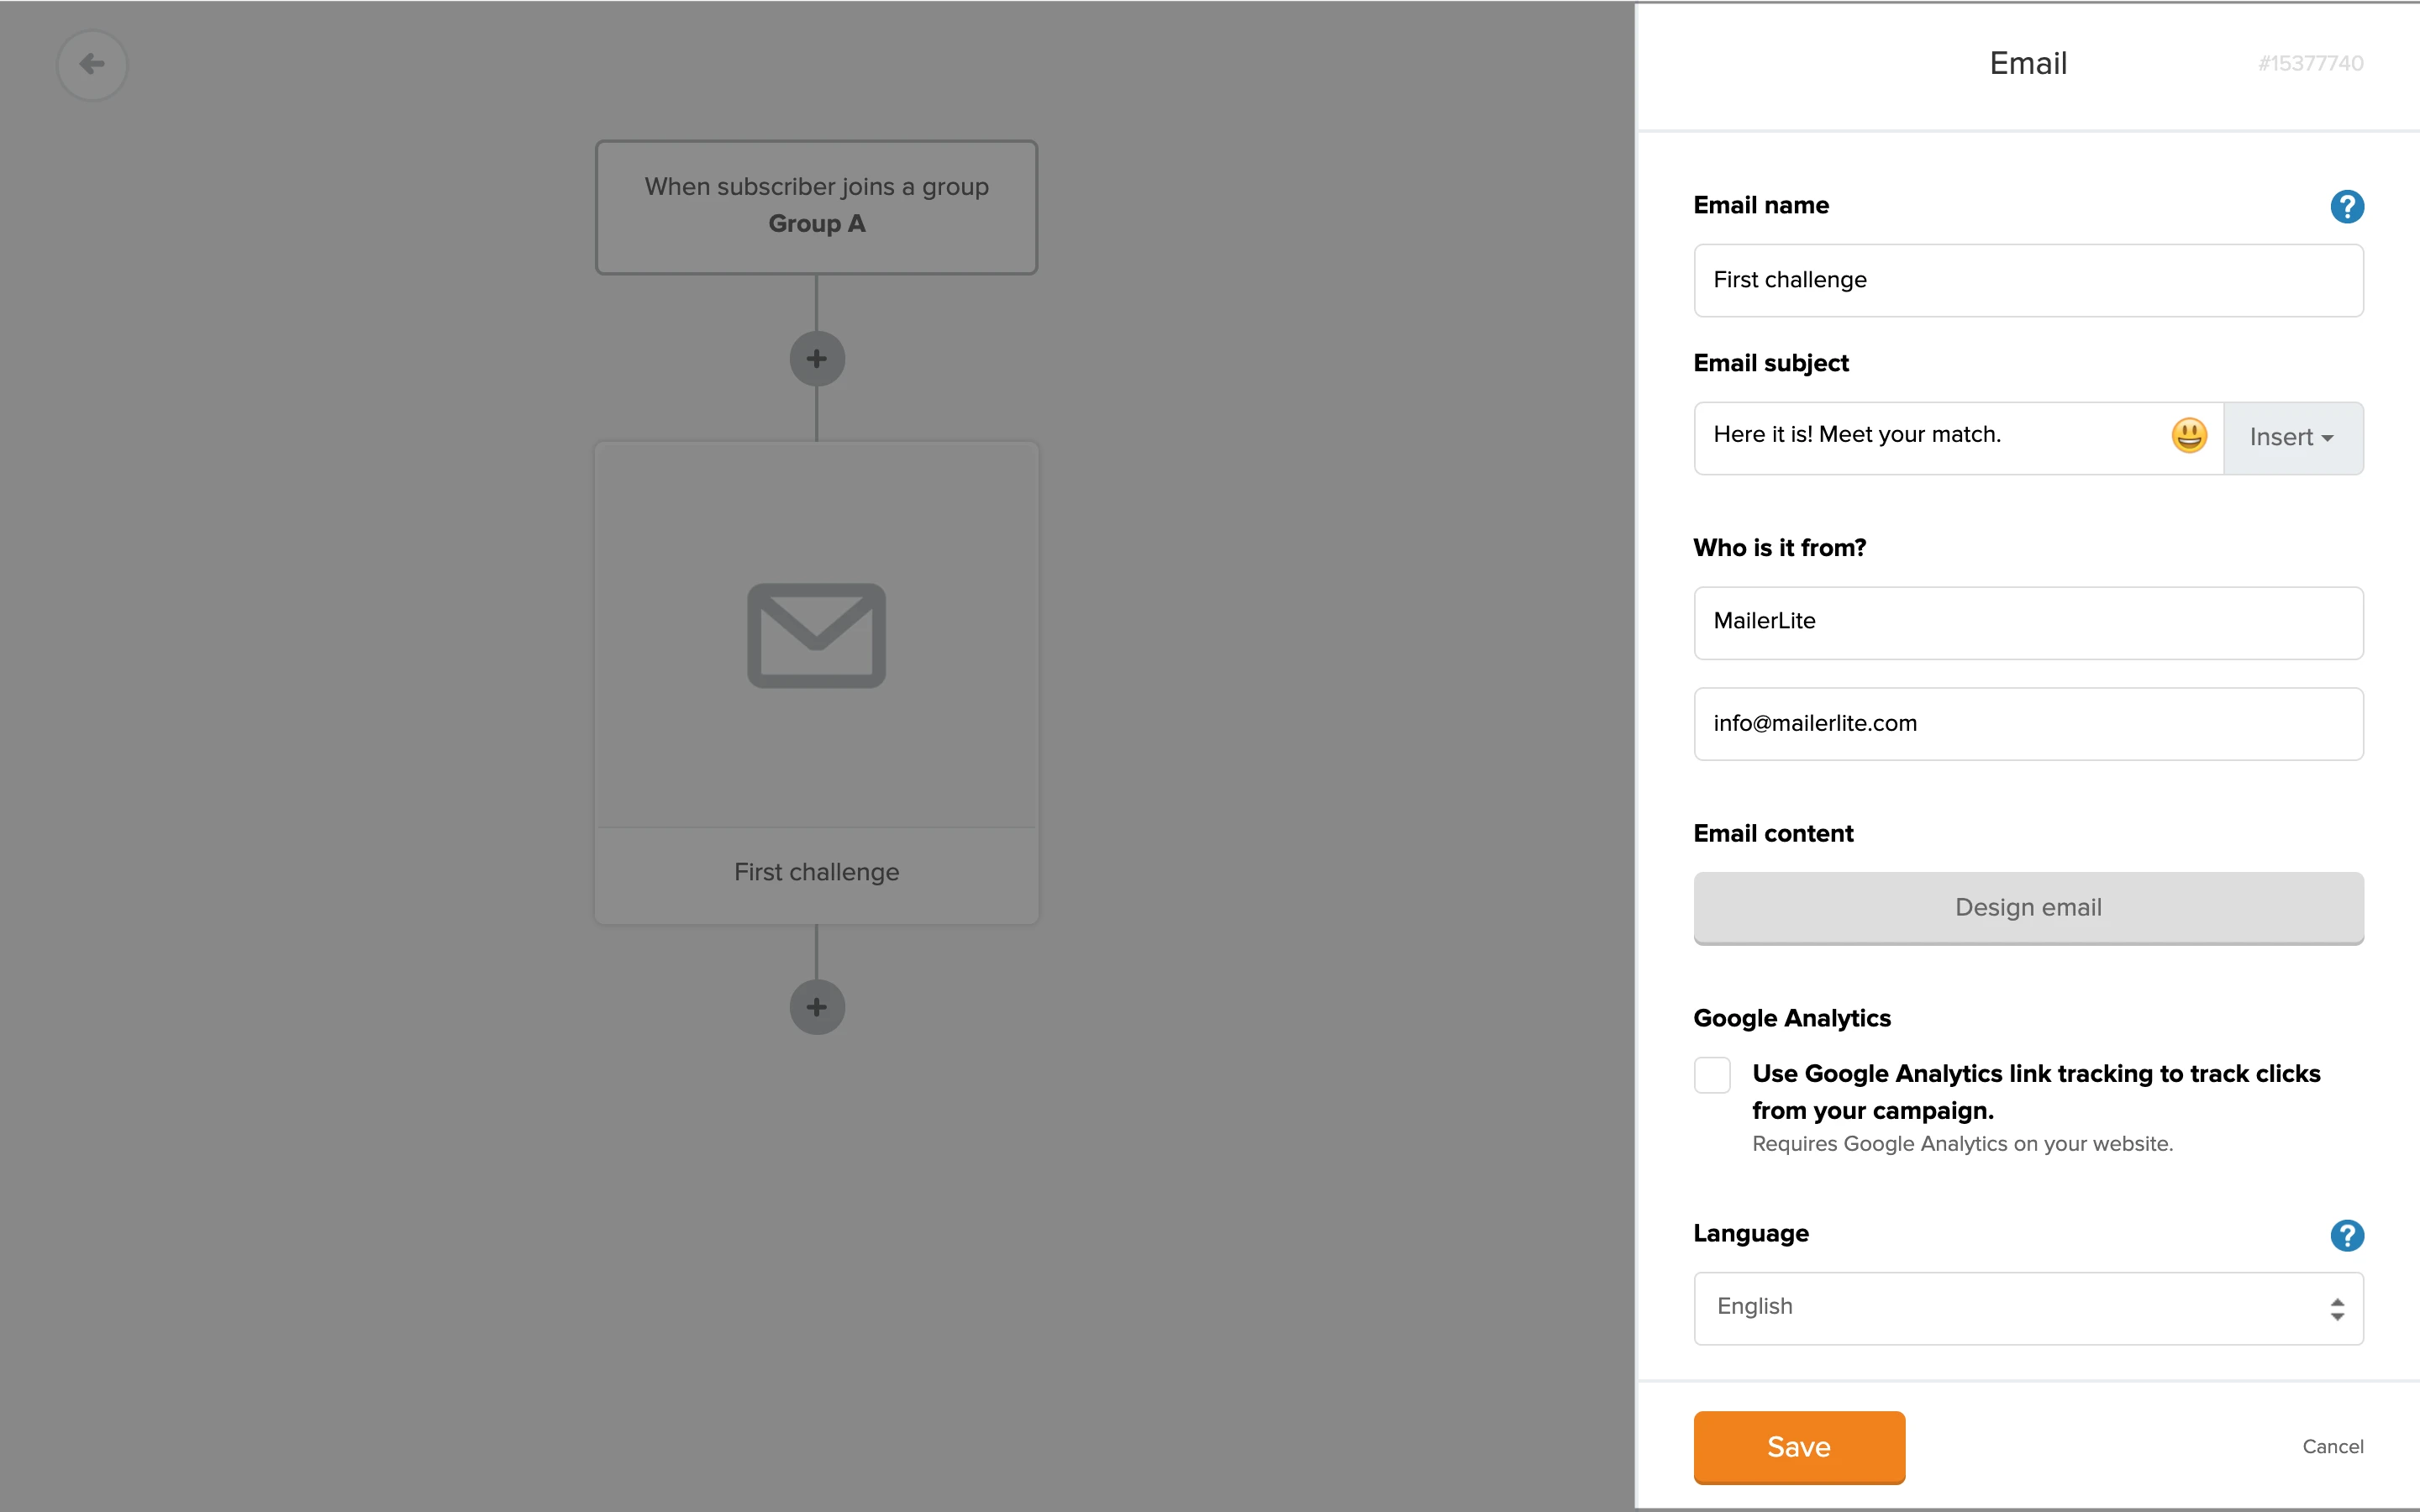
The Send email action allows you to add an email to your workflow that will be sent out automatically when subscribers reach that step. This could be a welcome email, freebie email, or even an automated birthday email, for example.
To set up an Email:
From the left side panel, drag and drop the Send email action to your workflow.
In the right sidebar, enter the email subject and the sender information. You can also enable Google Analytics and select the language of your email.

3. Click Design email and select a campaign editor to create your email.
4. Once you have finished designing your email, click Done editing to return to your workflow editor.
Webhooks
To use webhooks in your MailerLite workflows:
Navigate to Automation.
Choose New automation.
In the automation editor, define your workflow trigger to begin creating.
Click the + sign to add another step, and choose Webhook.
In the right side-bar, enter the Webhook URL and the Secret Key.

The Secret Key can be found in the Webhook settings, in the Integrations page.
How to delete a step from an automation
Before you can make any changes to the steps, your workflow must be paused. Then you can hover over any step and click the trash icon in the right-hand corner of the step to delete it.
You can delete an Email, Action, or A/B split testing step without subscribers being removed from the workflow. Subscribers who were waiting in the queue to get the email or execute the action will be moved to the next step in the sequence once you delete that step. Learn more about deleting A/B split testing steps in this article.
When deleting an Email step, you will have two options:
Remove: The email will be removed from the automation, but it will be saved in your account and can be restored.
Permanently delete: The email and its data will be deleted and cannot be restored.

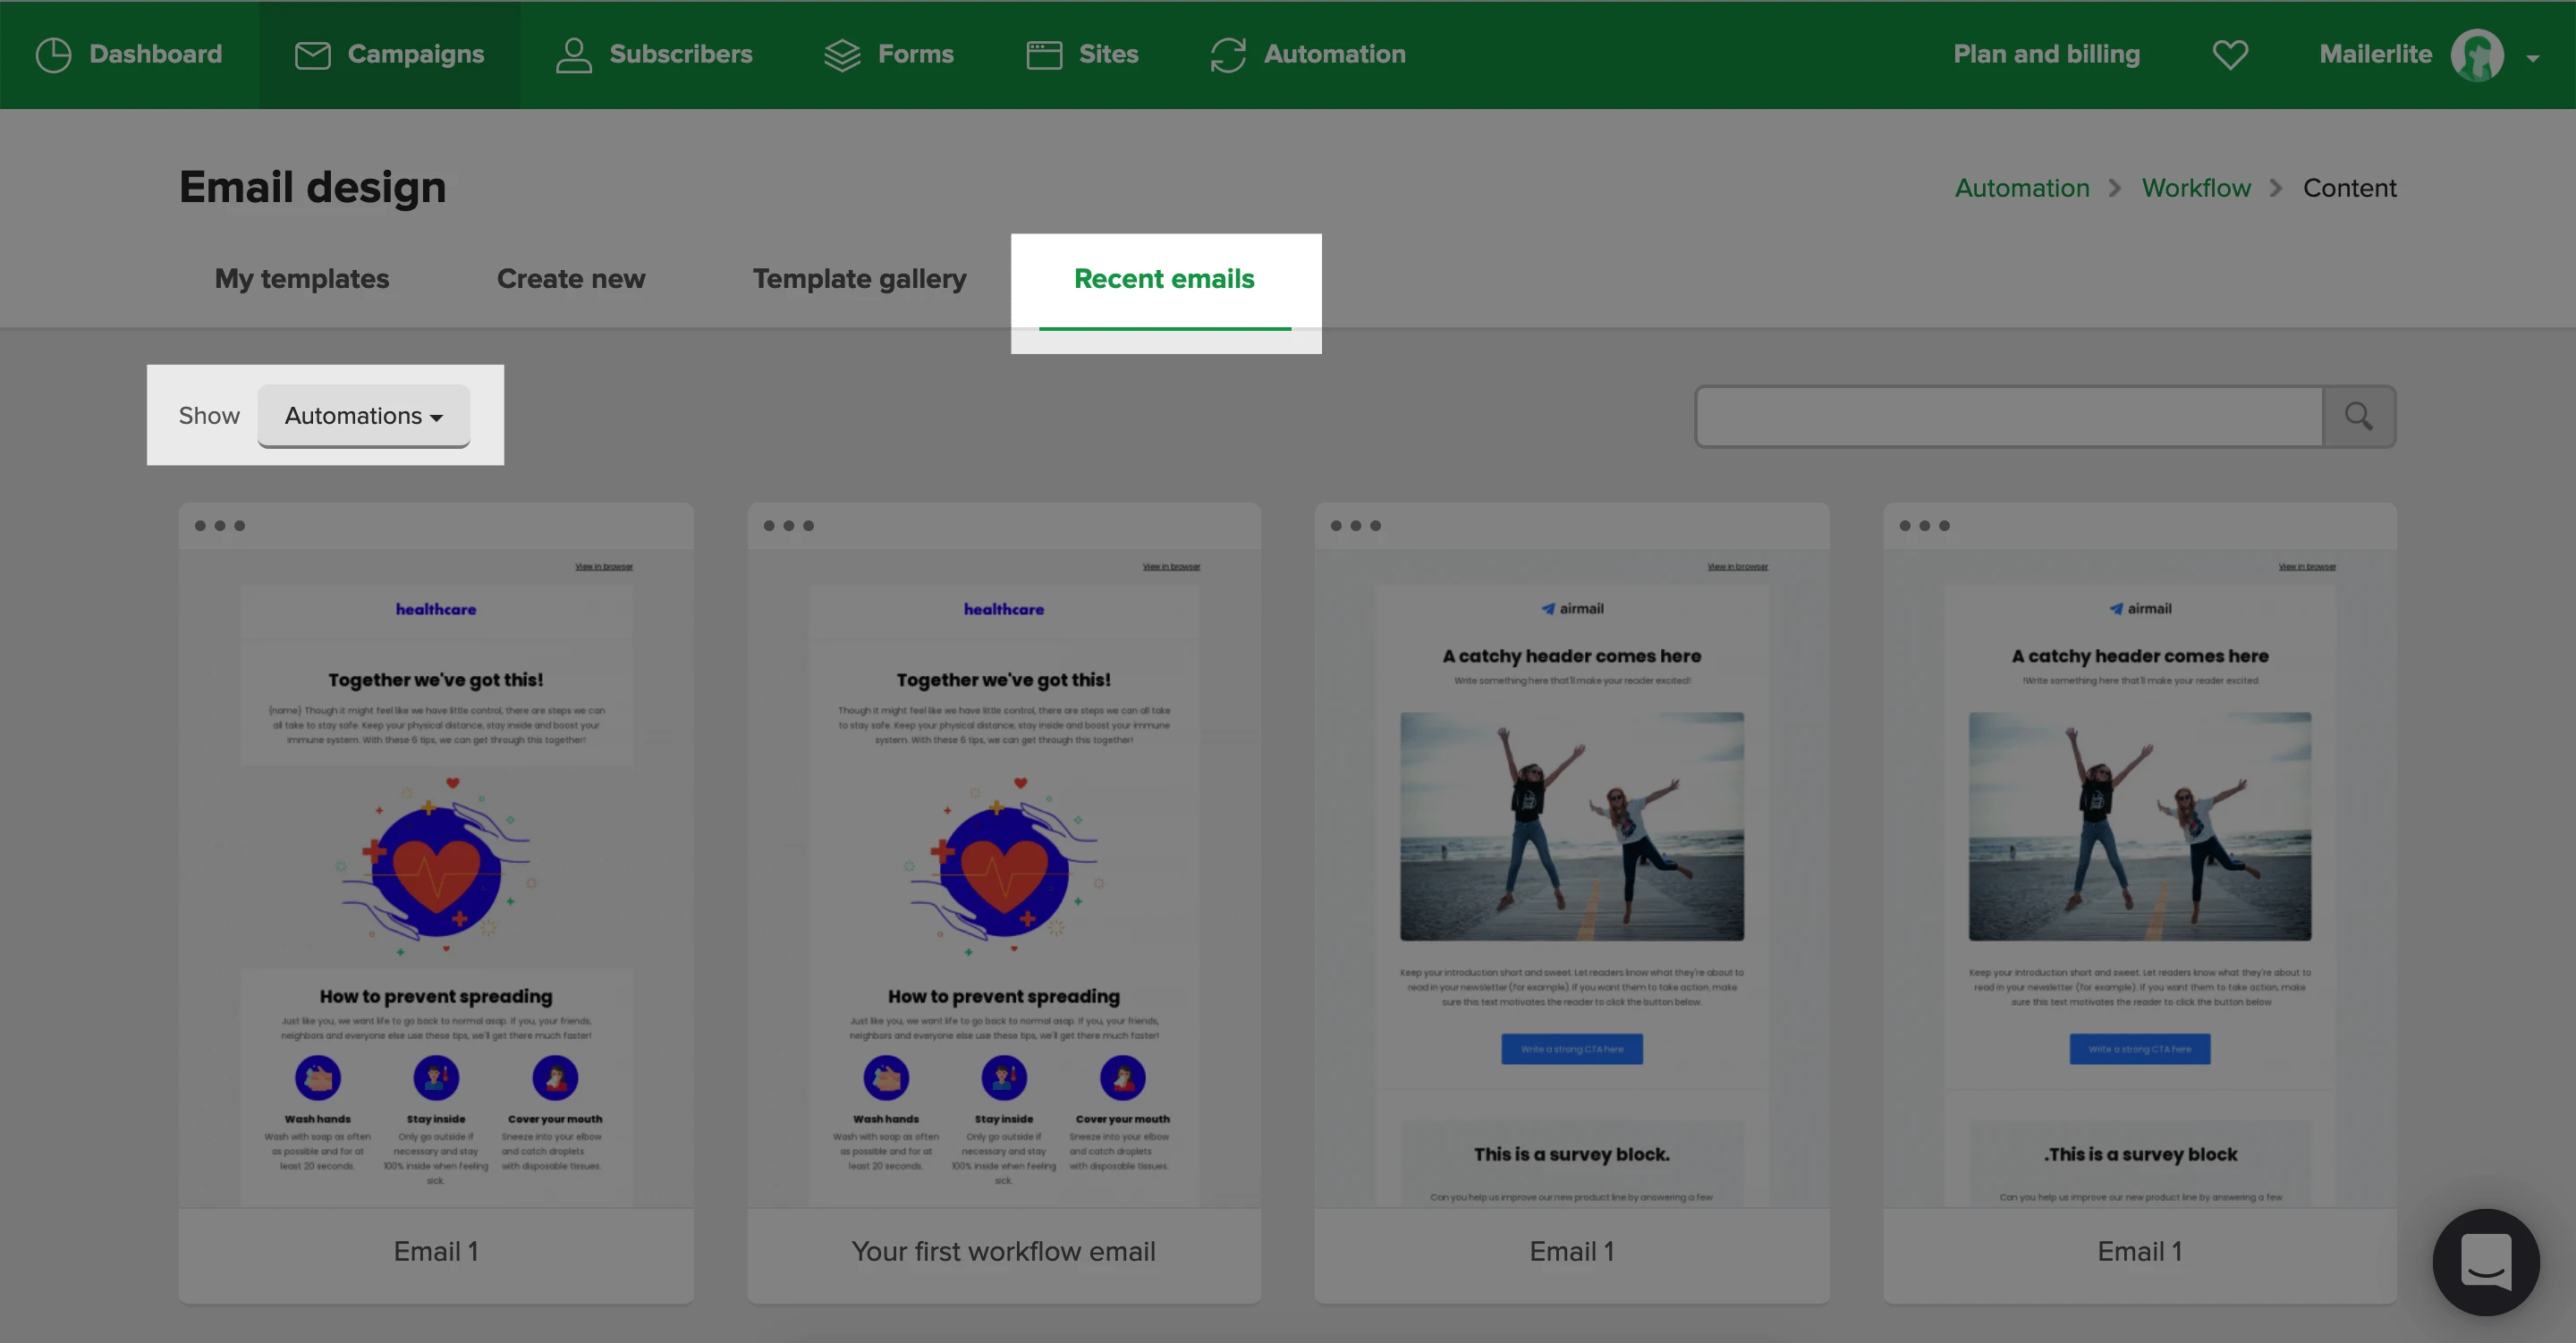
To restore an email that has been removed, add a new Email step using the + icon. In the upper right corner, click Restore email. From here, you can select an email that was previously removed from the automation.

If you delete a Delay step, all subscribers who were waiting on that Delay step will be canceled from the workflow. You can find and re-add canceled subscribers in your automation activity.
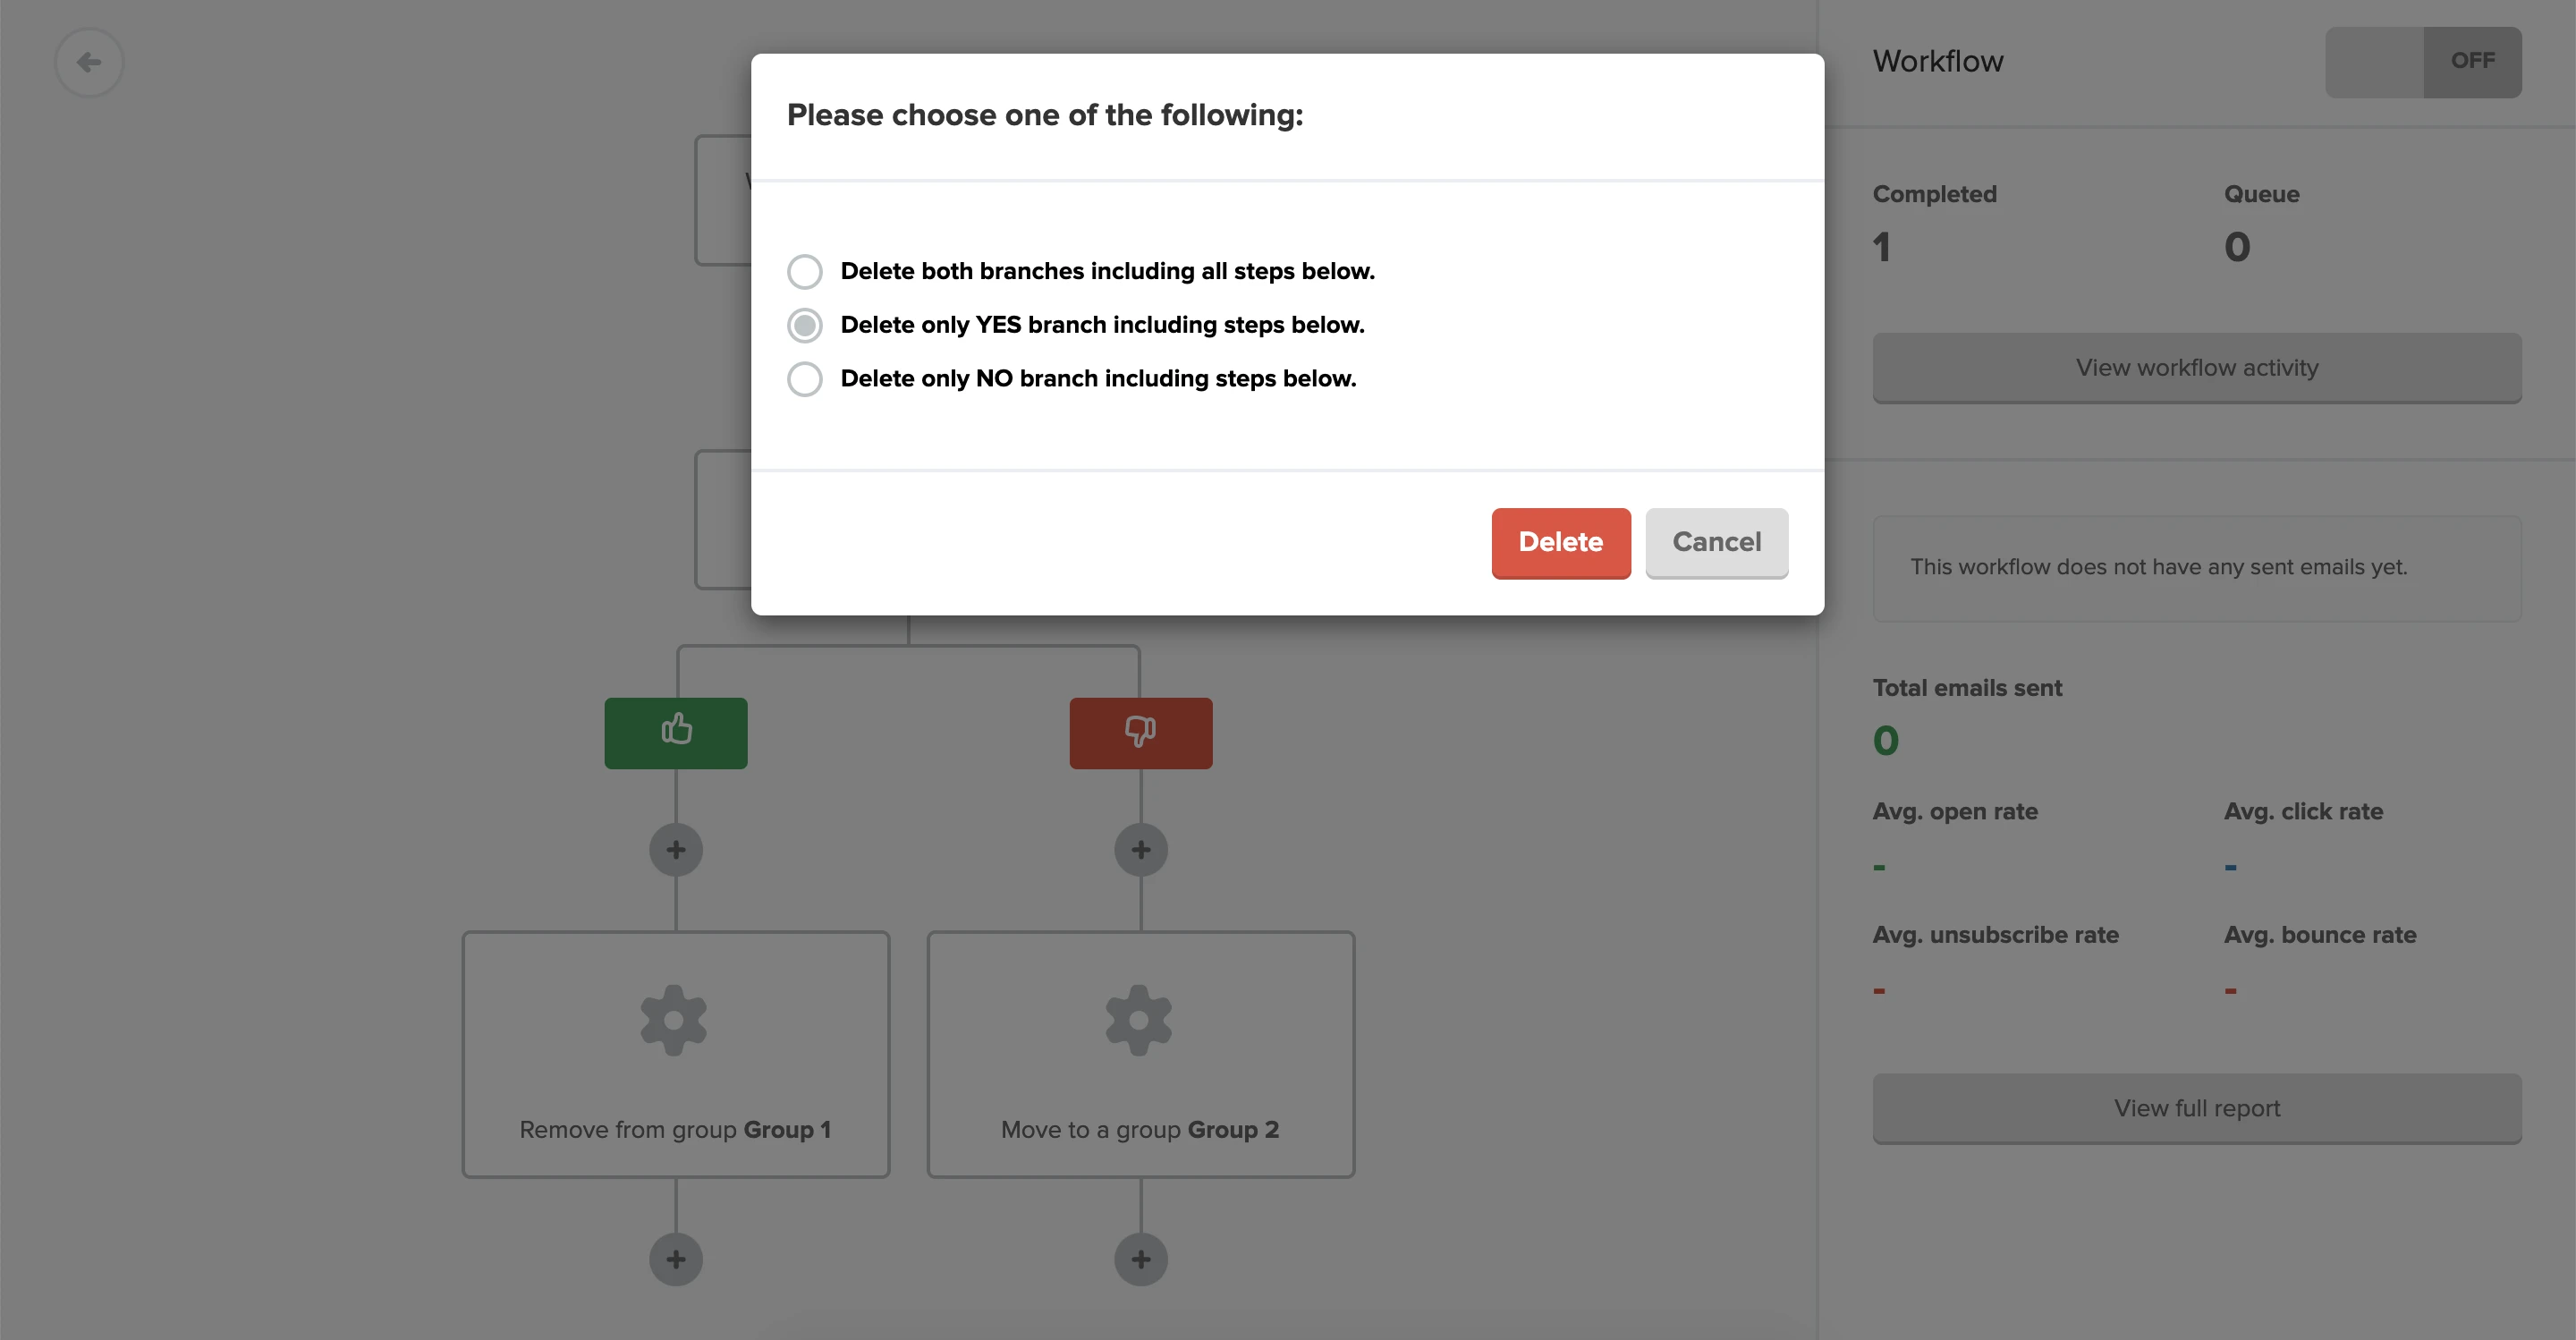
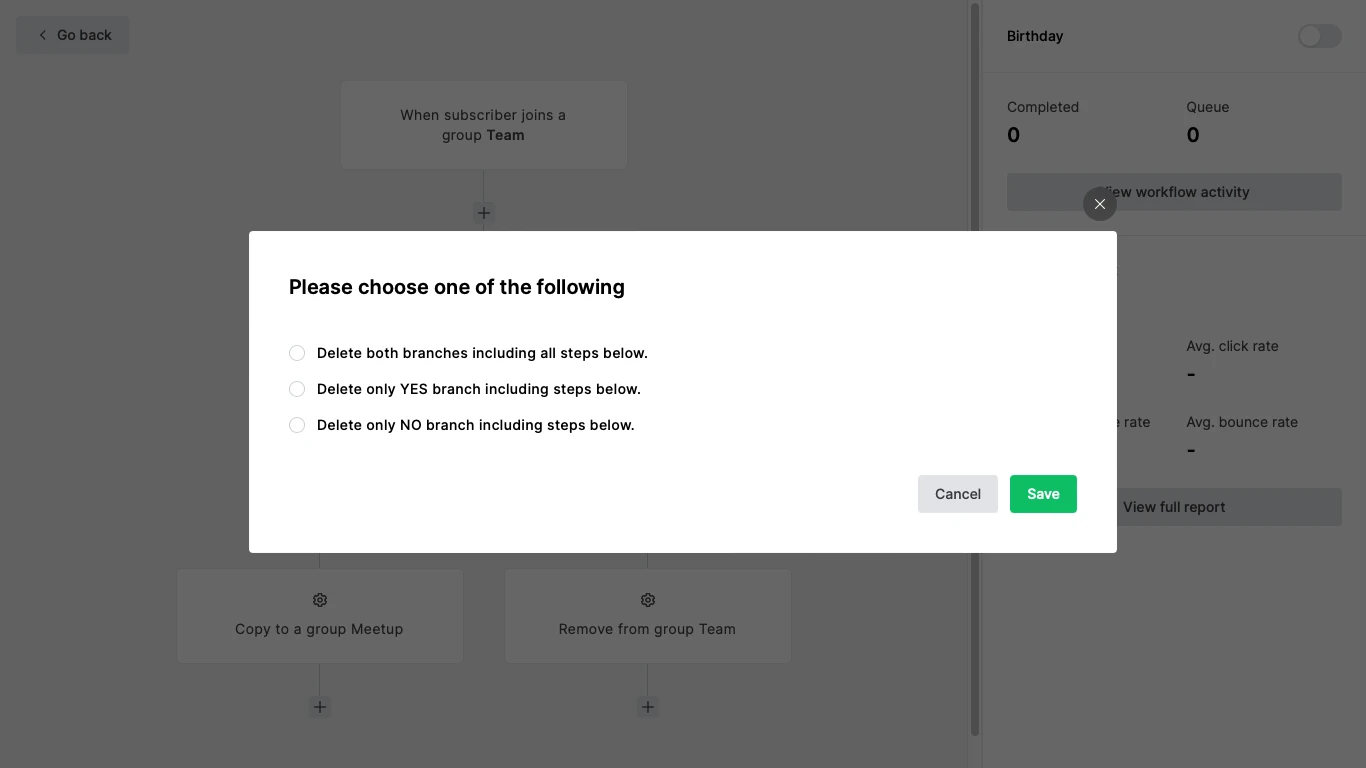
When deleting a Condition step that has active steps under both branches, a pop-up will appear asking to select which branches to delete – the YES branch (thumbs-up), the NO branch (thumbs-down), or both.
If the Condition step only has active steps underneath one branch, those steps will remain in the sequence after the Condition step is deleted.
How to re-arrange steps in an automation
If you wish to change the order of the steps in your workflow, you can easily drag and drop steps to a new location.
Note: To edit a workflow, your automation must be paused.
It’s currently possible to re-arrange Email, Delay, Action, Webhook, Condition, and A/B testing steps. To move a step:
Click and drag the step by the draggable icon in the top-left corner.
As you do this, available spots to place the step will appear labeled Drop step here.

If a step cannot be placed in a certain location, you will see the label Not available for this step. This can happen if steps need to retain a specific order to work properly. For example, Webhook steps cannot be placed after A/B test branches.
Keep in mind, delay steps cannot be moved if there are subscribers currently queued in them.

Condition and A/B testing steps
When moving a Condition or A/B testing step, the branches attached to that step will move with it. You will be able to see how many steps are being moved with the label (X amount) of hidden steps.

When dropping a Condition step to another area in the automation that has existing steps below it, you will see the option to choose whether the steps below will fall under the positive or negative branch.

Cut and paste
It’s also possible to re-arrange automation steps by cutting and pasting to a new location. To do this:
Hover over a step and click the three dot icon in the upper right corner.
Select Cut.

3. You will see a pop-up appear showing the step that was cut, with an option to click Undo.
4. All valid paste locations will appear with the label Paste step here. Simply click the empty step placeholder to paste the step in the chosen location.

When you move an automation step, it will still keep its existing metrics. If you’d like to preserve the current metrics in their original position and start tracking fresh metrics from a new spot, we recommend duplicating the step (with the same settings) and moving the duplicate instead.
