This article is intended for those who have successfully registered a domain with Google Domains.
🔔 Important: On September 7, 2023, Squarespace acquired all domain registrations from Google Domains. This means Google Domains will no longer accept new domains registrations, but you can still manage previously owned domains.
➡️ Learn more.
How to add a domain to MailerLite
Head to the Account settings page and click the Domains tab.
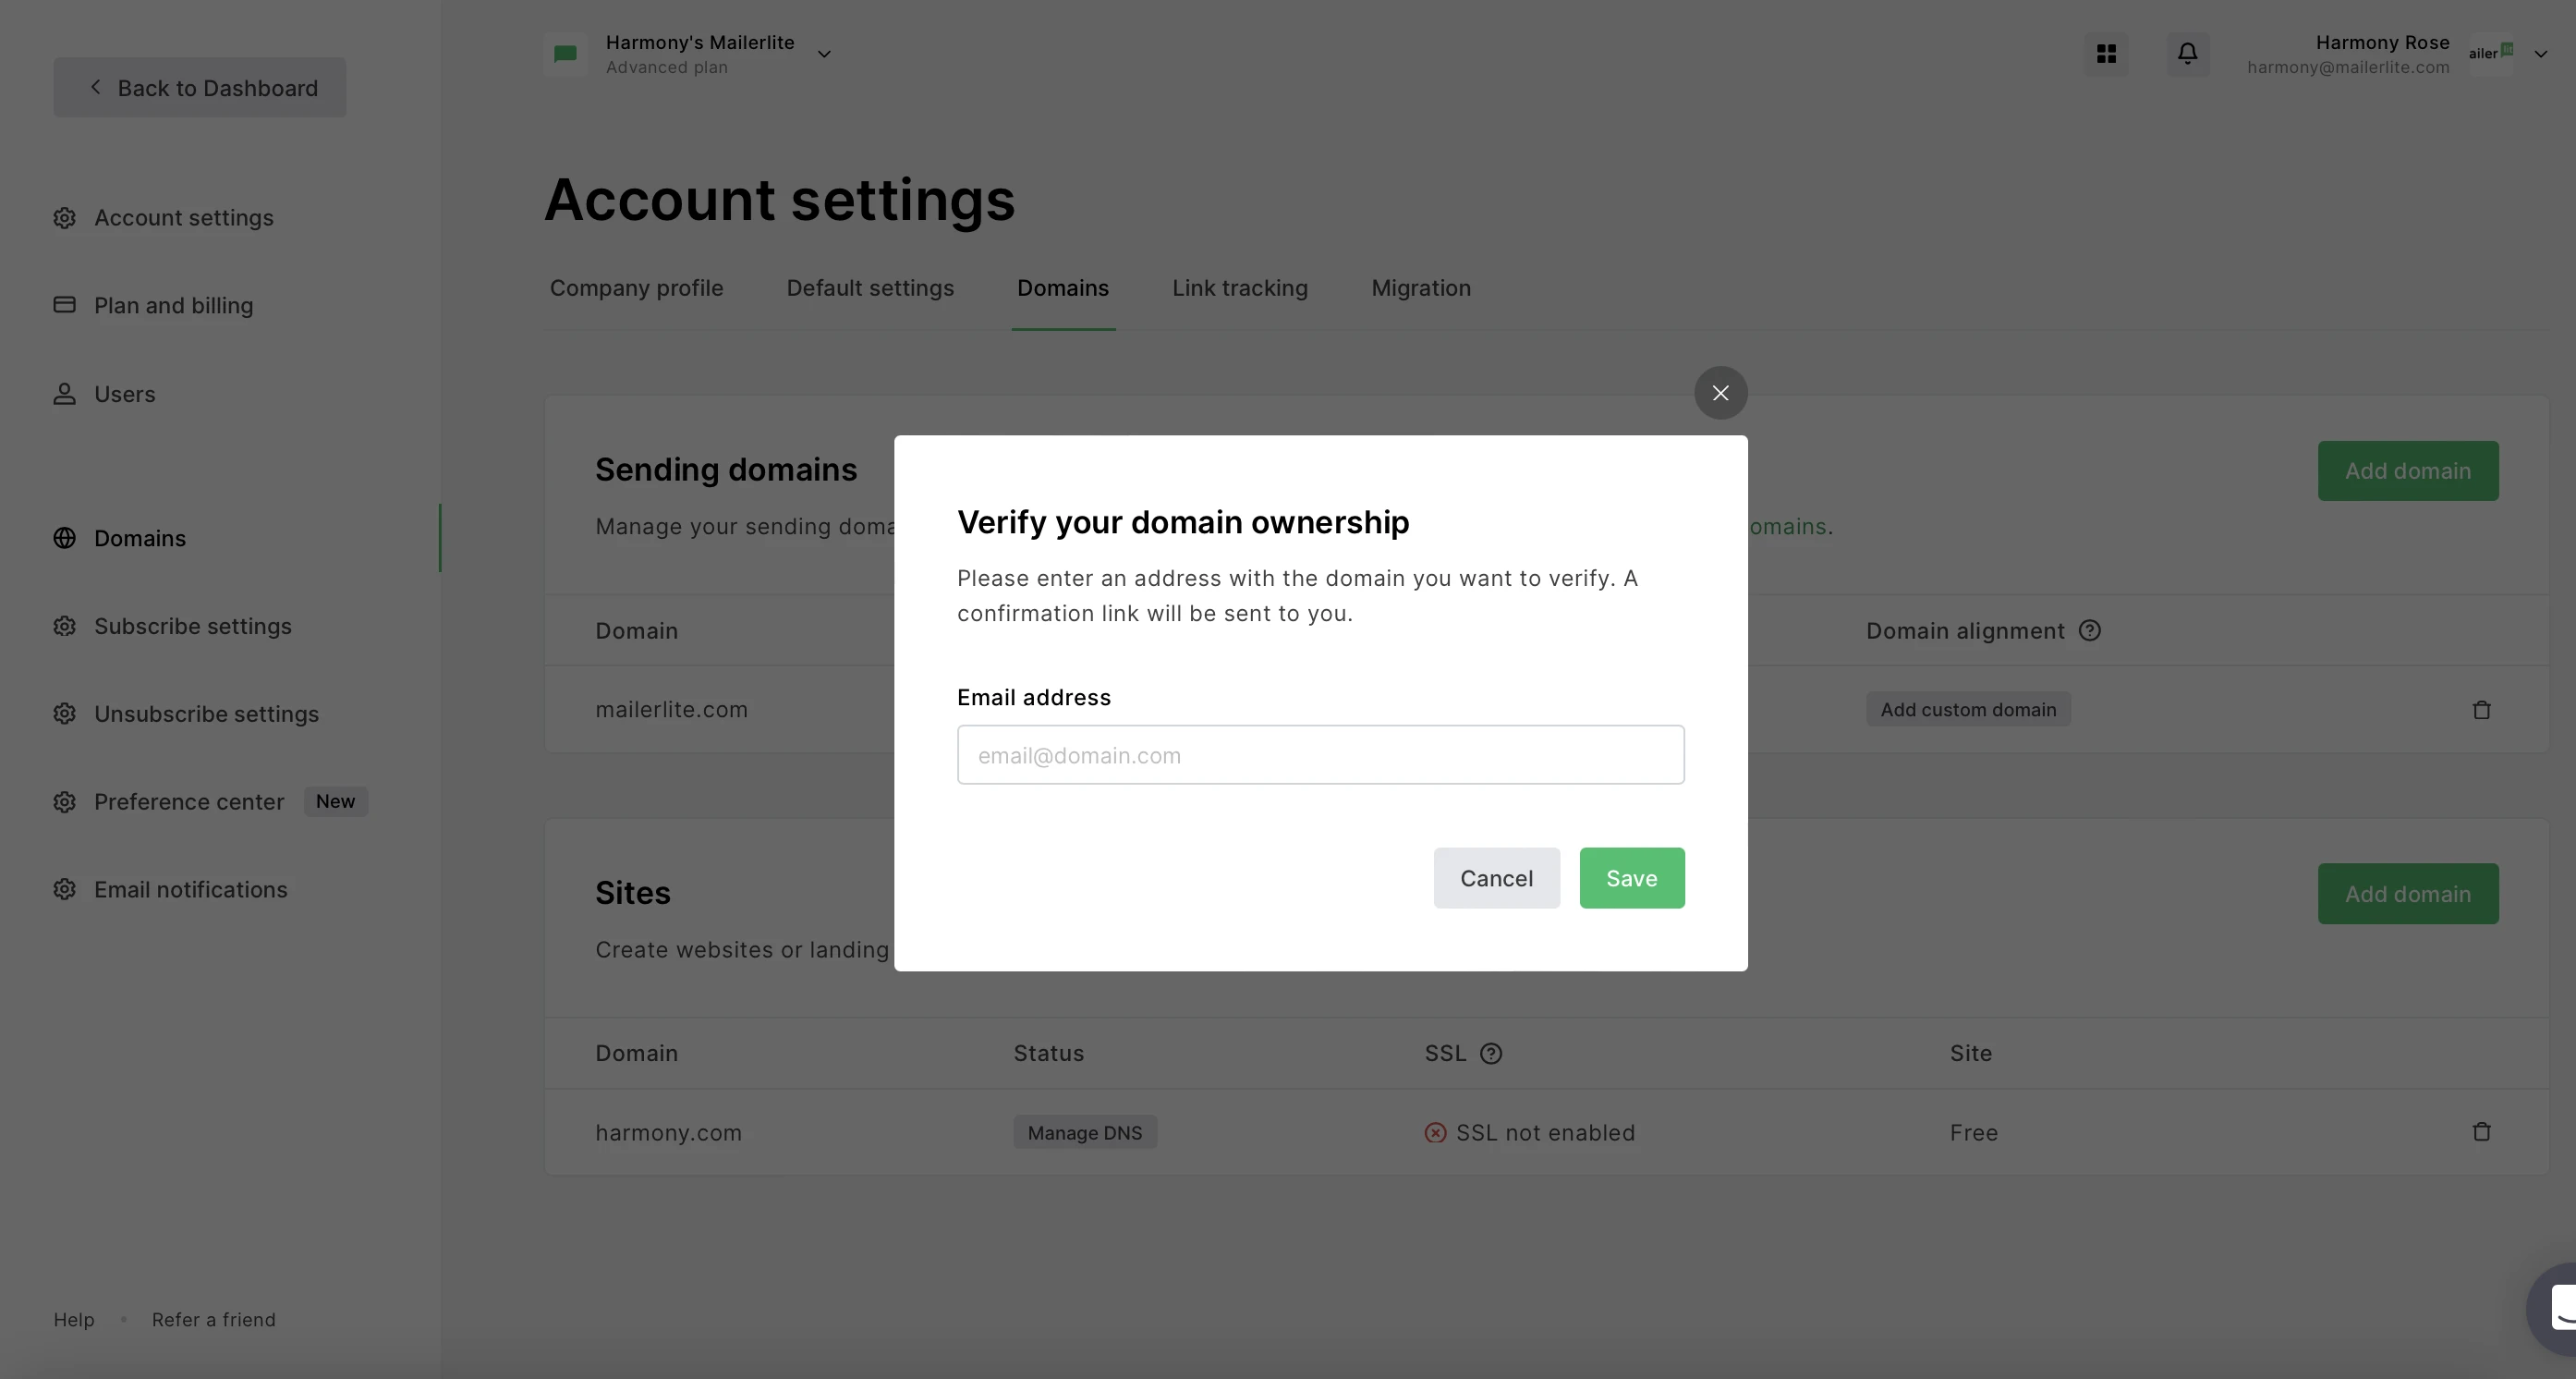
Under Sending domains, click Add domain.
Enter an email address that includes your paid domain, which will be used to send campaigns.

Do I need a website?
No, it is not necessary to have a website attached to your domain. However, you will need to have an email address that uses that domain and has an inbox that can receive emails, as this will be ideal for sending.
If your domain is example.com, your email may look something like newsletter@example.com
You can create a domain email address within your Google Domains account.
Check your inbox for the verification email and follow the steps to verify the email address.
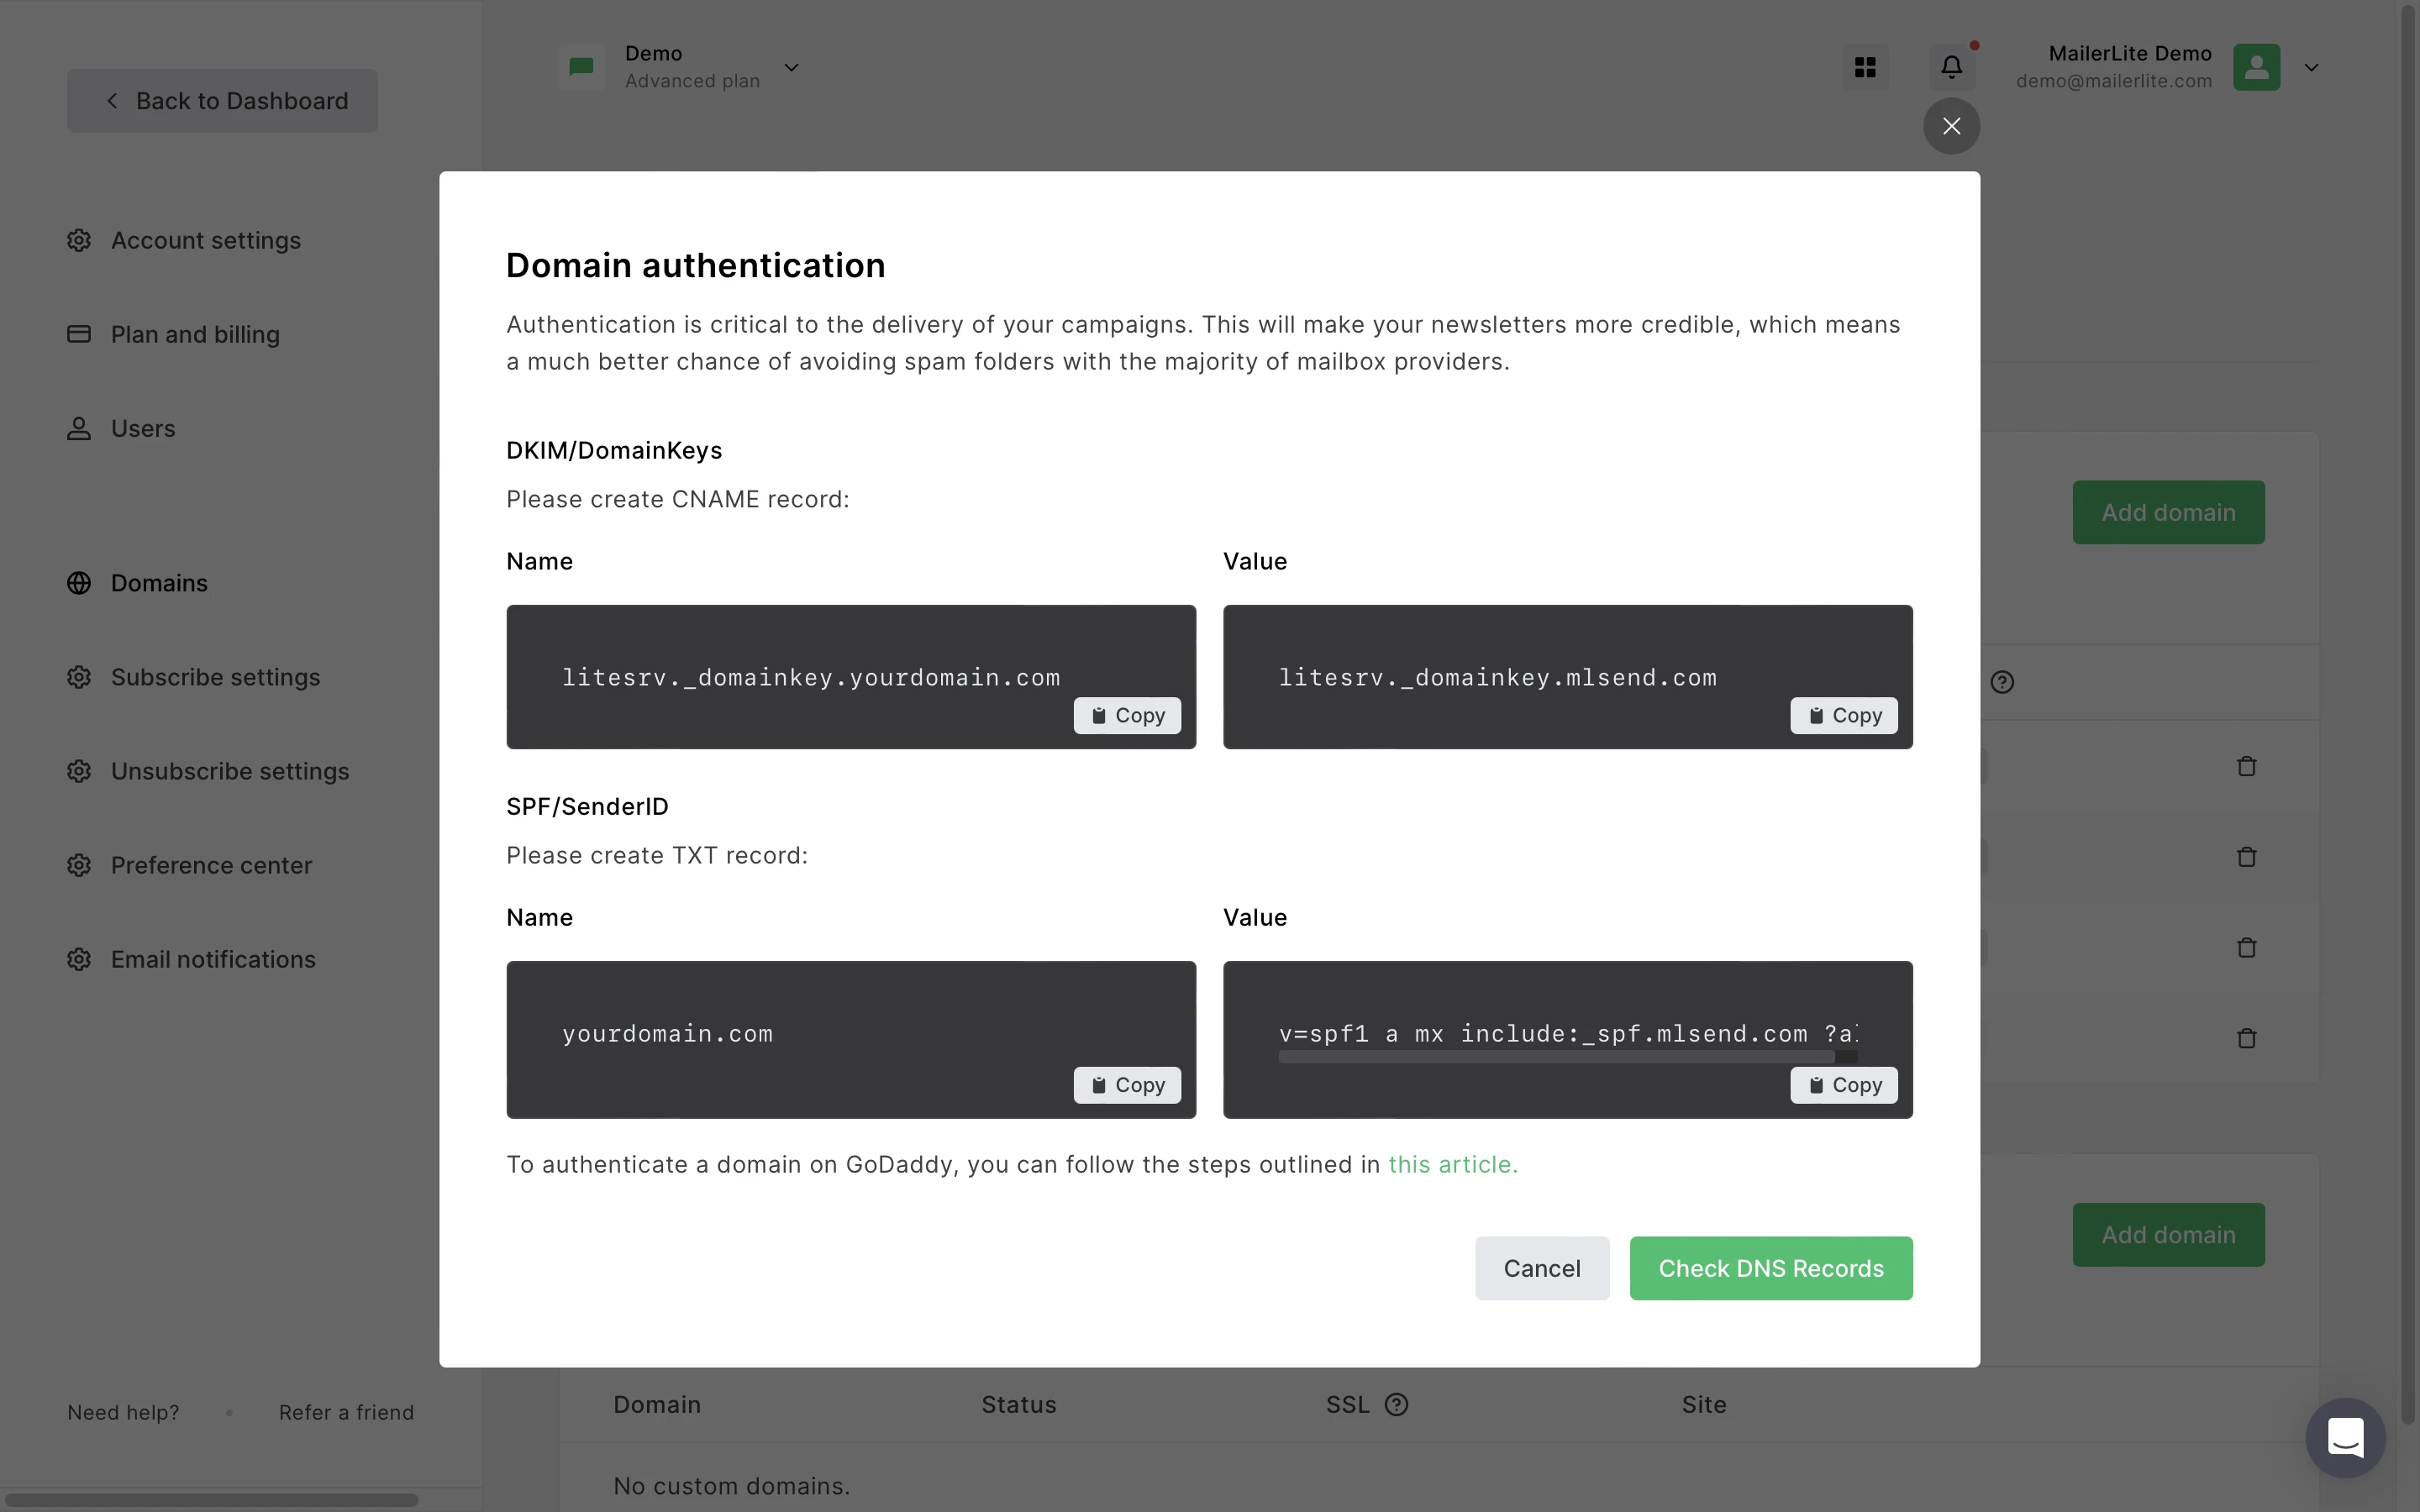
Once the domain has been added, click Authenticate. A window will appear containing Name and Value fields of your DKIM and SPF records. Copy these fields and keep the page open.

How to access the DNS zone page for Google Domains
Head over to Google Domains and log into your account.
Go to My domains.
Click Manage for the desired domain.

4. Click DNS.
Next steps:
Google Domains has what they call Synthetic records.
Synthetic records are like "packages" that contain multiple DNS records and can't be modified individually.
To be able to add a custom SPF record from MailerLite, the synthetic records must be deleted first, and added back in after you have added the MailerLite records.
To do this:
Start by exporting of all your DNS records.
Find the Workspace records in your DNS settings. There's a specific section for Workspace under custom domains.
Delete the existing Workspace records from your DNS settings. Remember, you can't edit these records directly – they must be deleted.
Add the previously deleted Workspace records into the Custom records section, except for any SPF records. You can check which records contain SPF, and remove them.
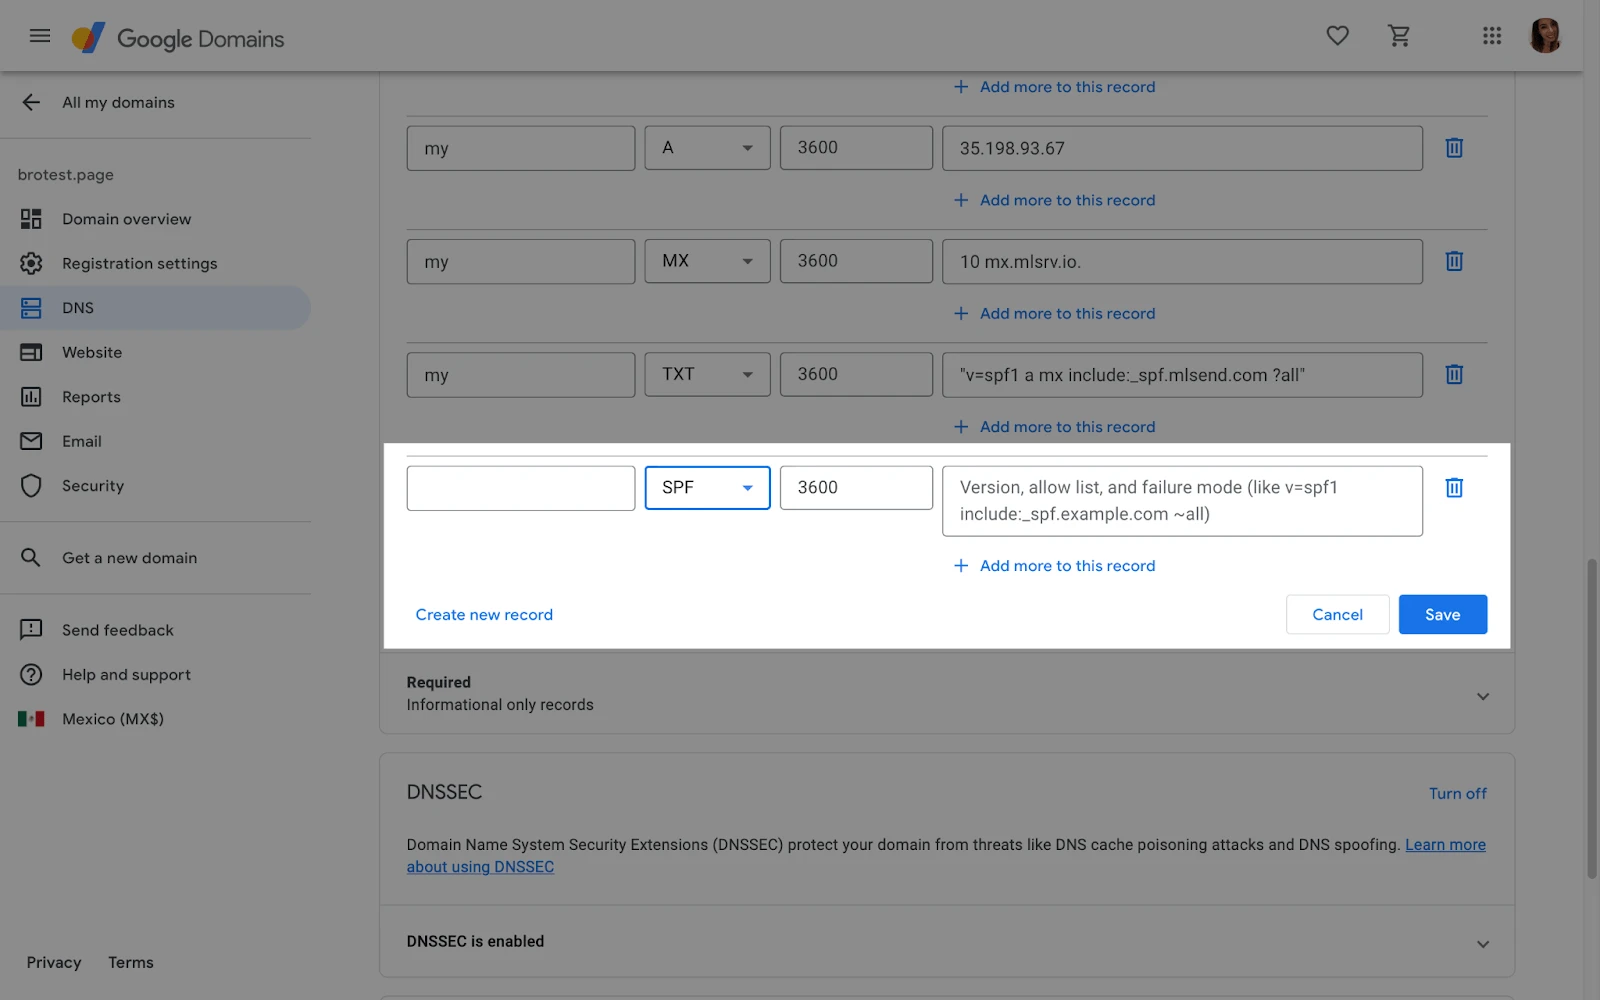
You can now set up MailerLite records without any conflict by clicking Create new record.

How to add the SPF record
Hostname: This should be left empty since your domain is already added automatically
Type: TXT
TTL: 3600
Data: You can find the record value in MailerLite. The Value text should be added here.
"Too many SPF records"
You can only have one SPF record in your DNS zone. If you are seeing this error, it may mean you have several SPF records present.
Be sure to follow the steps above by:
Exporting all DNS records.
Delete the existing Workspace records.
Add the deleted Workspace records into the Custom records section, except for any SPF records. You can check which records contain SPF, and remove them.
Add both MailerLite records.
How to add the DKIM record
Hostname: This should include only litesrv._domainkey
Type: CNAME
TTL: 3600
Data: litesrv._domainkey.mlsend.com
Please note: If you have any questions, we encourage reaching out directly to the support team of your hosting provider for better assistance.
For additional troubleshooting steps, see our guide on how to verify, authenticate and align your domain.


