This article is meant for those who already successfully registered a domain with Bluehost.
How to add a domain to MailerLite
Head to the Account settings page and click the Domains tab.
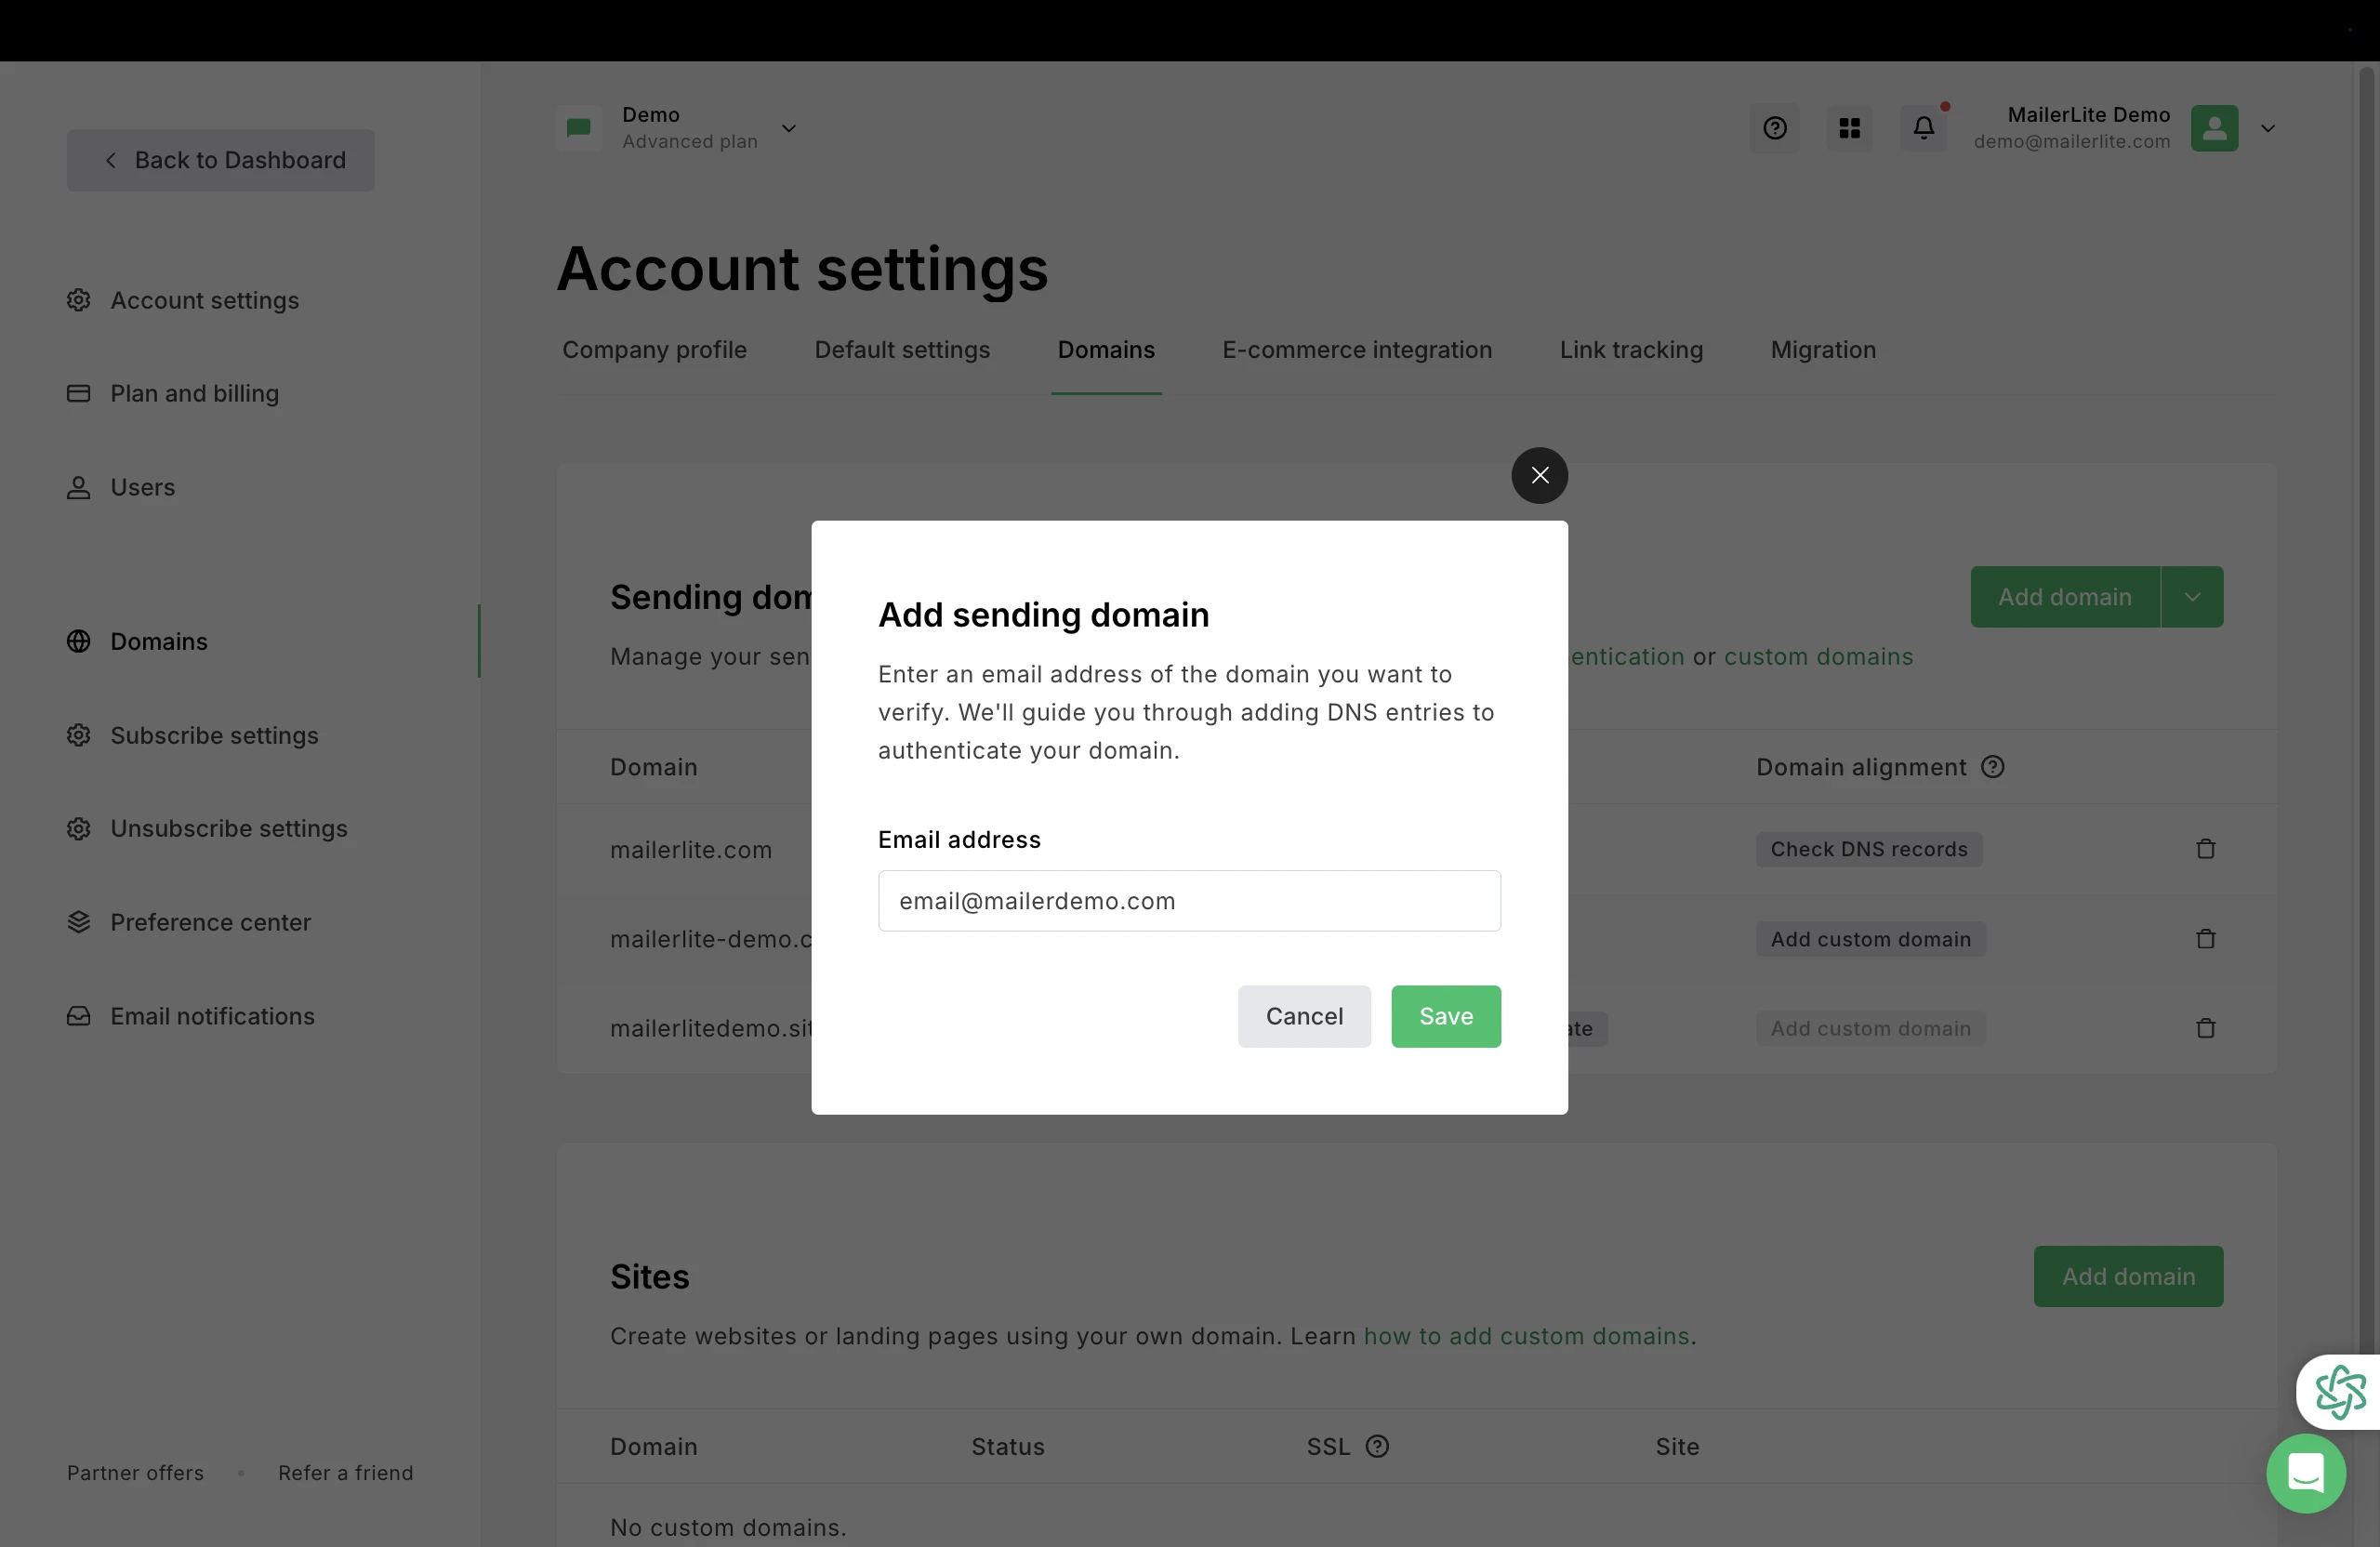
Under Sending domains, click Add domain.
To verify that you are adding a domain that you own, enter an email address that includes your paid domain, which will be used to send campaigns.
Click Save.
5. Once the domain has been added, click Authenticate.
How to use automatic domain authentication setup
A popup will appear, prompting you to start the authentication process. Click Continue.
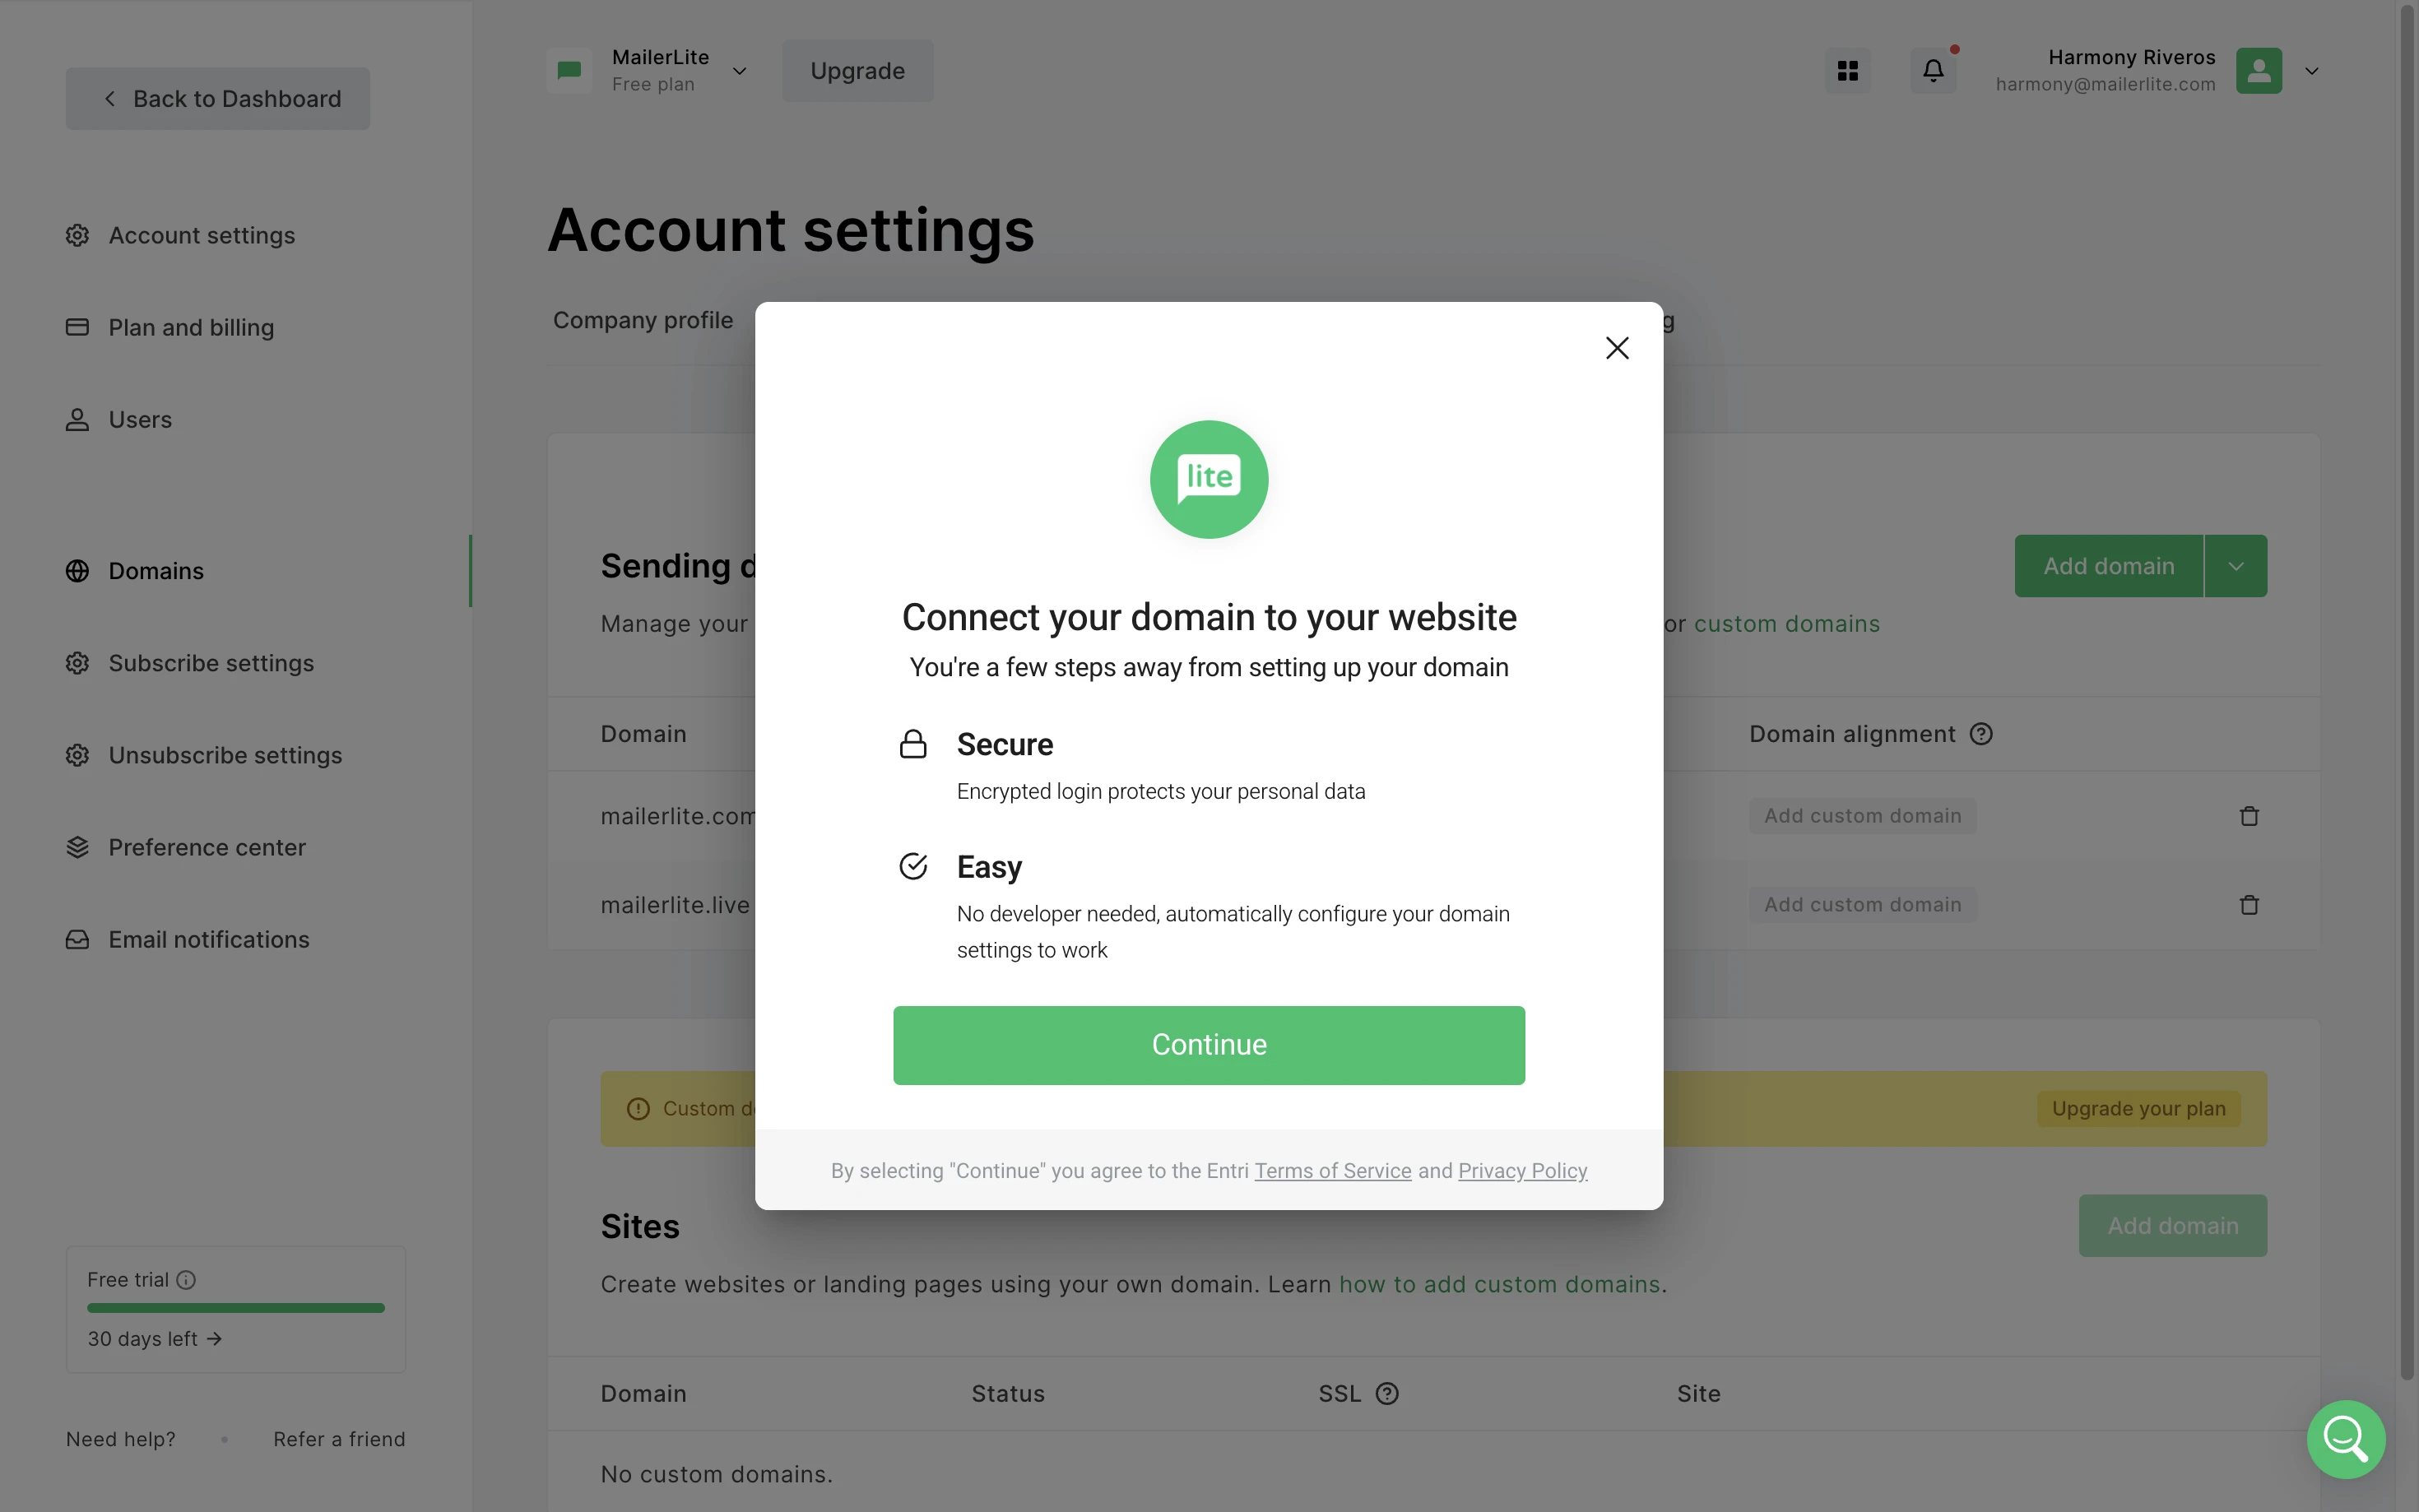
This tool will scan your domain, and detect which provider is the host.
2. Once the provider has been detected, follow the instructions to connect to your account. You will need to use your login credentials to log into your hosting provider.
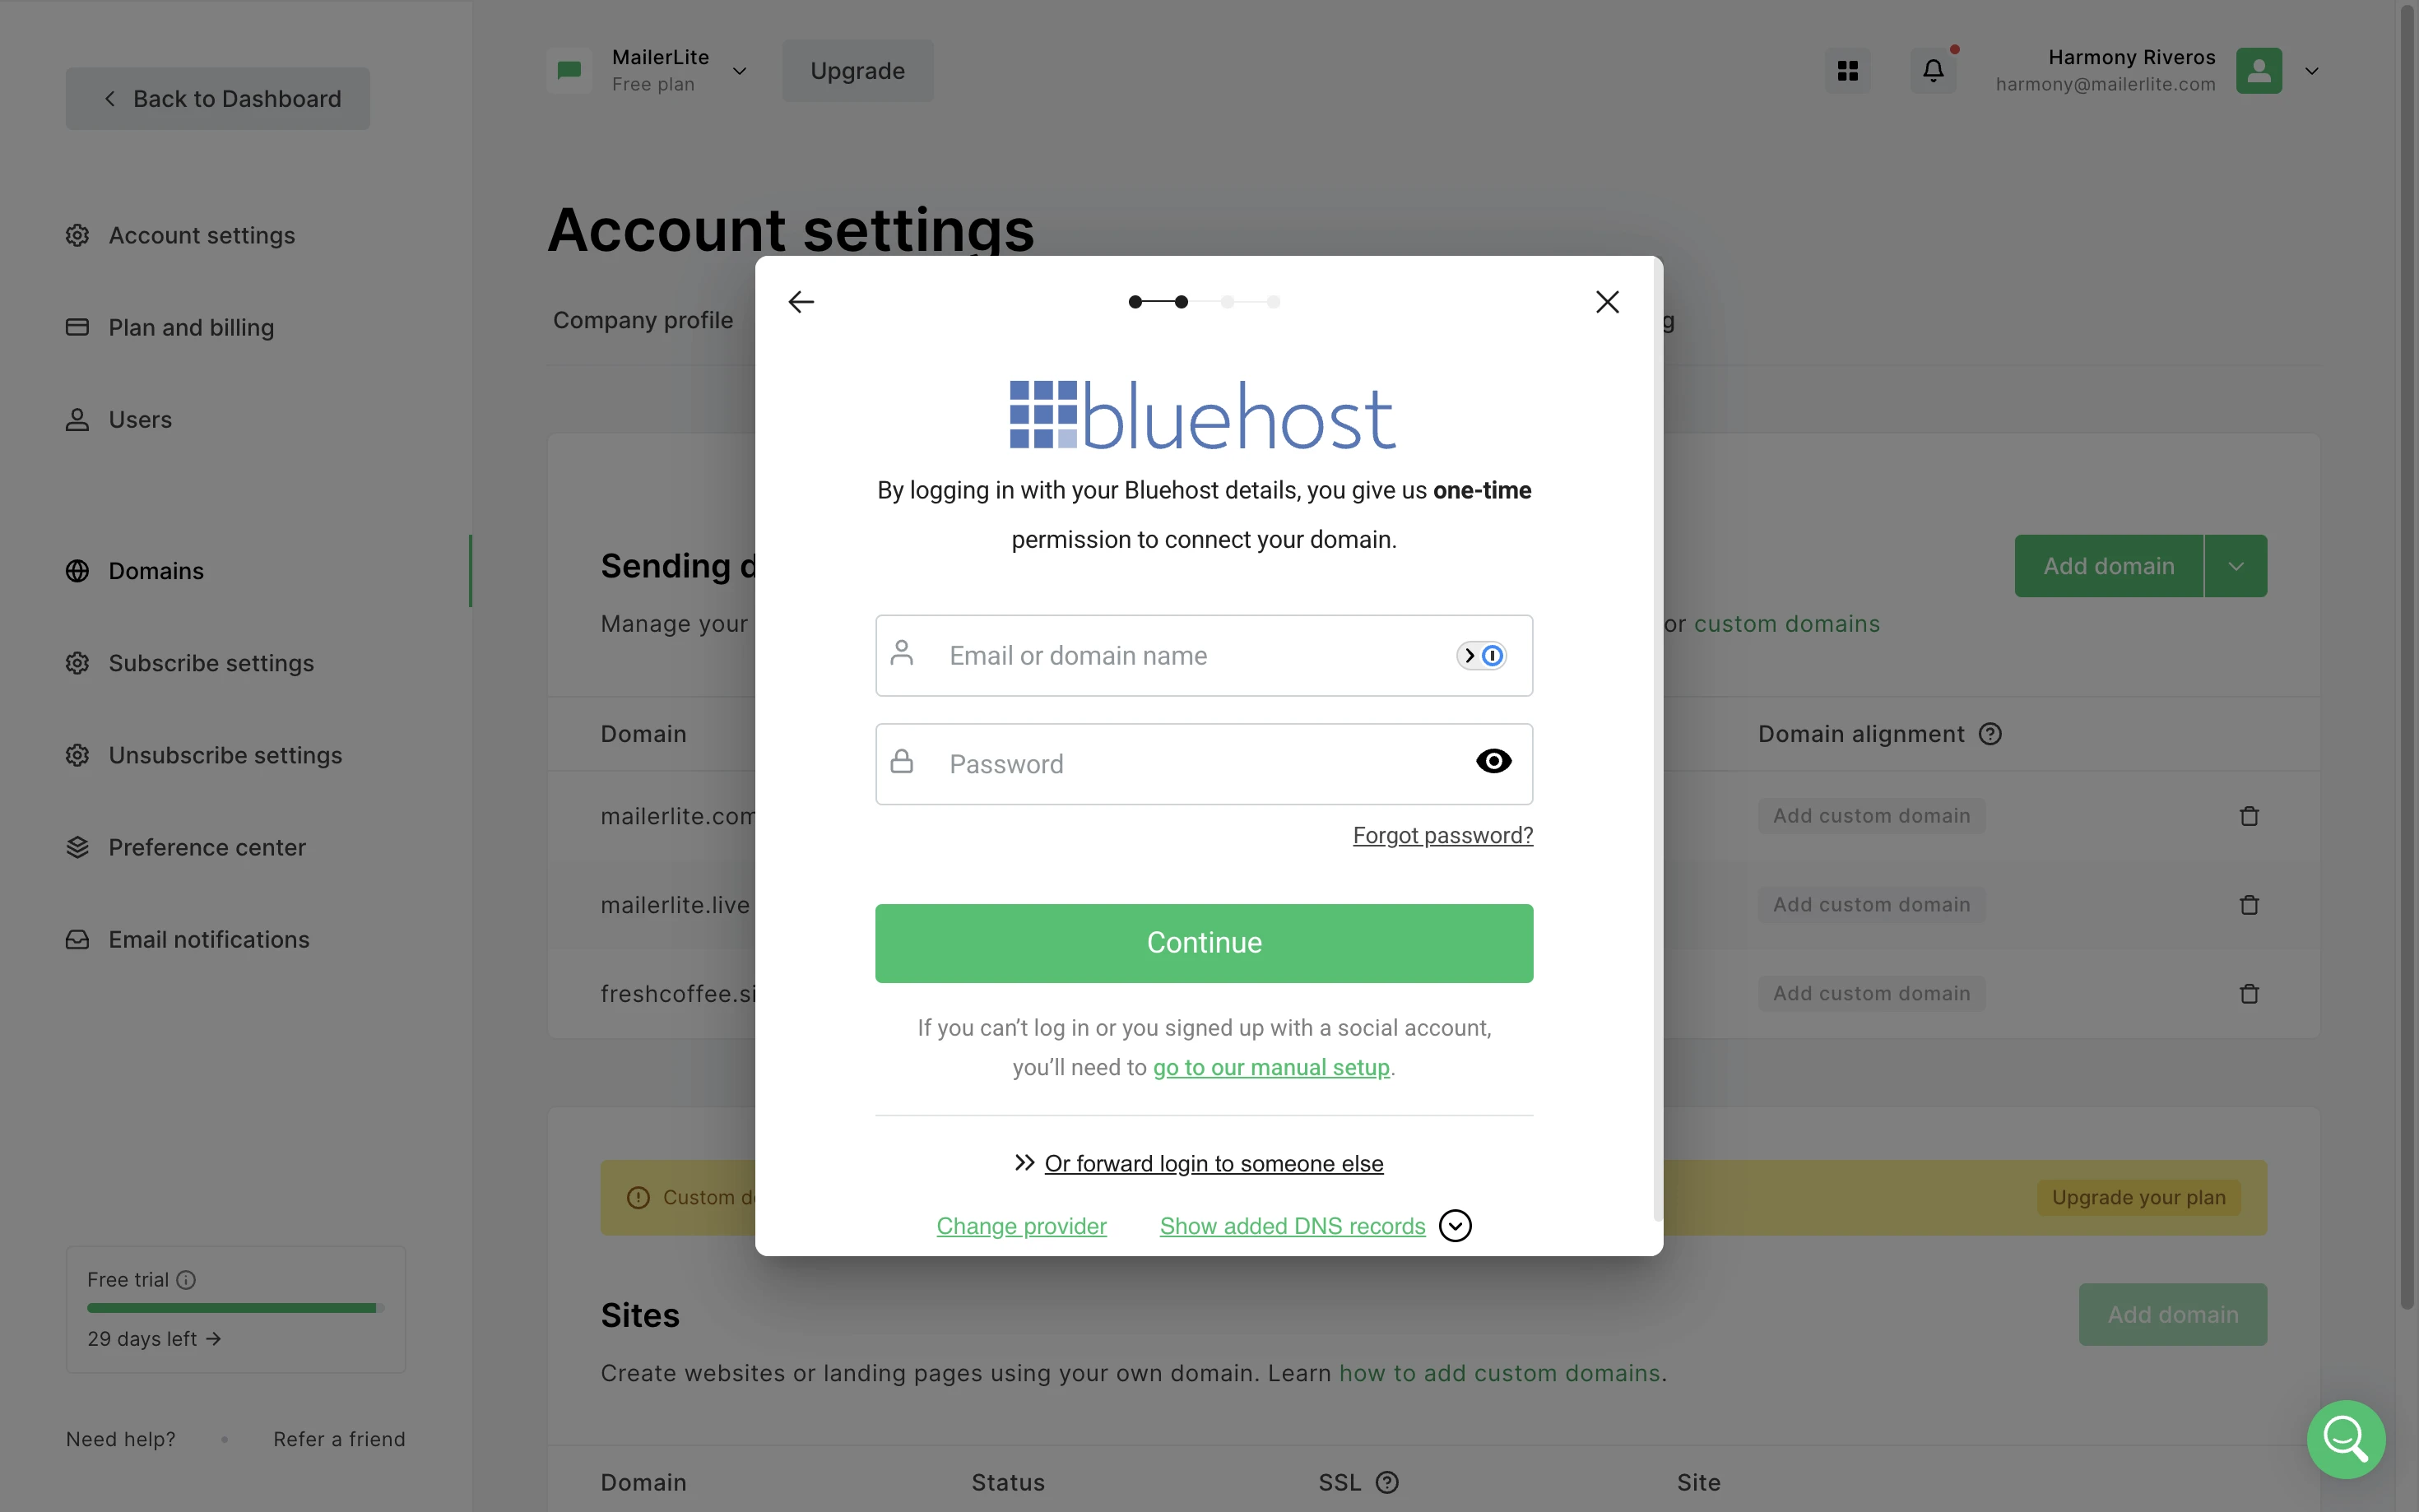
What if I do not have the login details?
By choosing the option to Forward login to someone else, you can share a link with someone who has the details to log in, so they can complete this part of the process.
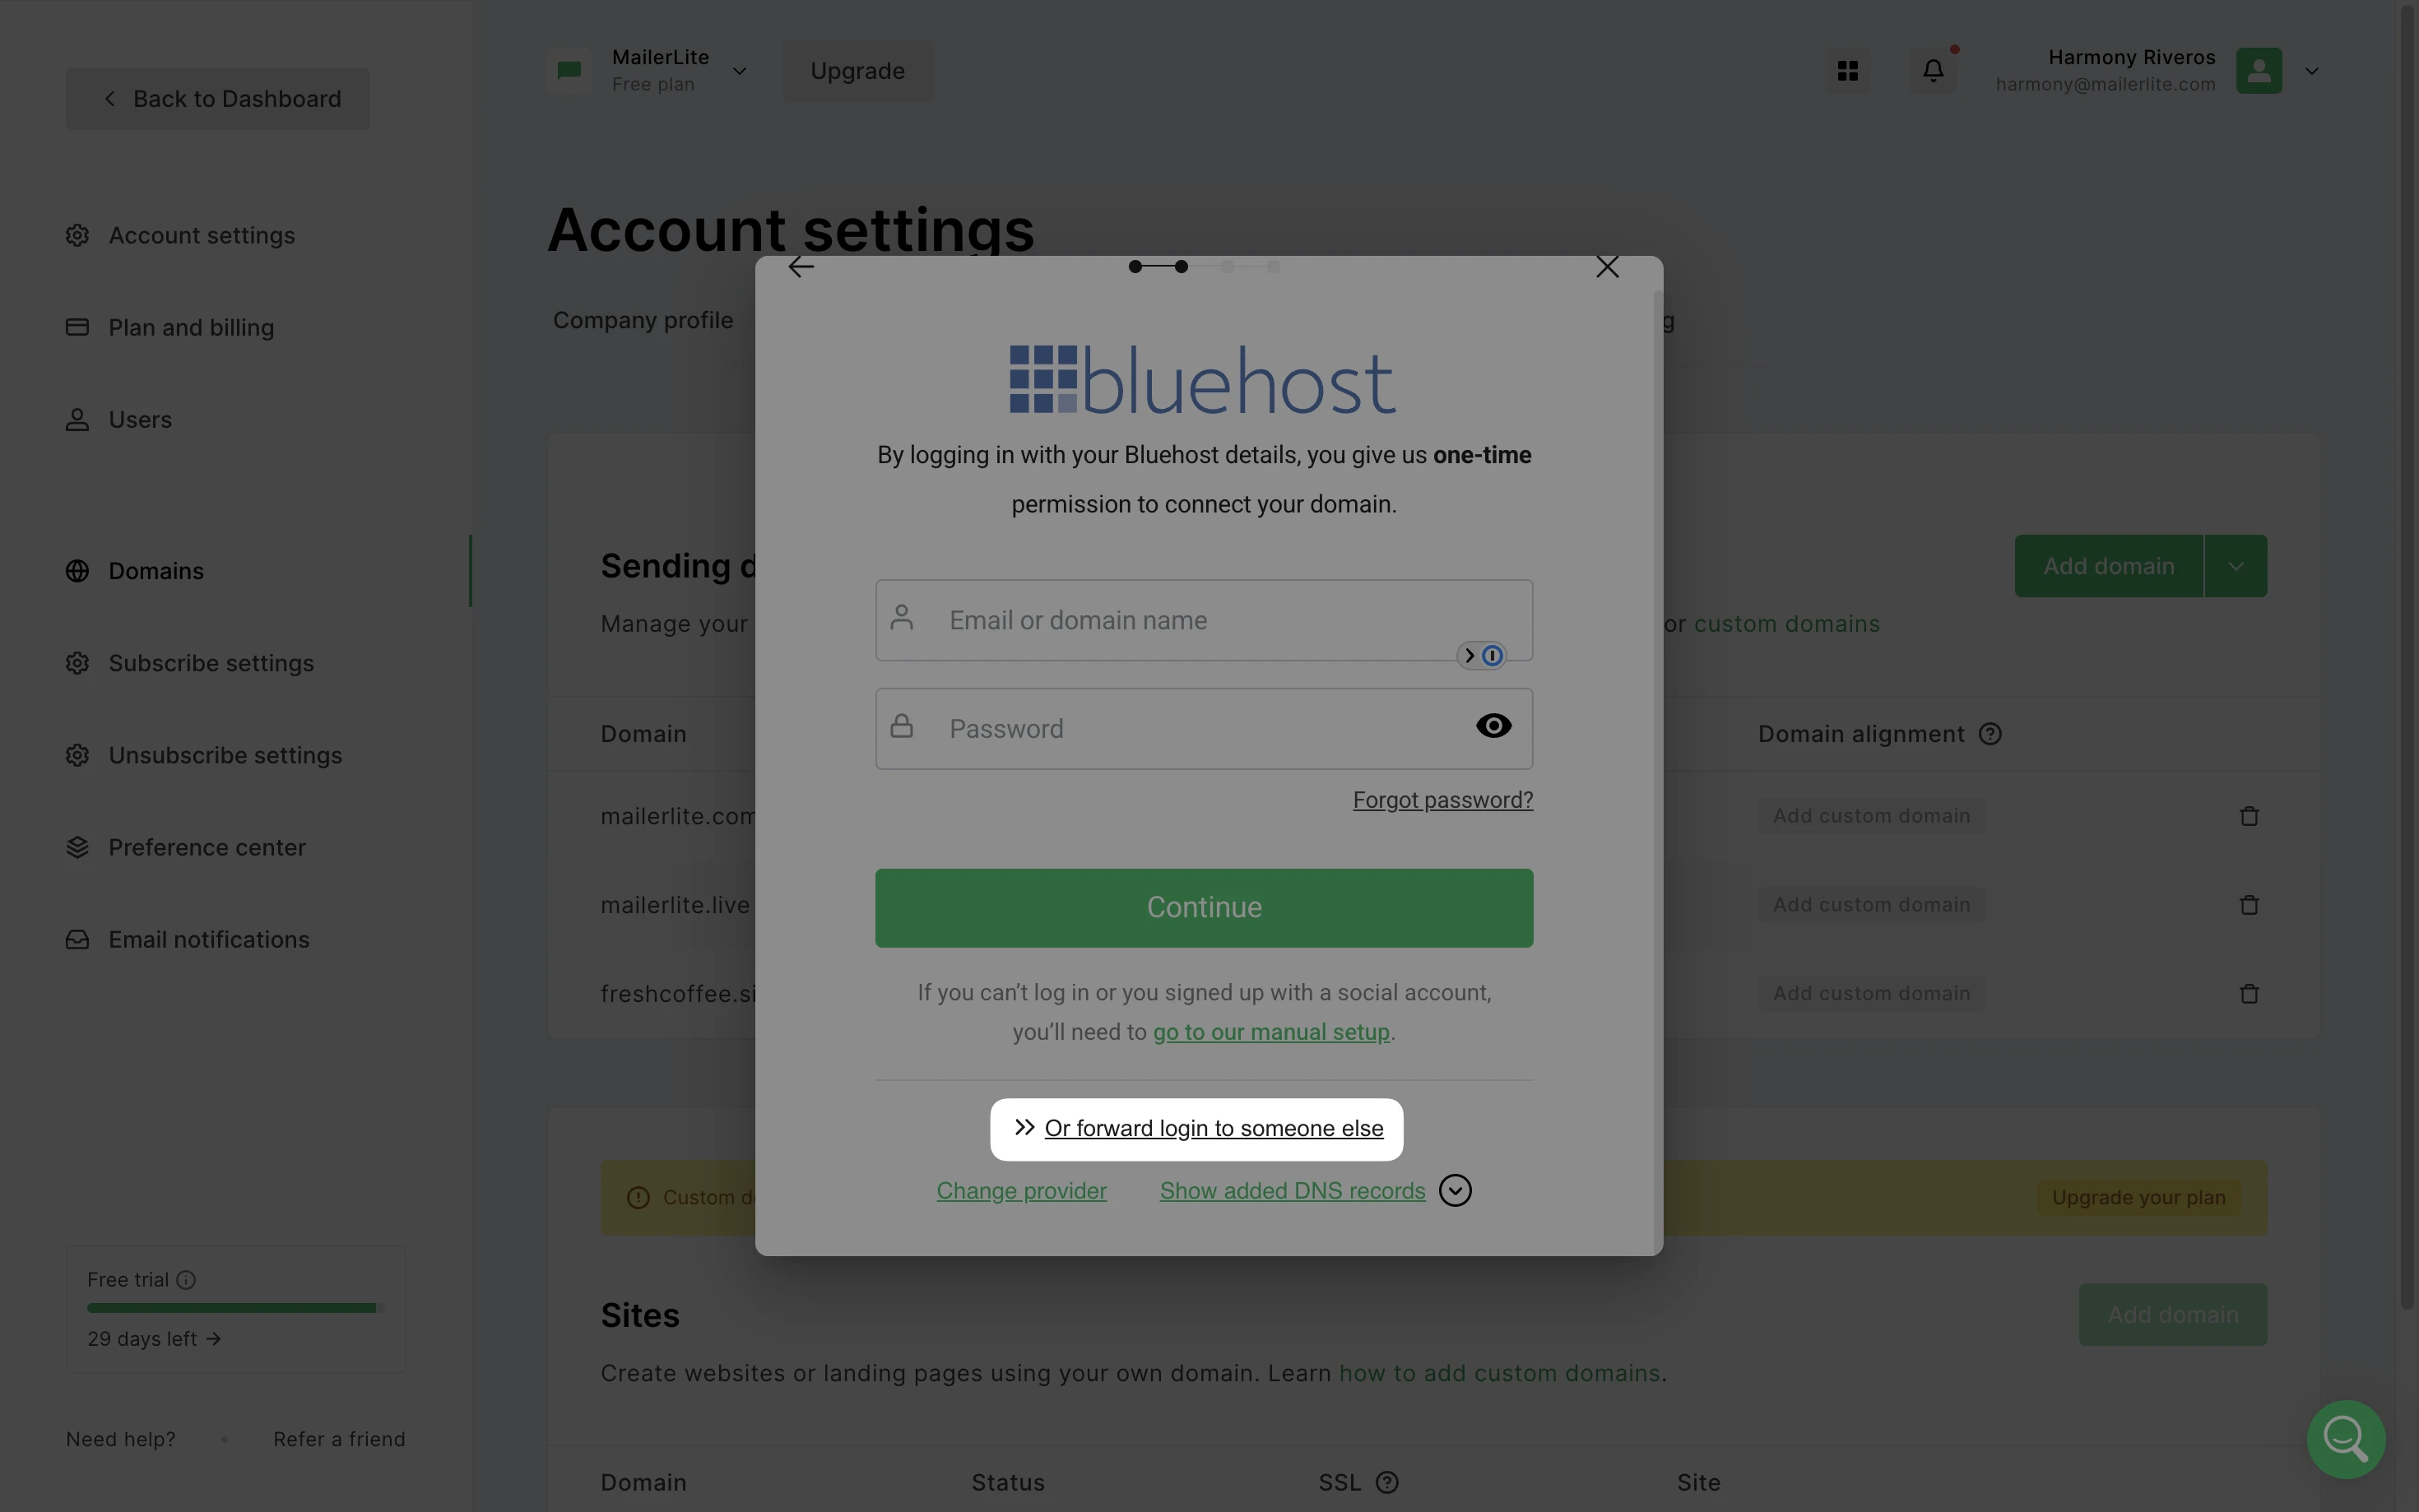
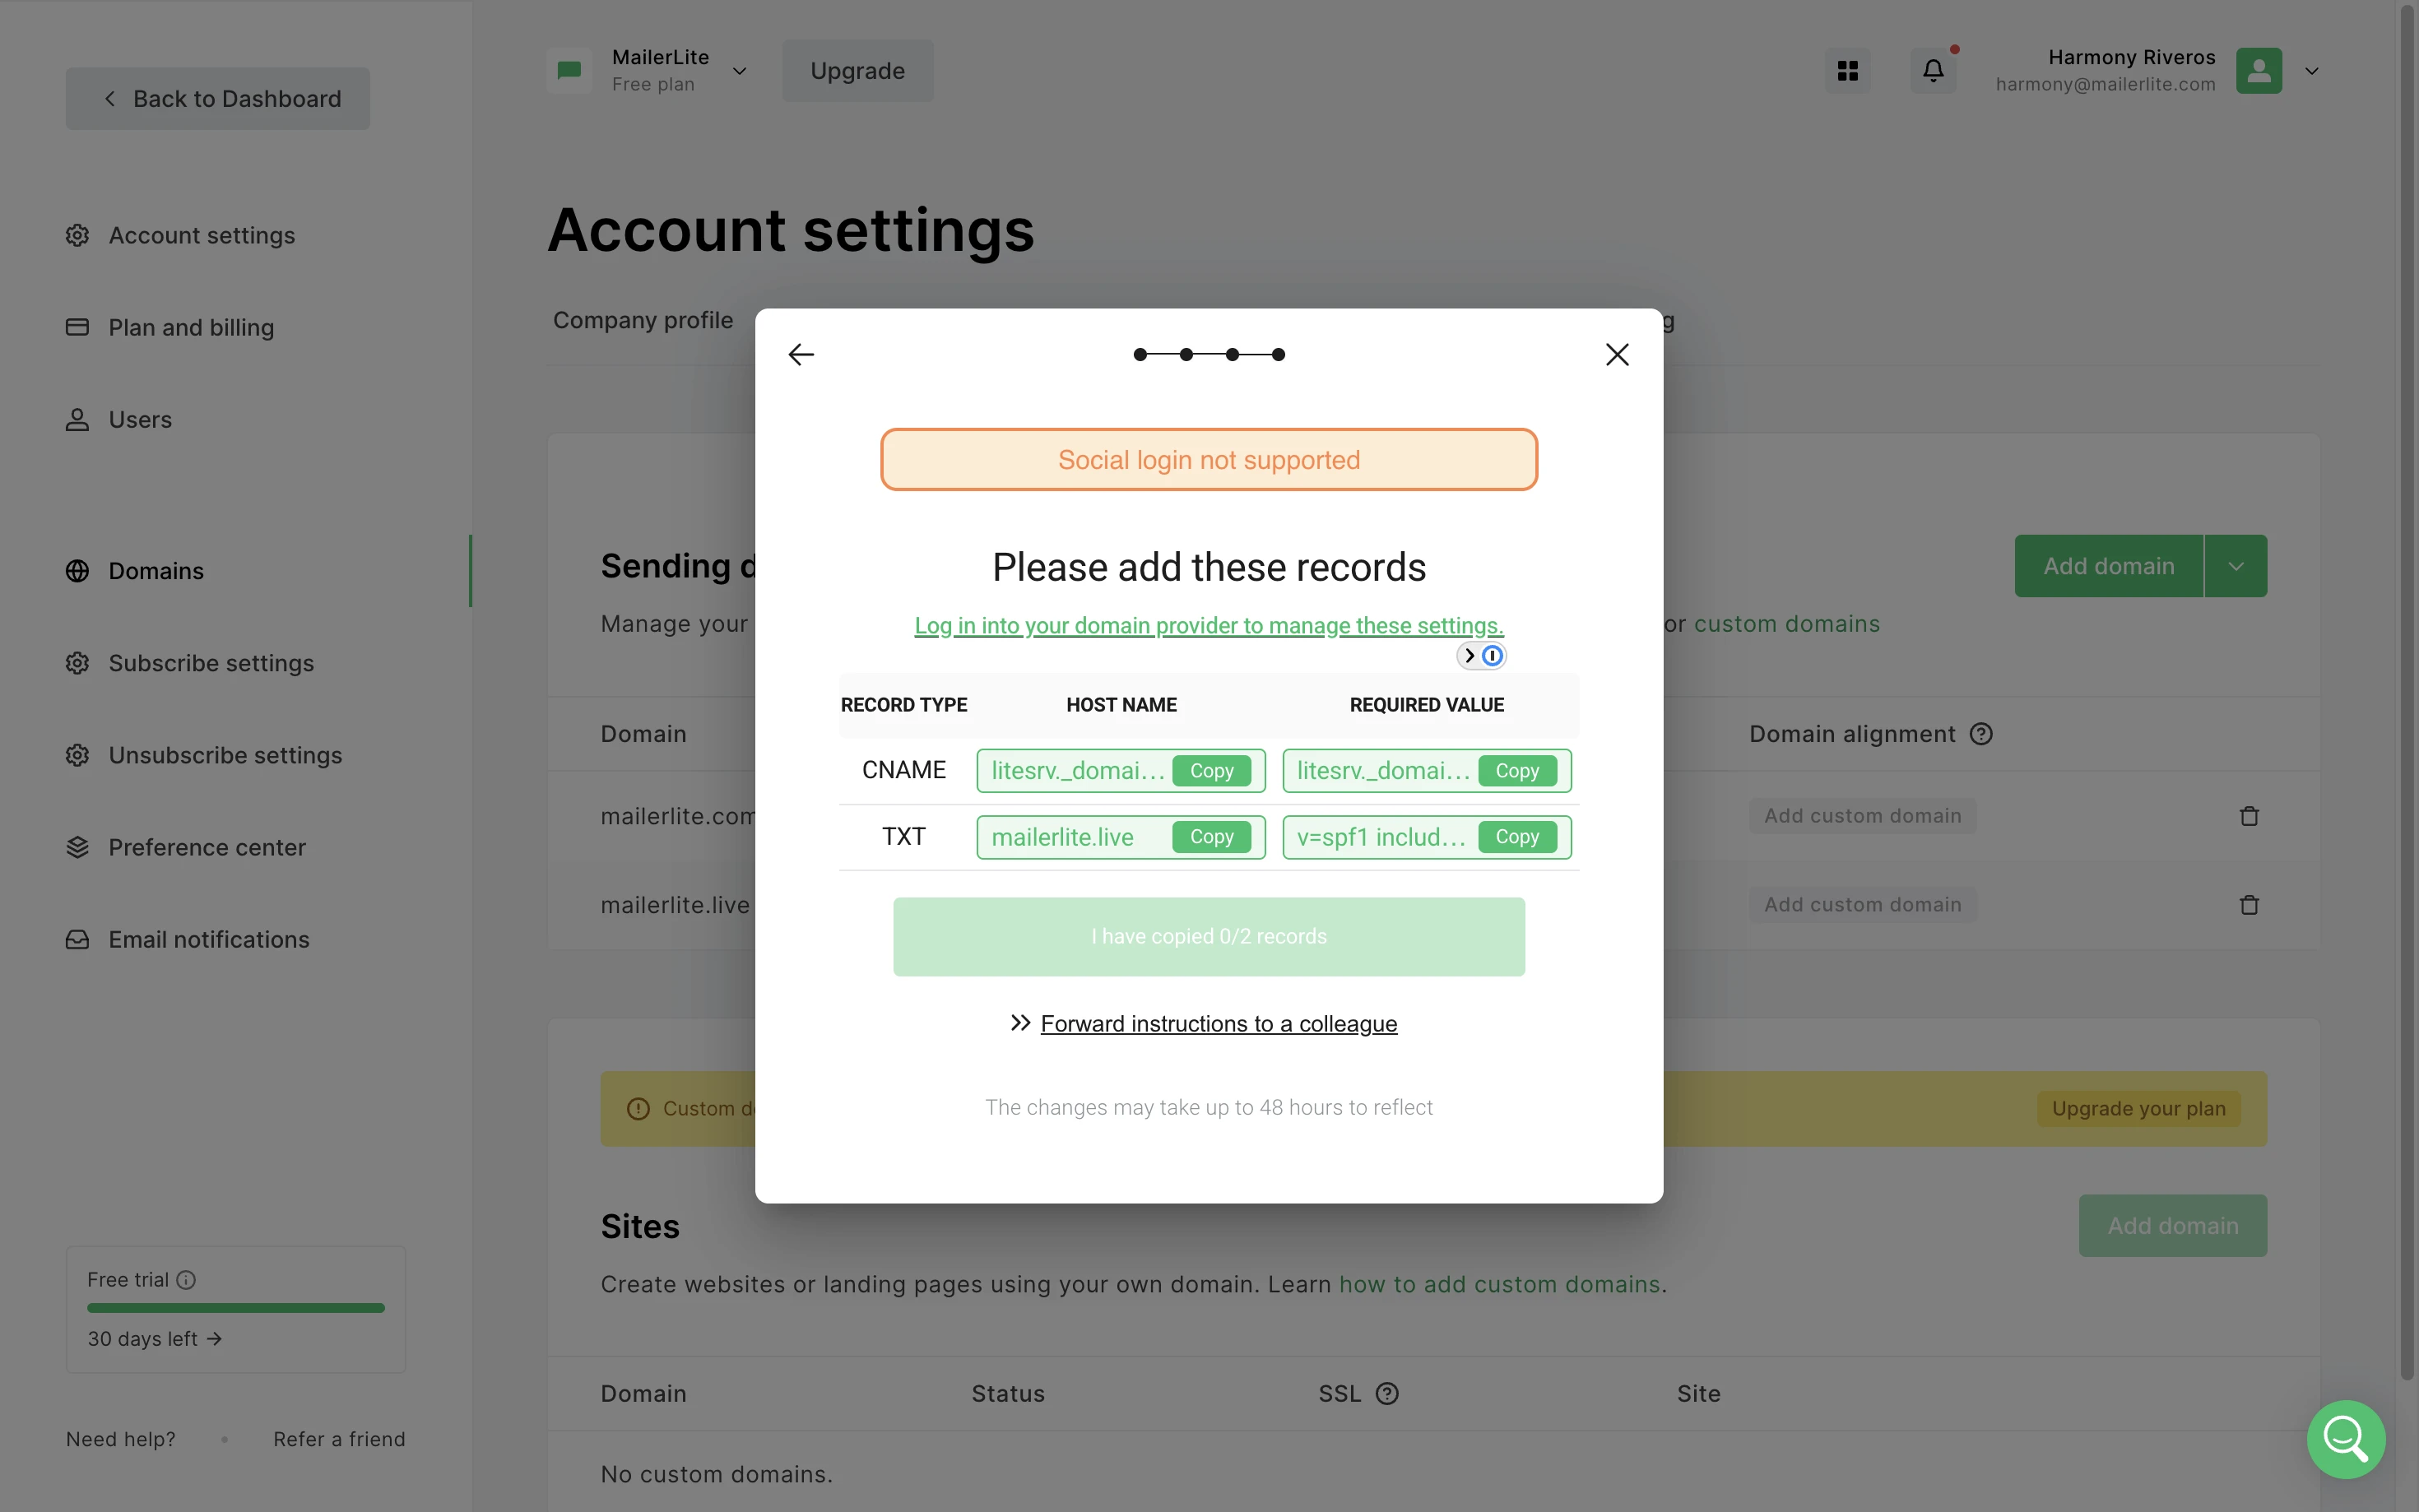
Or, you can choose Show added DNS records to manually view and add the records. Keep in mind, if you use a social login (such as Gmail) to login into your hosting provider, you will need to choose the manual authentication option, as this type of login is not supported.
3. Next, follow the steps to authorize MailerLite to configure your DNS and add the necessary records.
4. Once the DNS configuration is successful, you will be redirected back to MailerLite. Refresh the page to see the updated status of your domain.
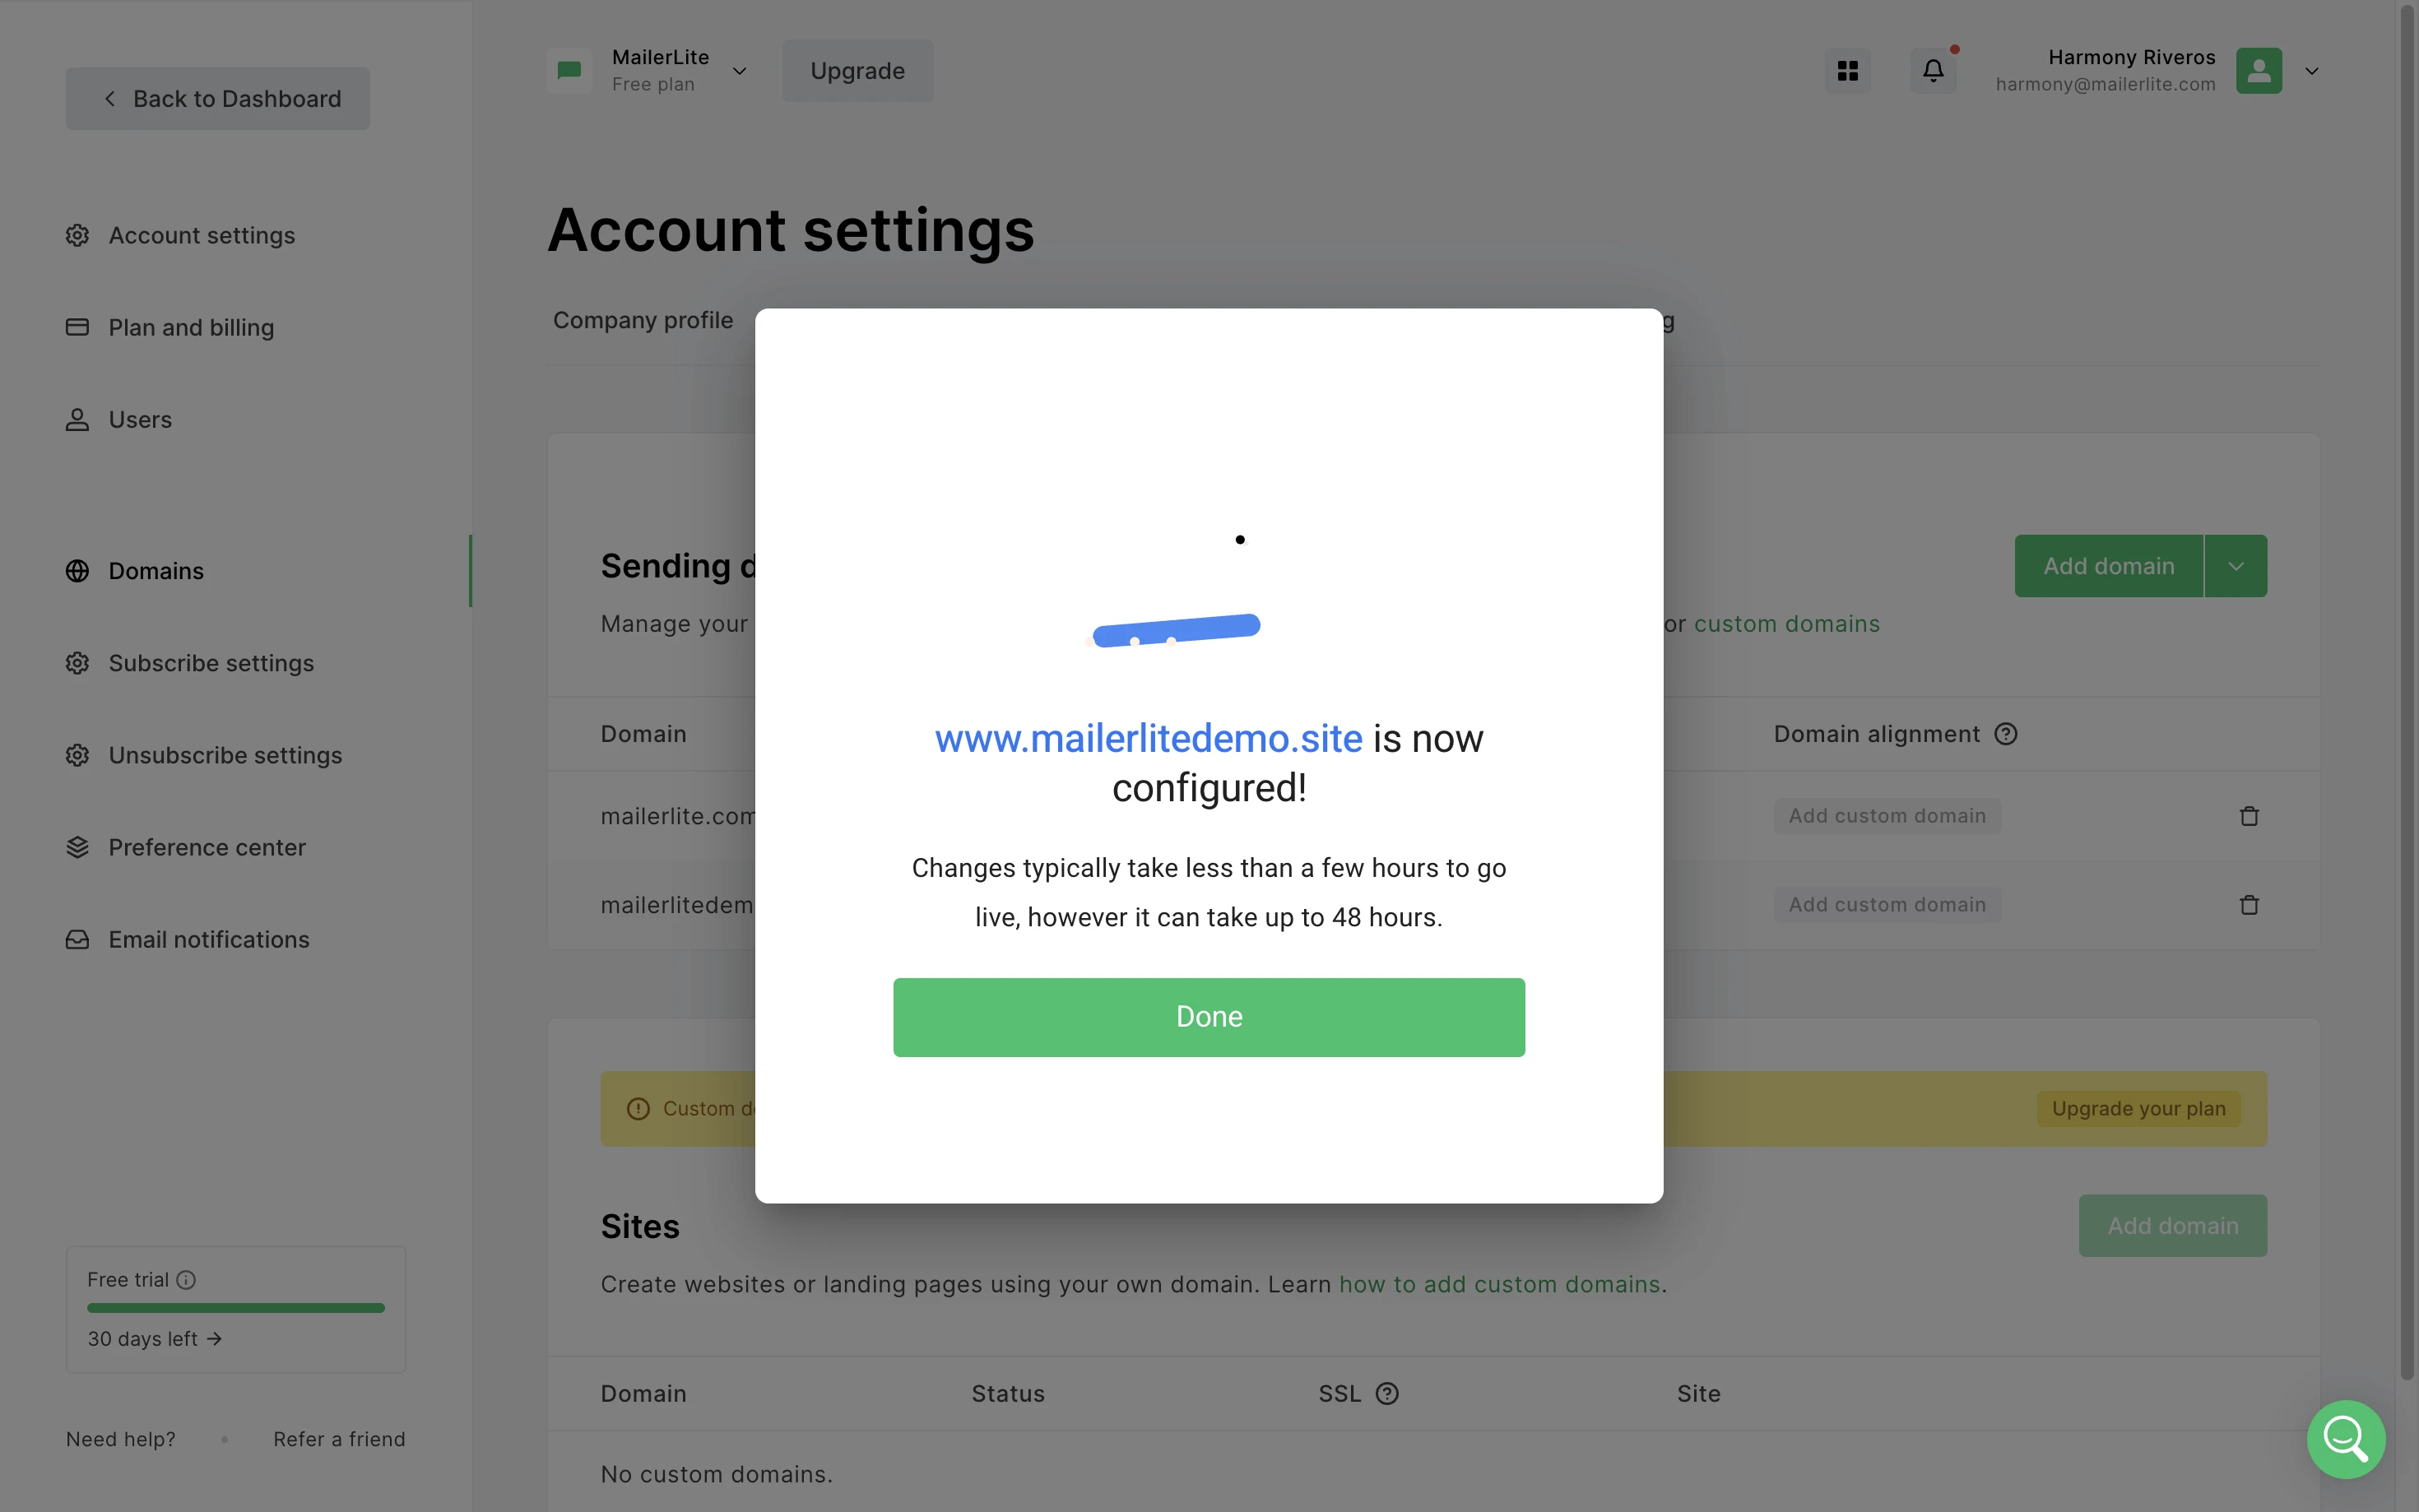
The domain may show as authenticated right away, or it can take up to 24 hours. In this case, you will see Pending next to your domain.
How to use the manual authentication setup
If your domain is not detected using the above method, we've got you covered with manual domain authentication.
Log in to the Bluehost dashboard and select a domain.
Navigate to Domains.
Select the domain you are trying to connect to be taken to the domain settings page.
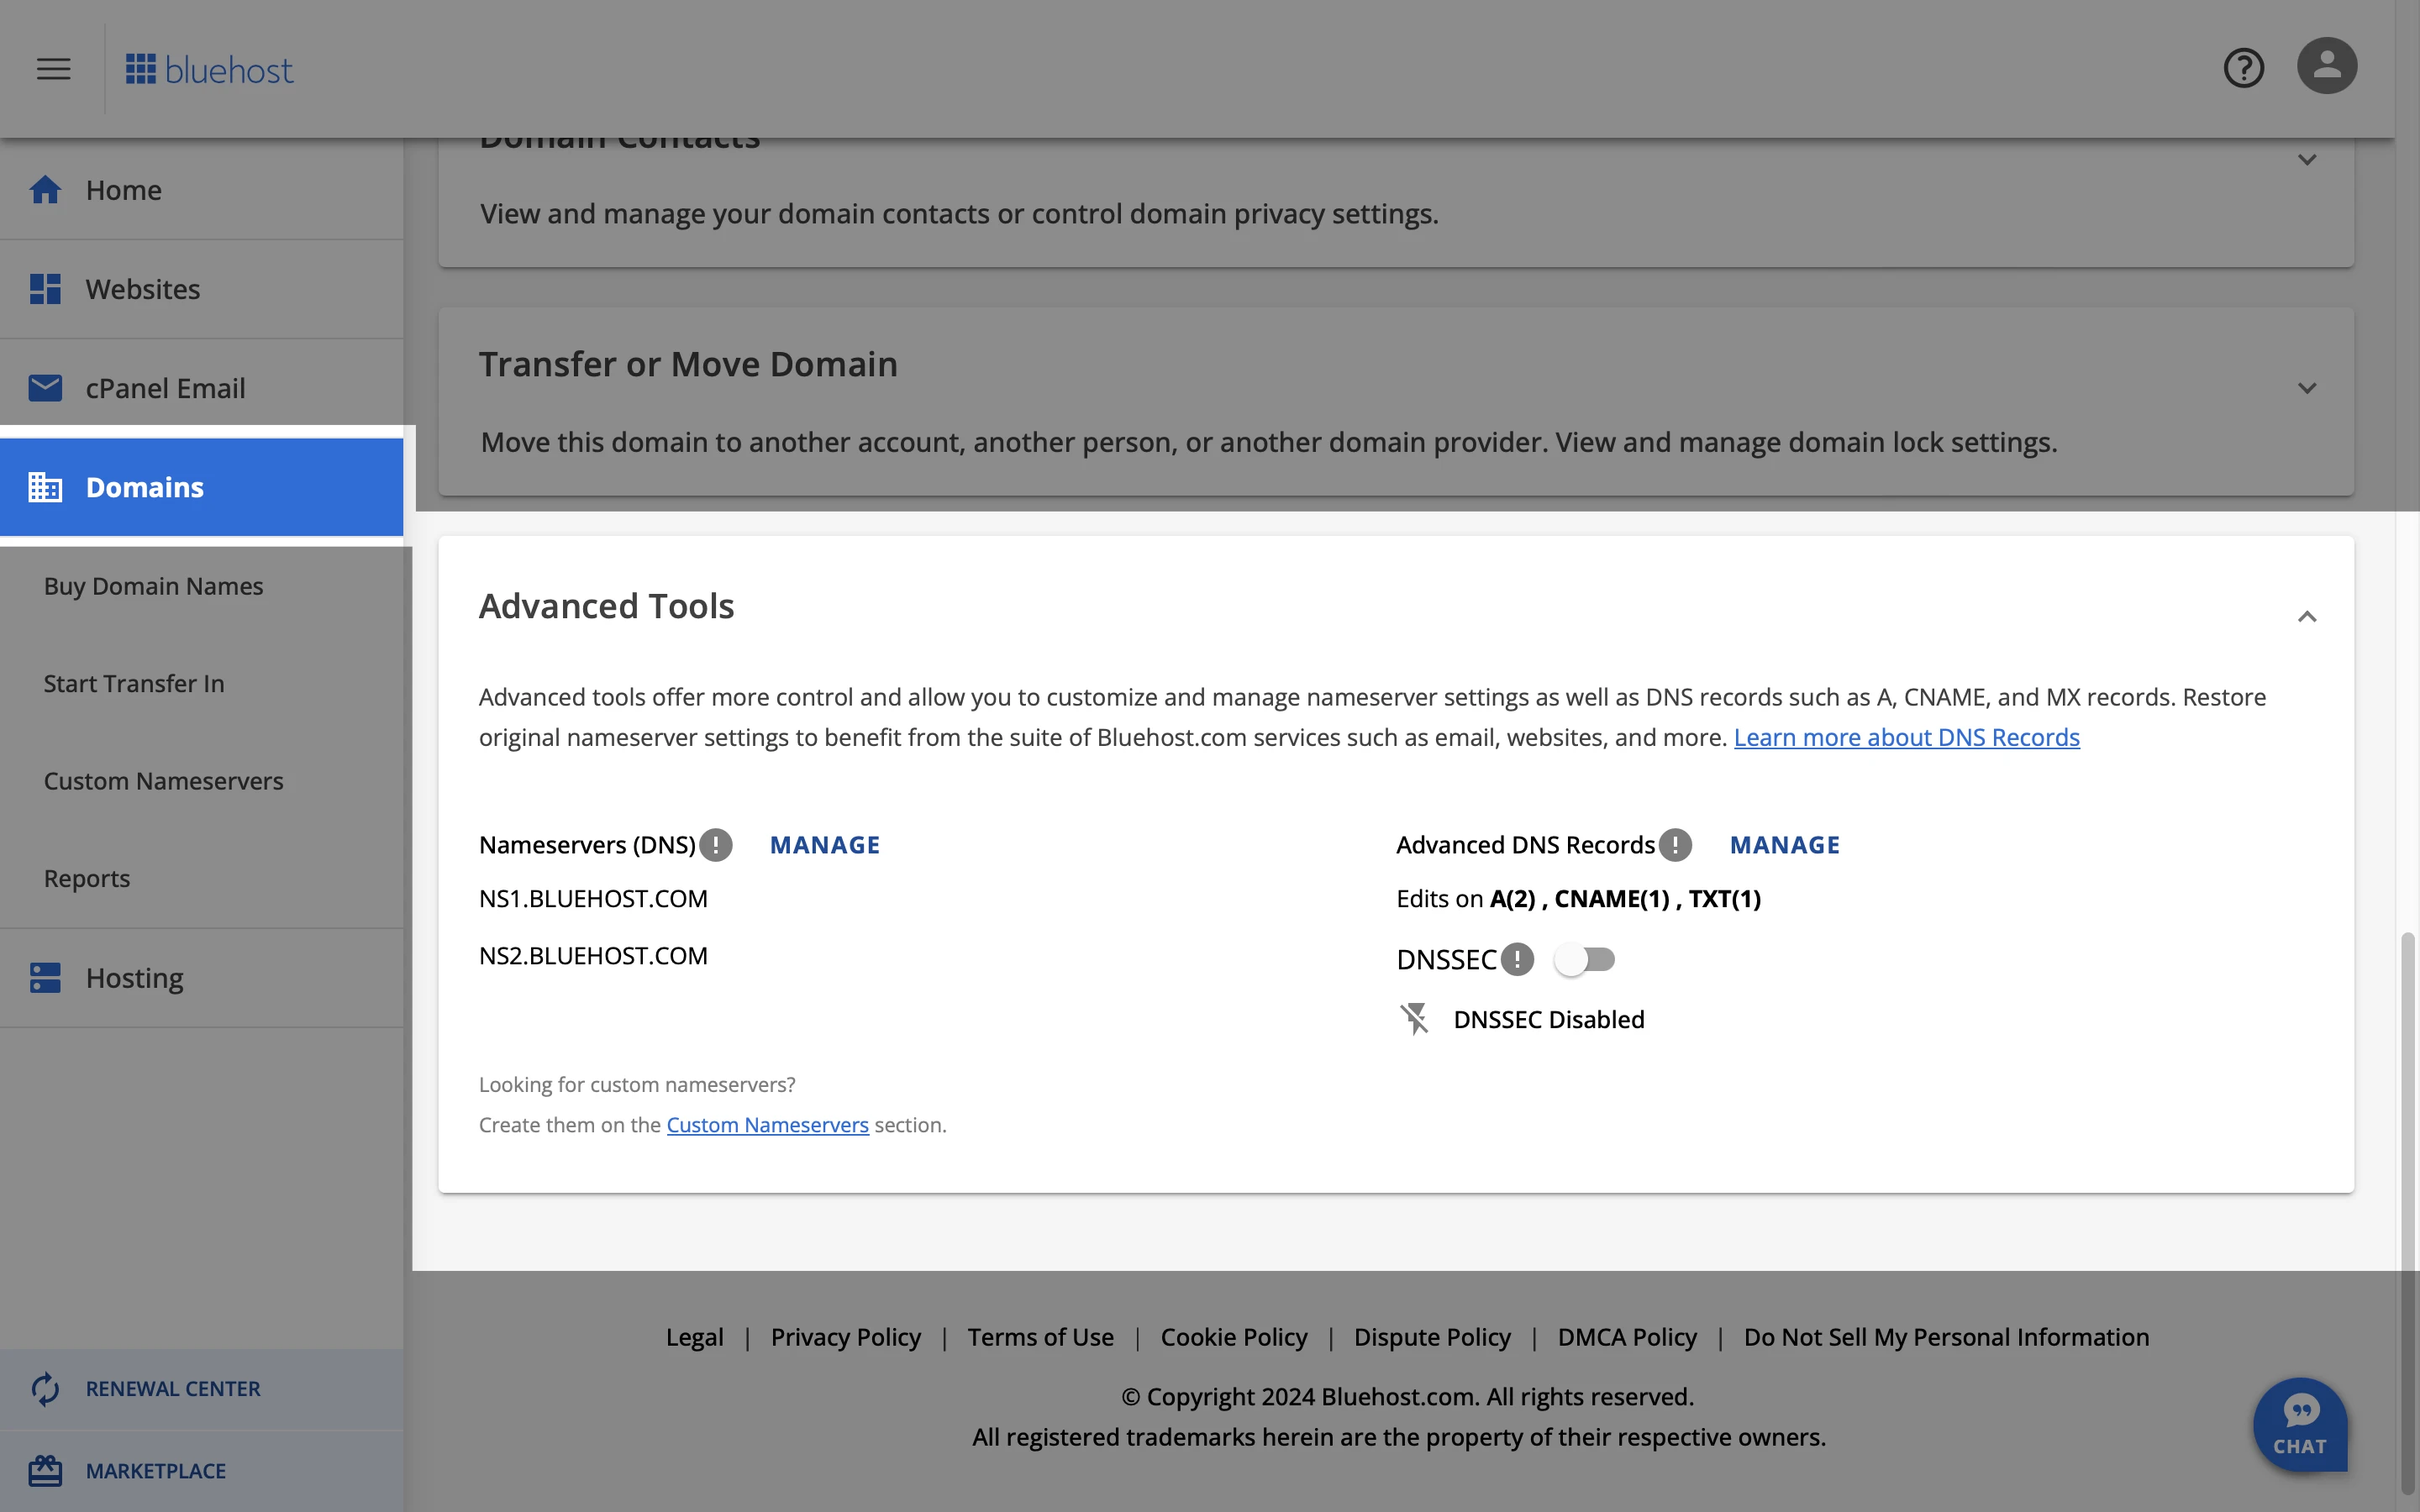
Scroll down to Advanced Tools.
Click Manage next to Advanced DNS Records.
How to add the DKIM record
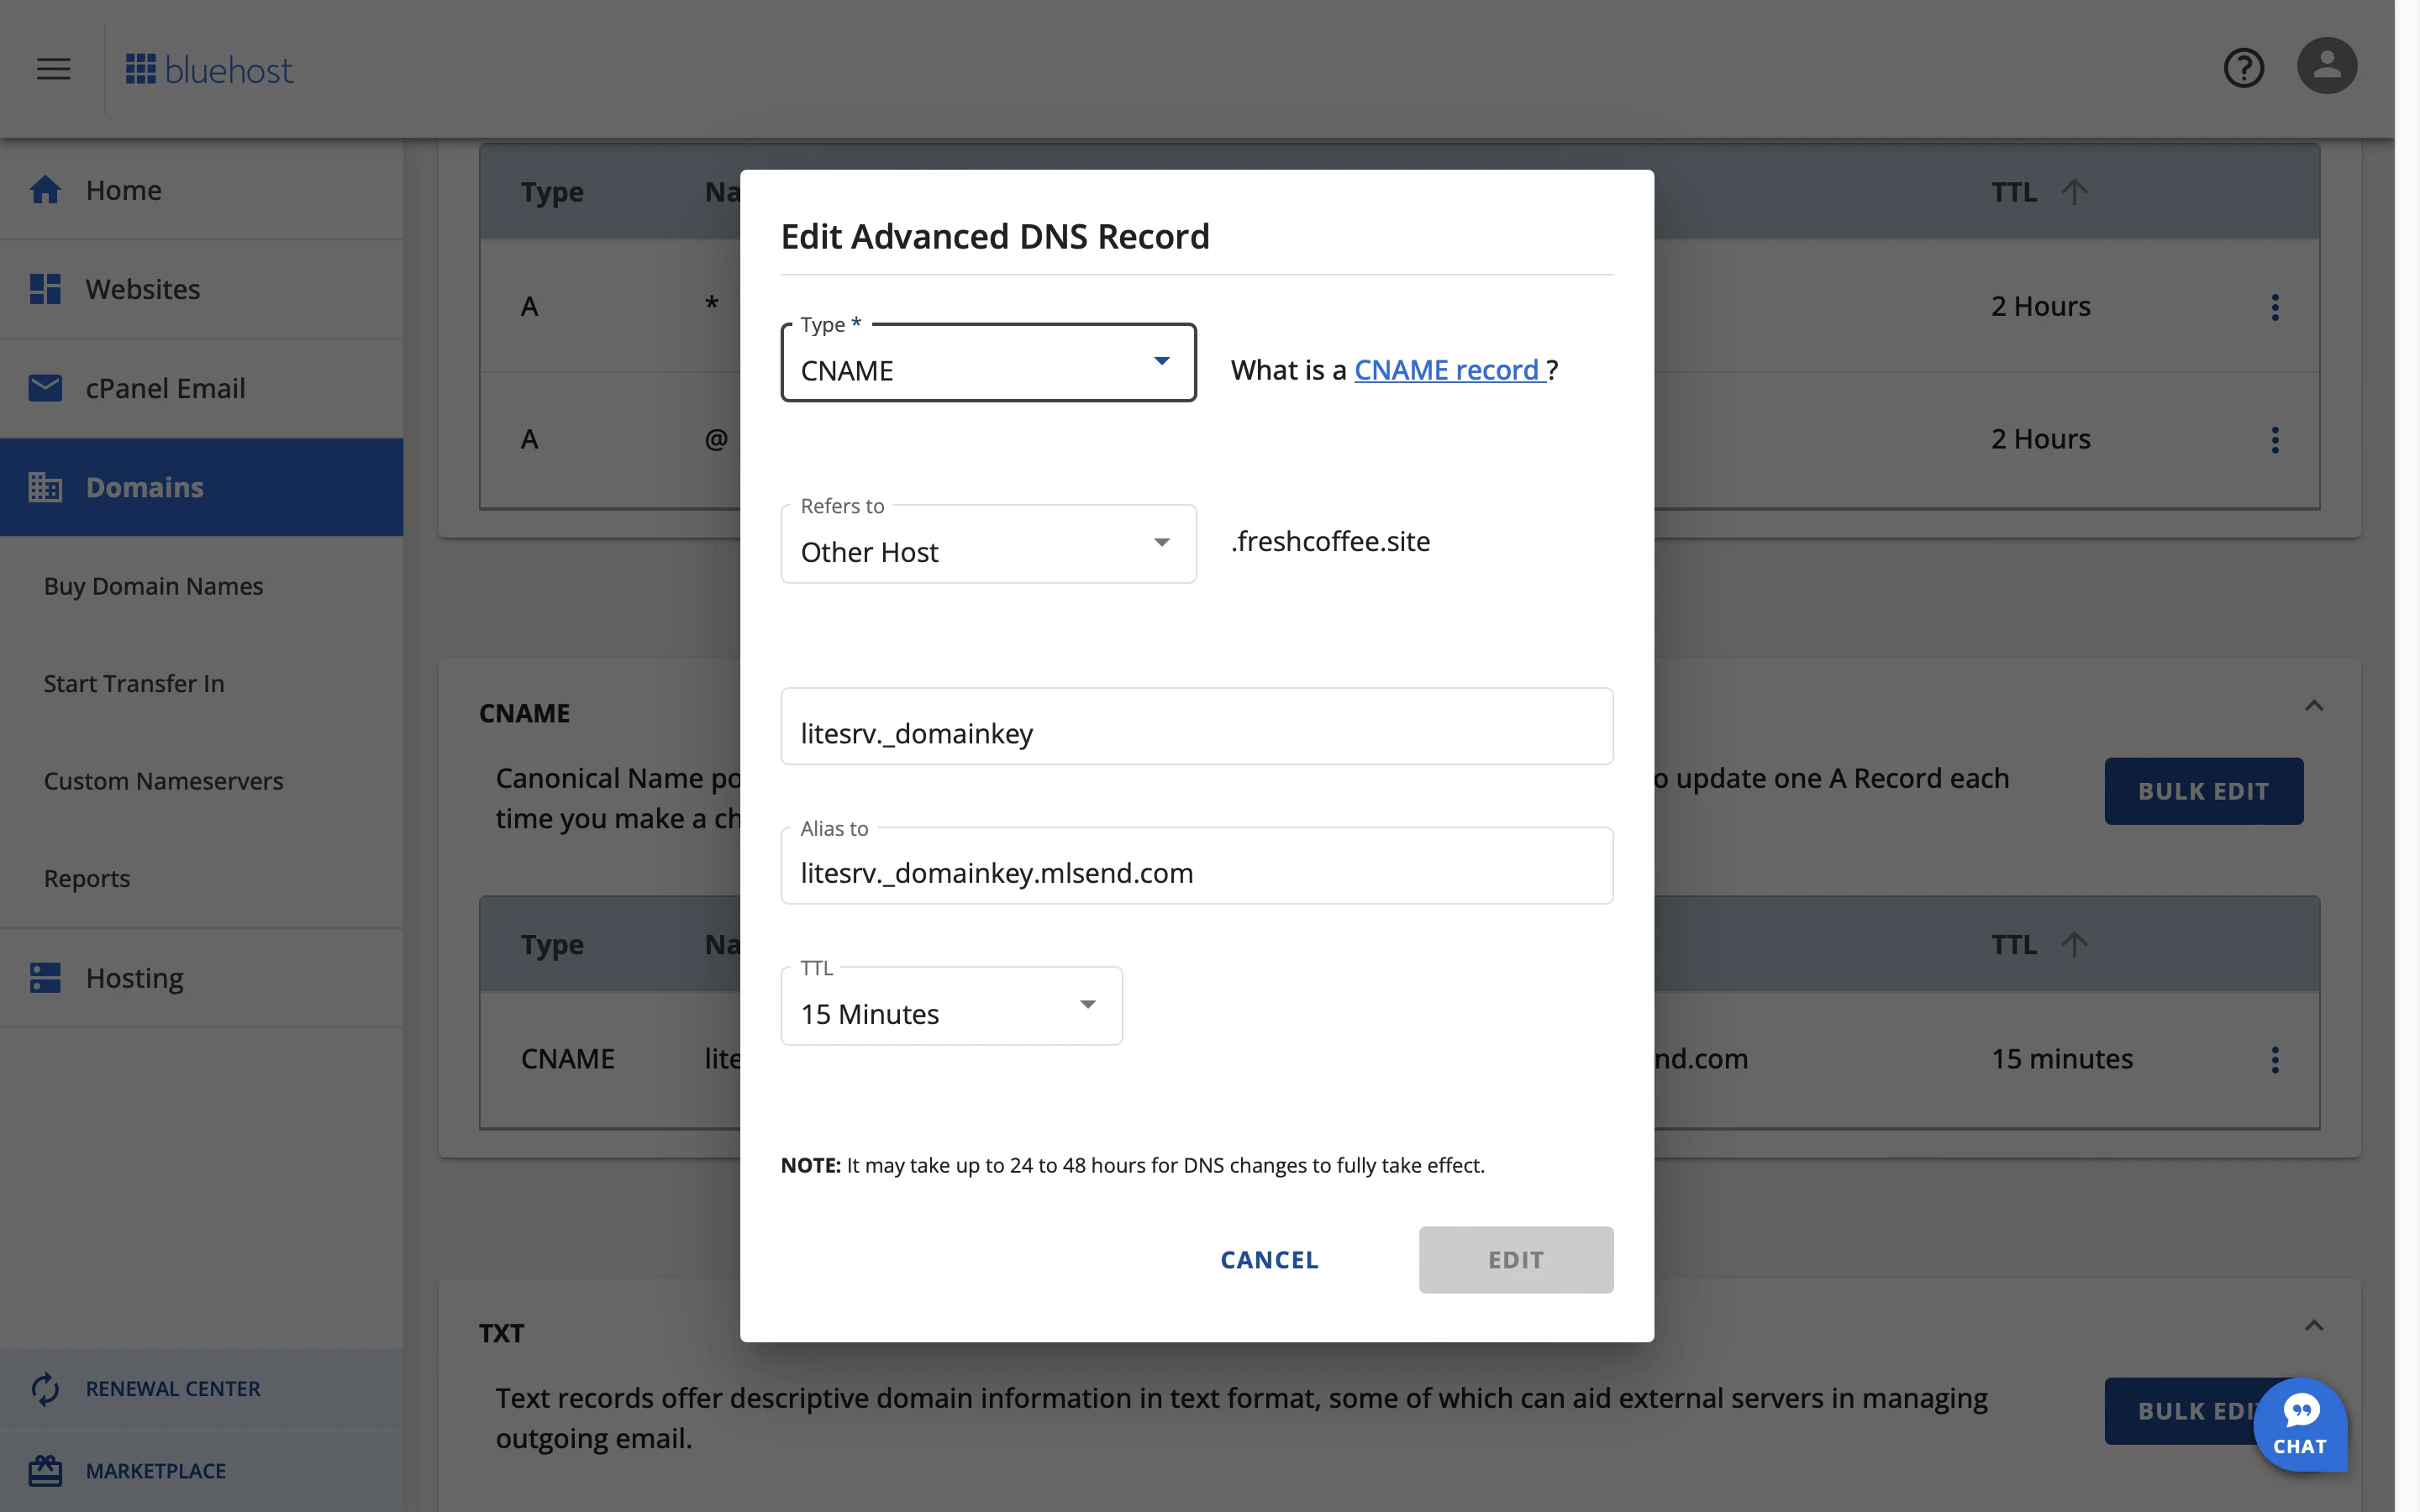
Click + Add record.
Select the type as CNAME.
In the Refers to field, select Other Host.
In the below field, enter litesrv._domainkey (leaving out your domain).
In the Alias to box, enter litesrv._domainkey.mlsend.com.
Click Add.
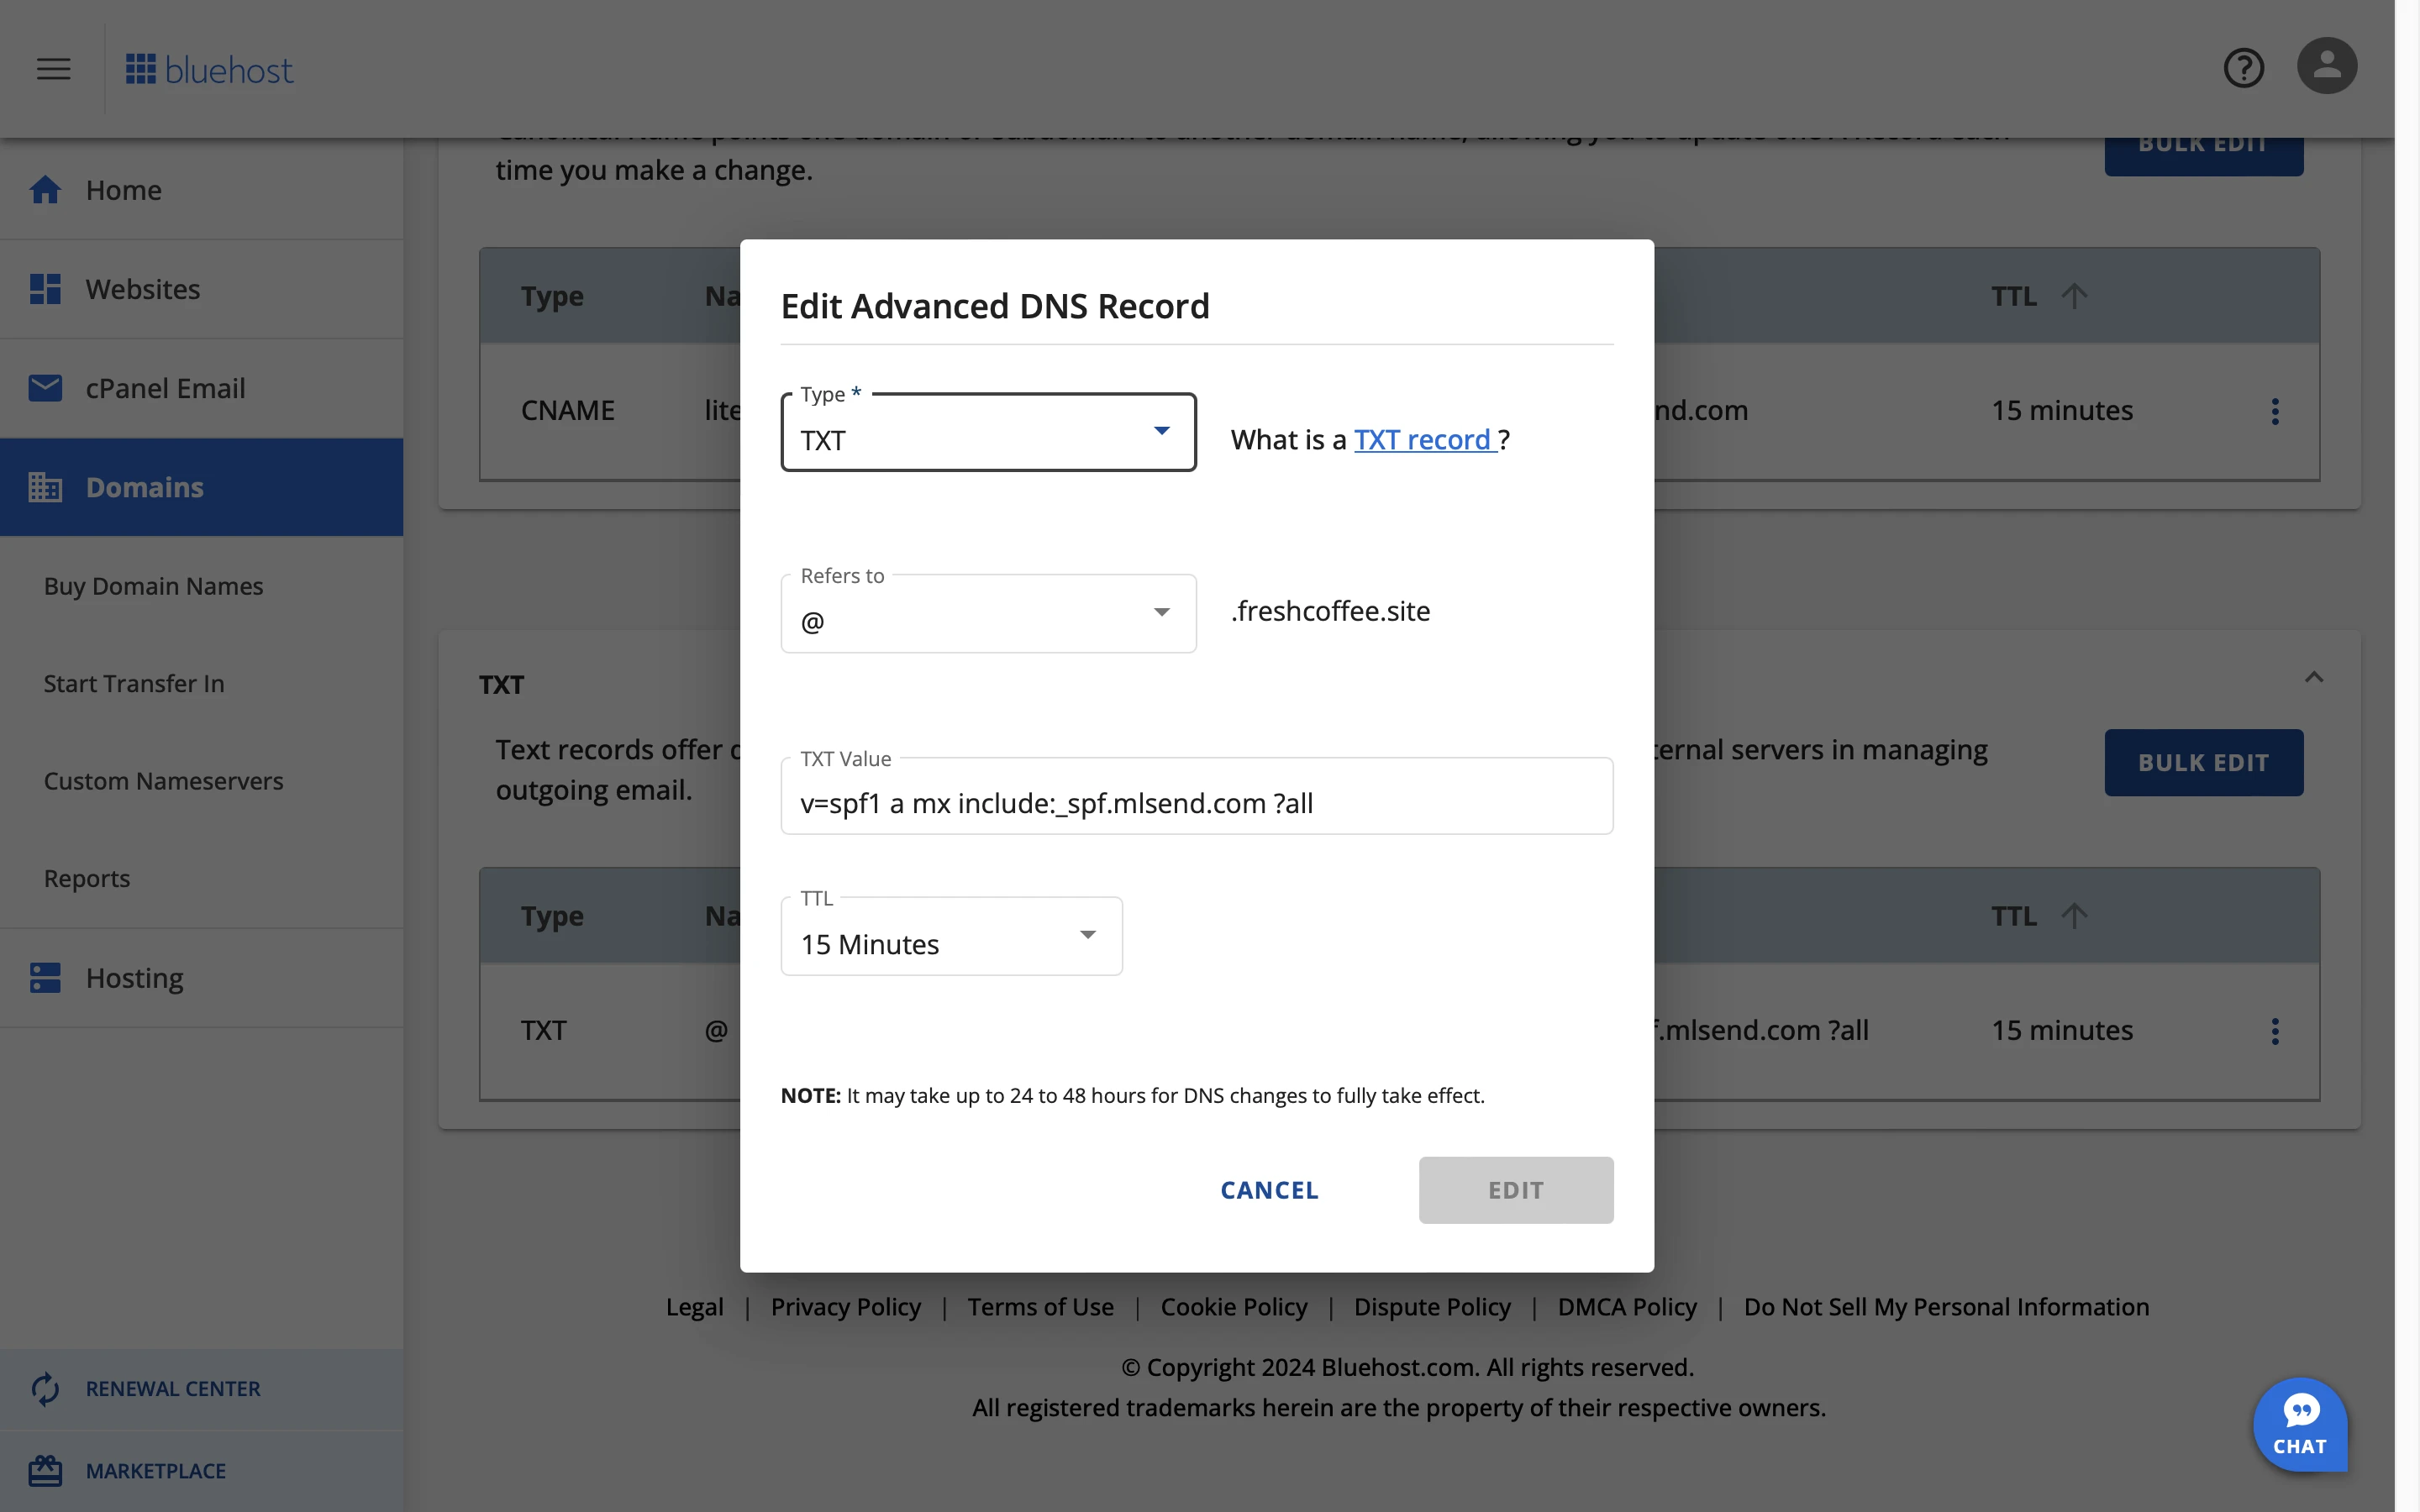
How to add the SPF record
Within the same DNS page, click + Add record again.
Select the TXT type.
In the Refers to field, enter @
In the TXT Value box, paste the SPF Value text that is given to you in your MailerLite account.
Adjust the TTL to 15 minutes.
Click Add.
Head back to your MailerLite Domains page and click on the green Check DNS records button on the domain authentication window. Once both records are approved, your new domain will be displayed as Authenticated ✅.
🛠️ Need help? For solutions to common issues, check our guide Troubleshooting: Domain authentication.
Please note: If you have any questions, we encourage reaching out directly to the support team of your hosting provider for better assistance.


