Collect subscriber information effortlessly by integrating your Squarespace forms directly with your MailerLite account.
💡 Important
For the Squarespace and MailerLite integration to function correctly:
Your Squarespace site must be on a Business or Commerce plan. The integration features, including the essential Code Injection capability, are not available on Personal plans.
Your site must be live and not in maintenance mode.
Getting started
In MailerLite:
Navigate to Integrations.
Locate Squarespace and click Use.

3. Choose the group(s) in MailerLite that your Squarespace subscribers should be added into.
4. Copy the Javascript code provided.
In Squarespace:
Choose the site you would like to integrate with MailerLite forms.
Open the Code Injection panel. Or, go to Website > Utilities > Website Tools > Code Injection.
Paste the provided JavaScript snippet into the Header section.

4. Click Save.
Return to your site editor in Squarespace. You can now add subscriber forms either through Blocks (choosing Newsletter or Forms) or by adding a new section that includes any form with an opt-in checkbox.
Adding subscriber forms to your Squarespace site
Once the JavaScript snippet for the MailerLite integration has been successfully injected into your Squarespace site, the next step is to add subscriber forms.
To begin:
Navigate to the page editor and select the page where you wish to add the subscriber form. This could be your homepage, a dedicated subscription page, or any other relevant section of your site.
Add a block. Click on a point where you'd like to add the form. Squarespace will present you with different block options.
Choose your block:
For newsletters: Select the Newsletter block for a straightforward subscription form. This block is designed specifically for capturing email addresses and integrating them with mailing lists.
For custom forms: Choose the Form block for more detailed forms. This option allows you to add various field types, including name, email, and custom fields.
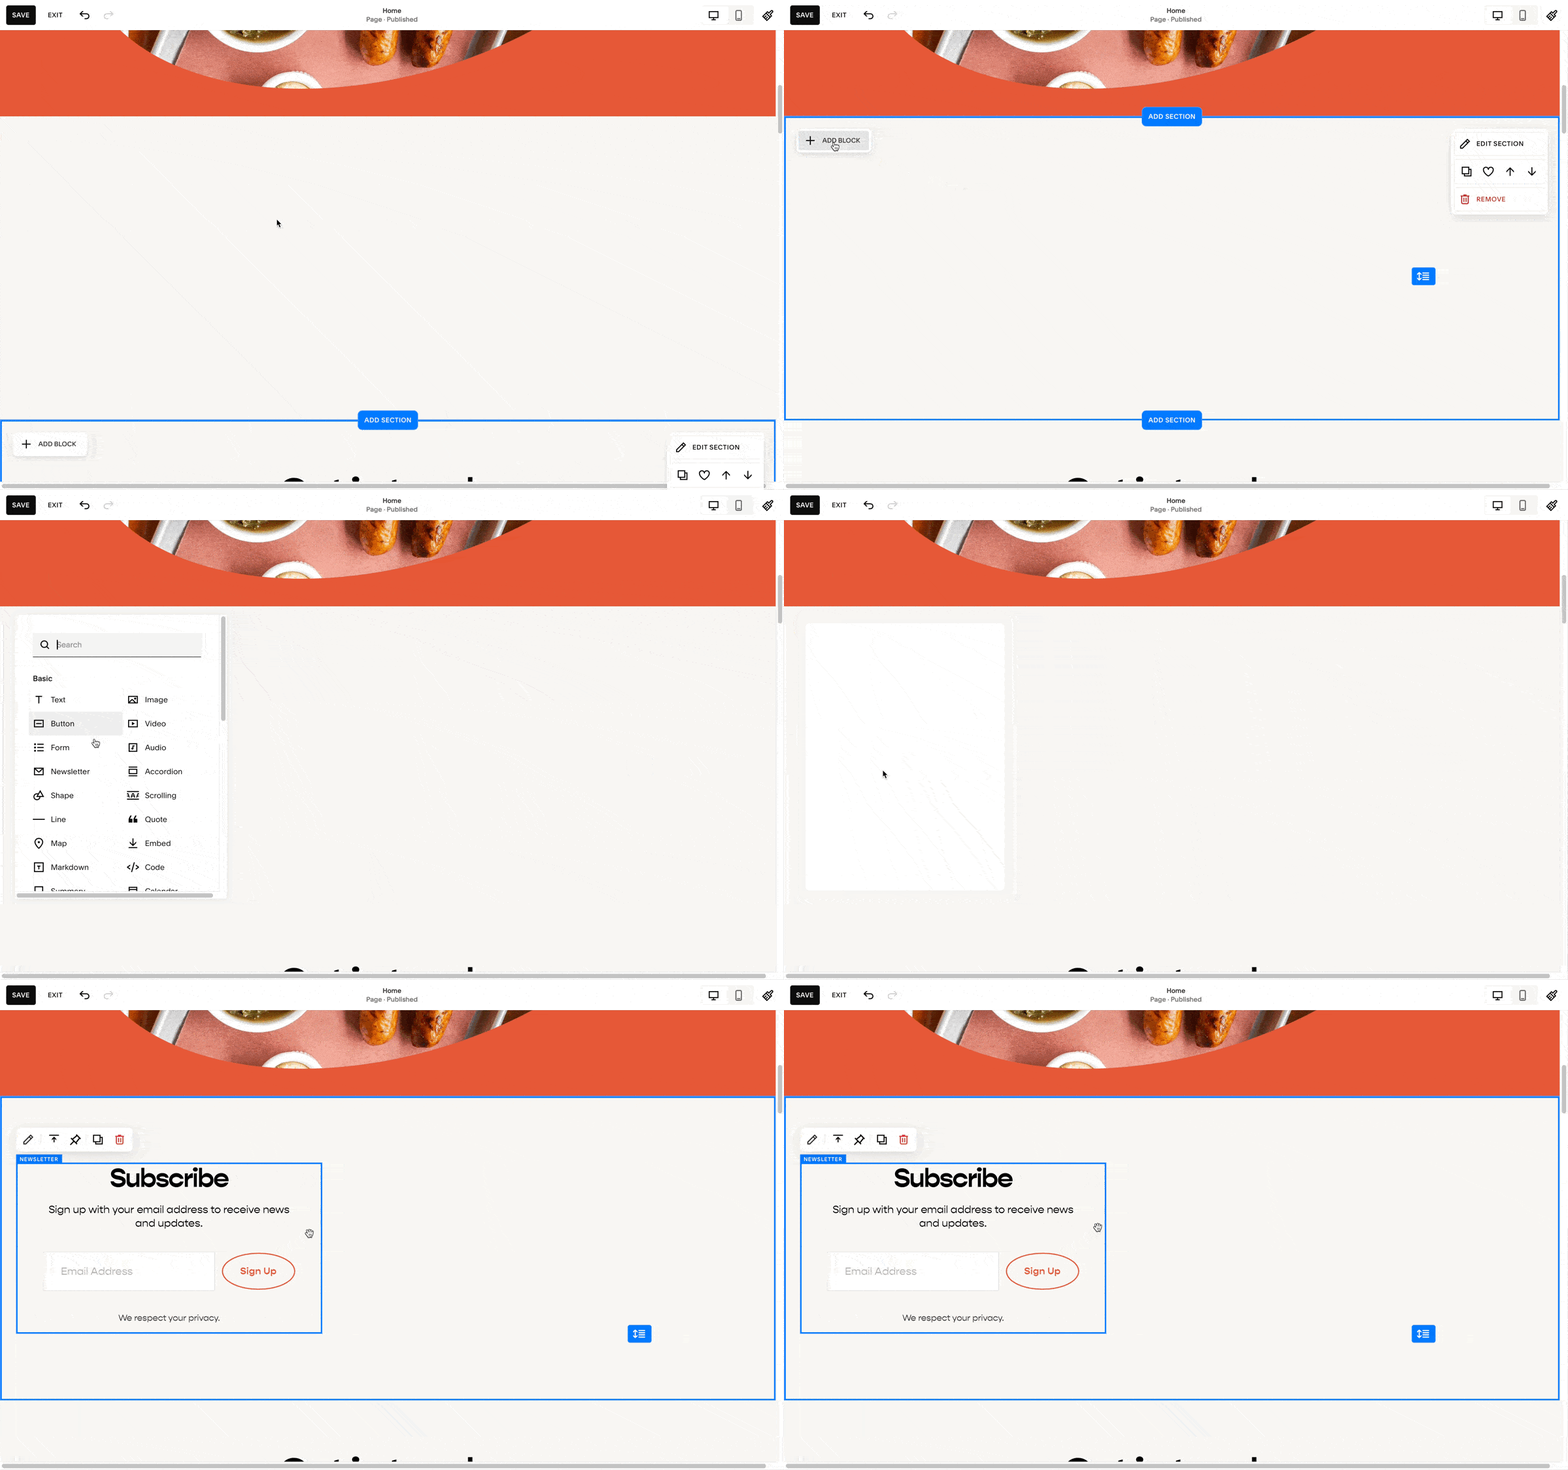
3. Customize your form. In the block settings, you can customize the form fields, button text, and post-submit message.
⚠️ Opt-in/signup checkbox required
The integration is designed to function with forms that include an opt-in/signup checkbox within the email field. This is important for complying with legal standards and for ensuring that subscribers actively consent to receive communications from you.
Many default forms provided within Squarespace section blocks do not include a signup checkbox by default. It's crucial to manually add this checkbox to your forms to enable the integration.
Adding a new section with a form
1. On the page you're working on, switch to Edit mode to modify content.
2. Use the + icon to add a new section.
3. Squarespace offers various pre-designed section templates that include forms. Choose one that fits your site's design and your needs. Be sure to incorporate an opt-in checkbox to the email field.
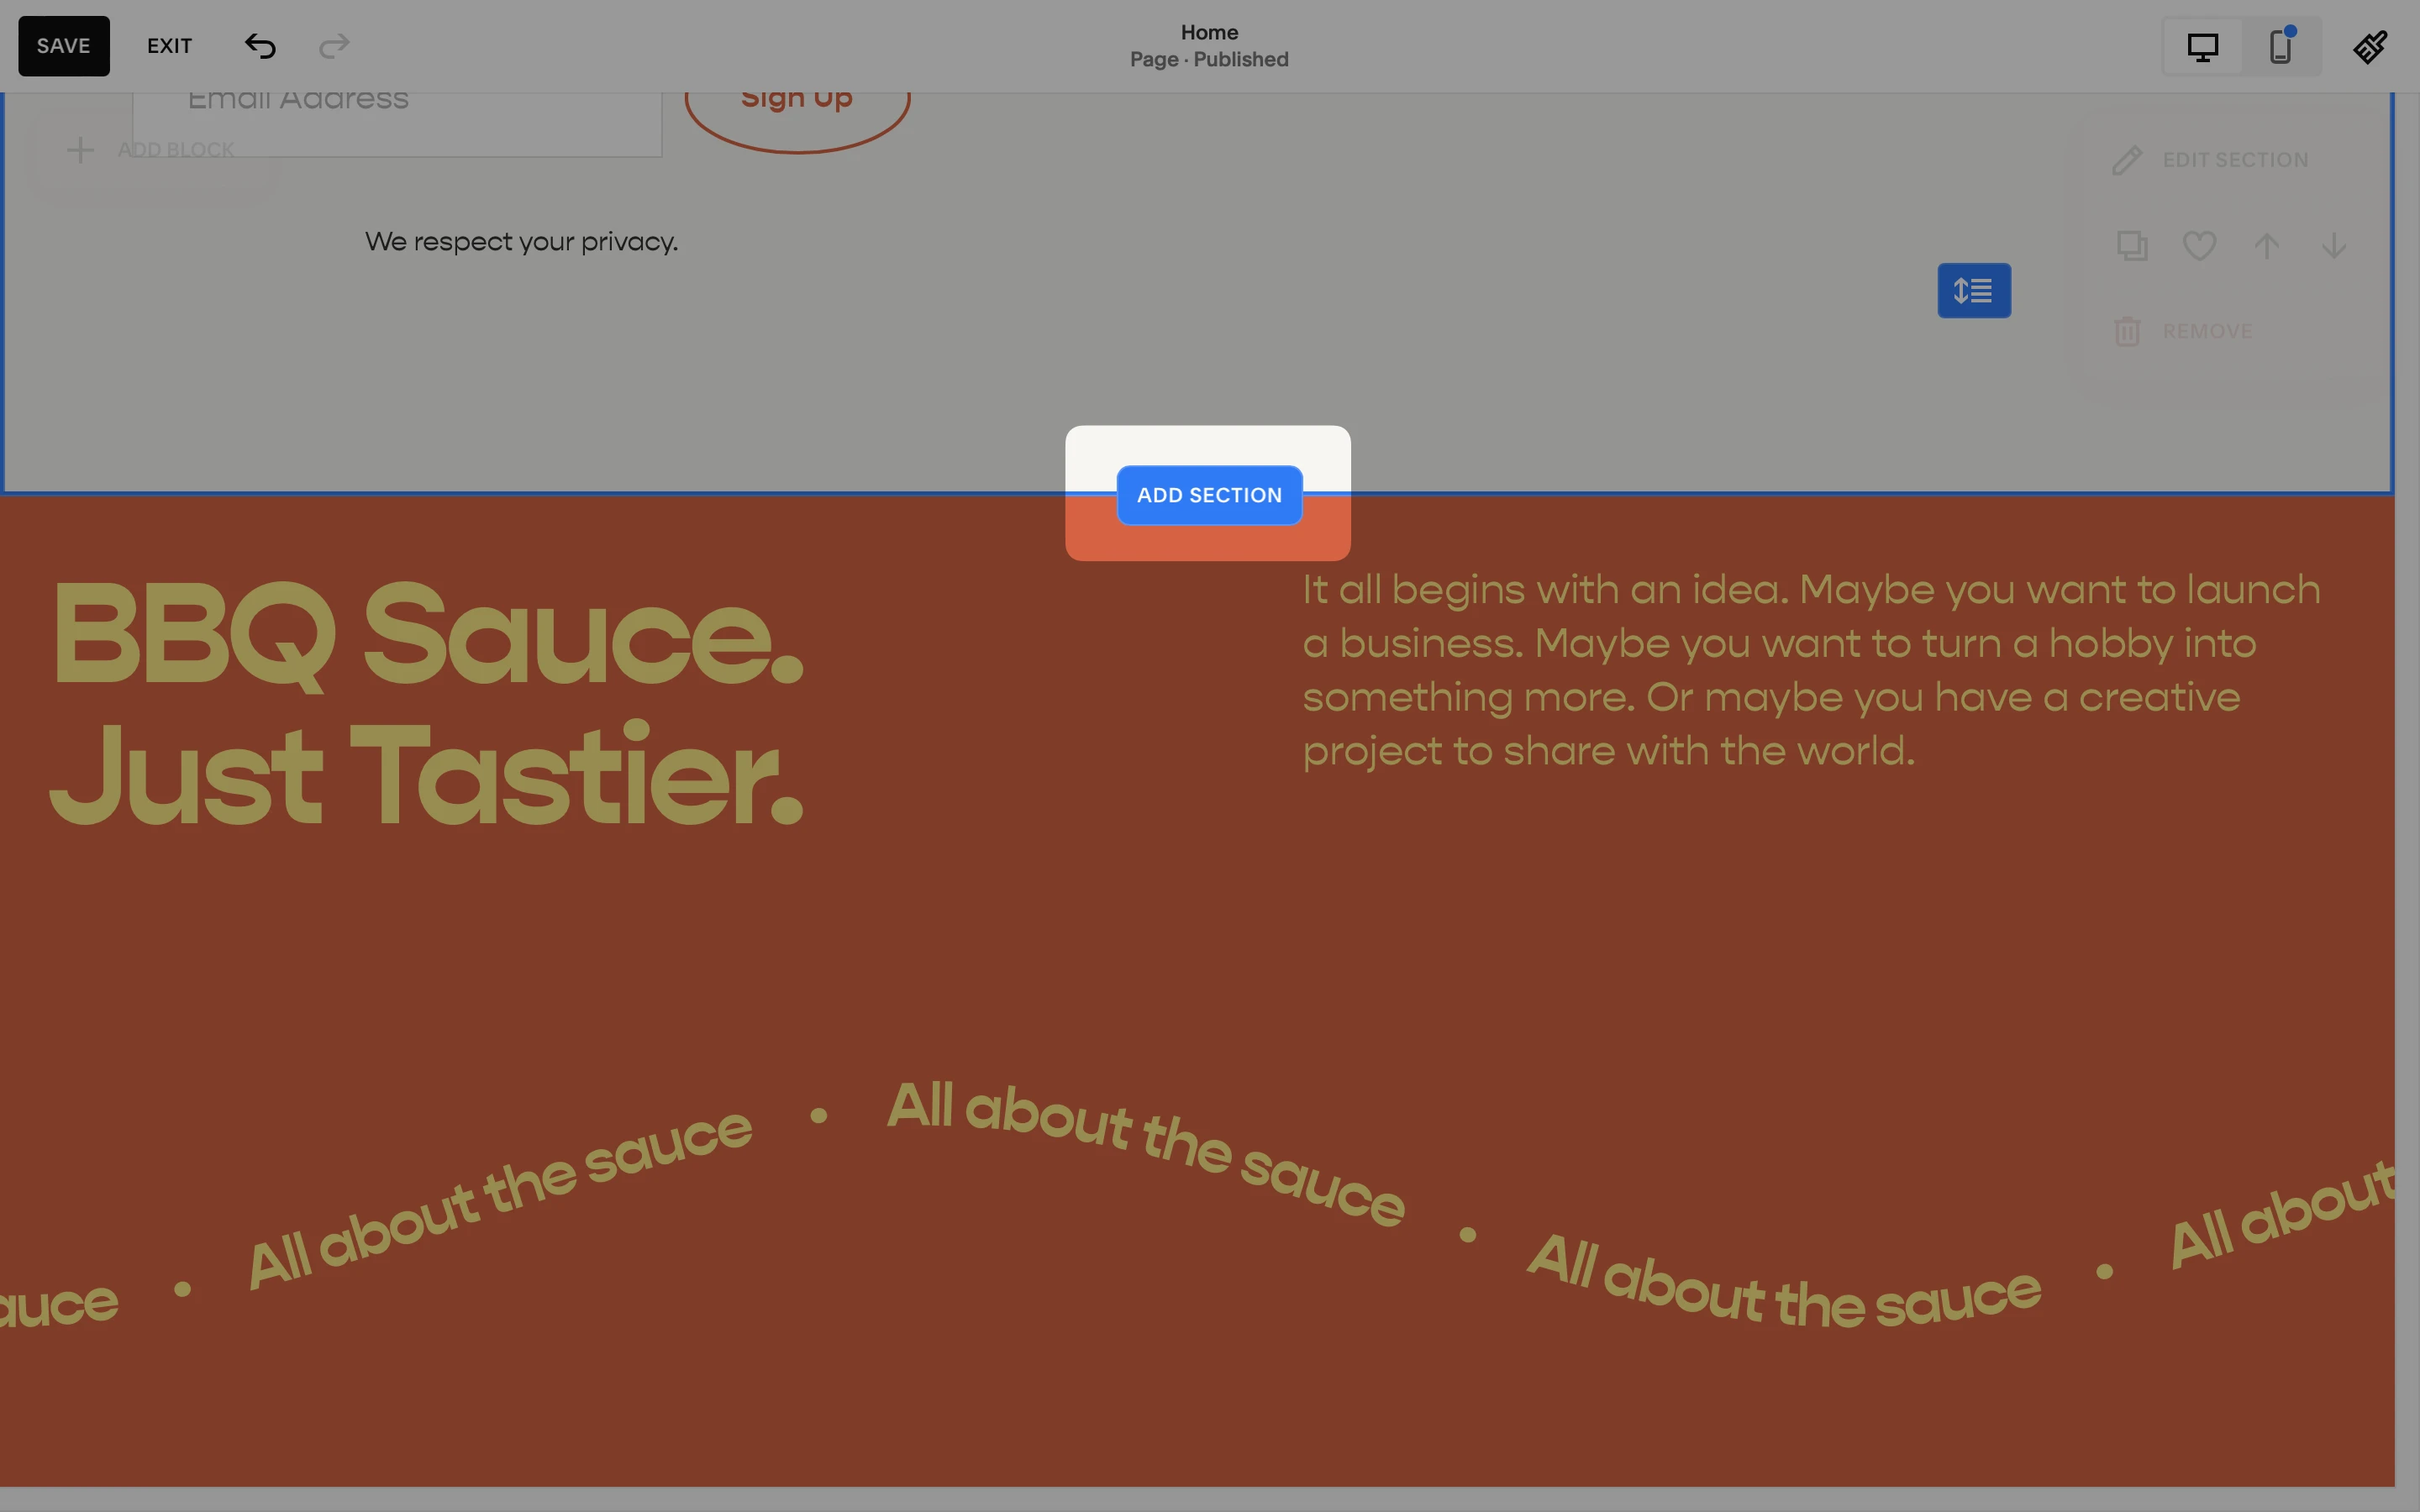
4. Like with the blocks, customize the form's fields, appearance, and submission settings to match your requirements
⚠️ Field forms
The following fields can be added from your Squarespace forms to your MailerLite subscriber list:
First Name
Last Name
Email
Should your Squarespace form include additional fields (e.g., Subject, Message), these will not be transferred to MailerLite. However, the integration will still work if extra subscriber fields are present.
Using MailerLite pop-up forms in Squarespace
Once you have added the MailerLite Universal tracking script to your Squarespace site, you can easily add pop-up forms to your site.
First, create a new pop-up form in your MailerLite account and activate it.
After refreshing your Squarespace site, the form should appear based on its Visibility settings in MailerLite (e.g., display after 5 seconds). Data collected will sync to the designated subscriber group in MailerLite.
Have multiple forms?
Using the one MailerLite Javascript means if multiple forms are enabled in MailerLite, they will all display on your Squarespace site. To limit this, you can adjust the Visibility settings for each form in MailerLite by adding your Squarespace site’s URL.
Using MailerLite embedded forms in Squarespace
To add an embedded form that was created in your MailerLite account to your Squarespace website:
In MailerLite:
First, create a new Embedded form and enable it.
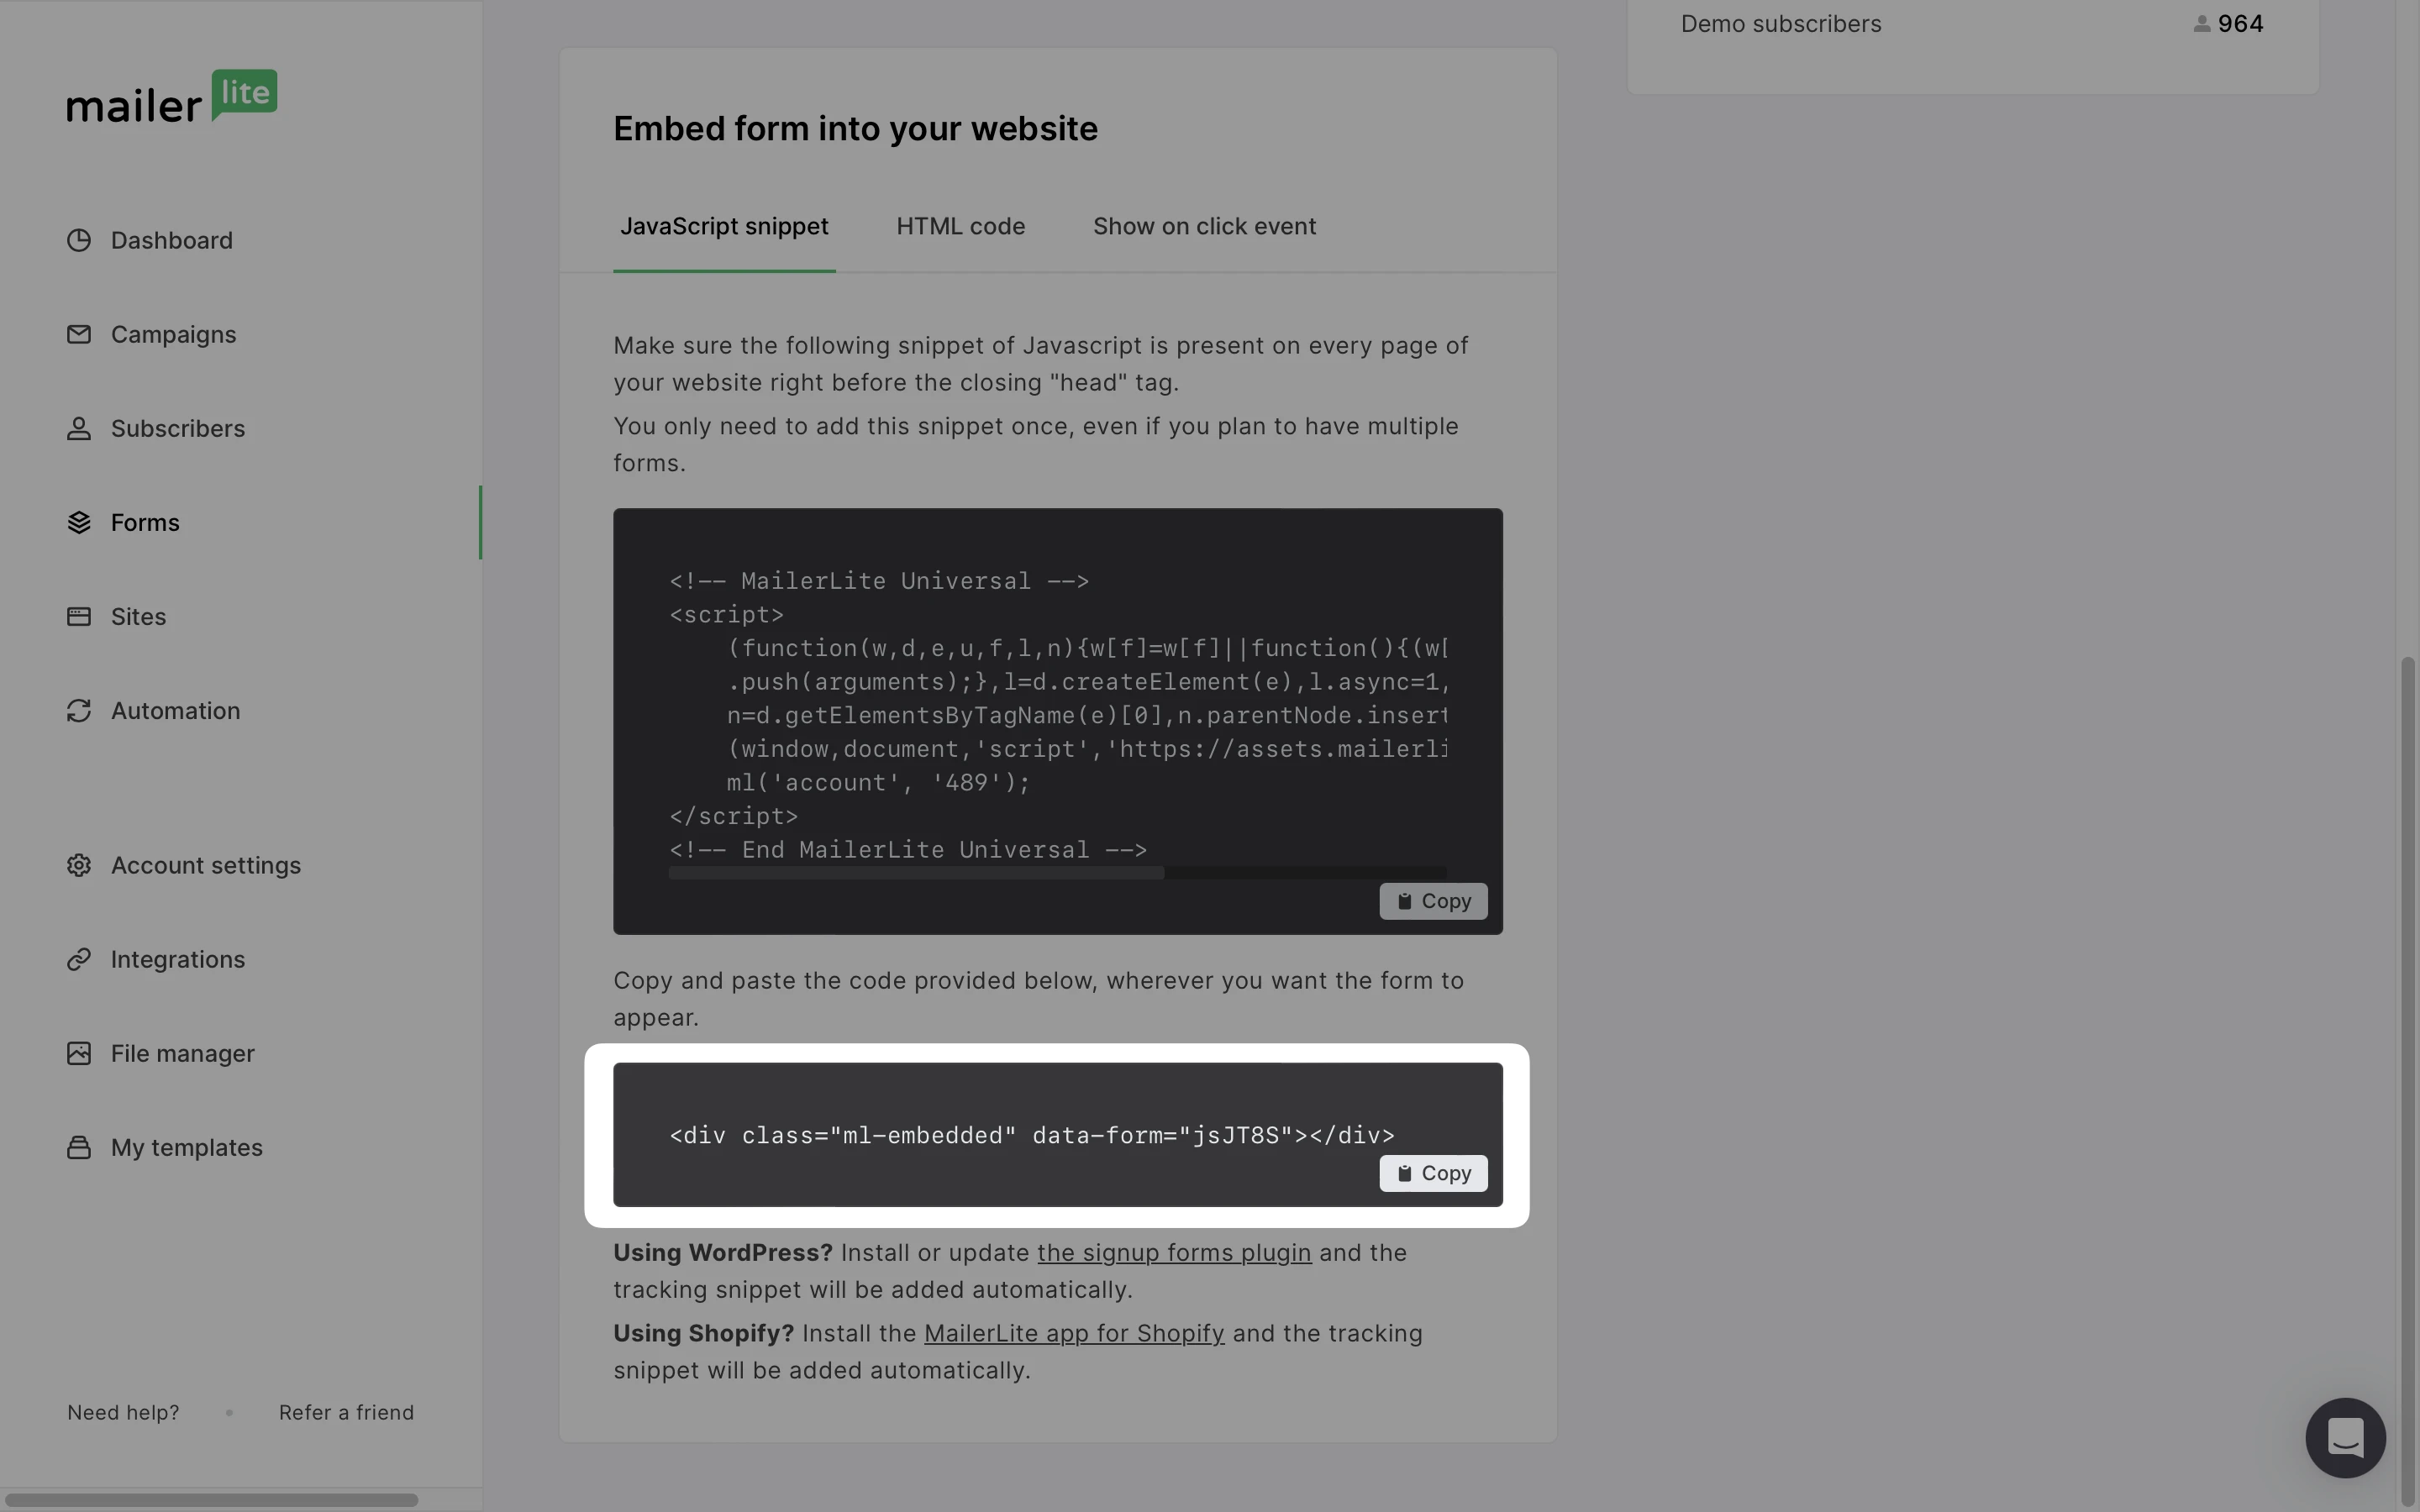
Scrolling down in the form Overview, you will see two Javascript snippets. The first begins with
<!-- MailerLite Universal -->
And the second is much shorter. Copy the second Javascript snippet.
In Squarespace:
1. Add a new Code box.
2. Insert the second Javascript snippet there. Ensure Display Source Code remains disabled.
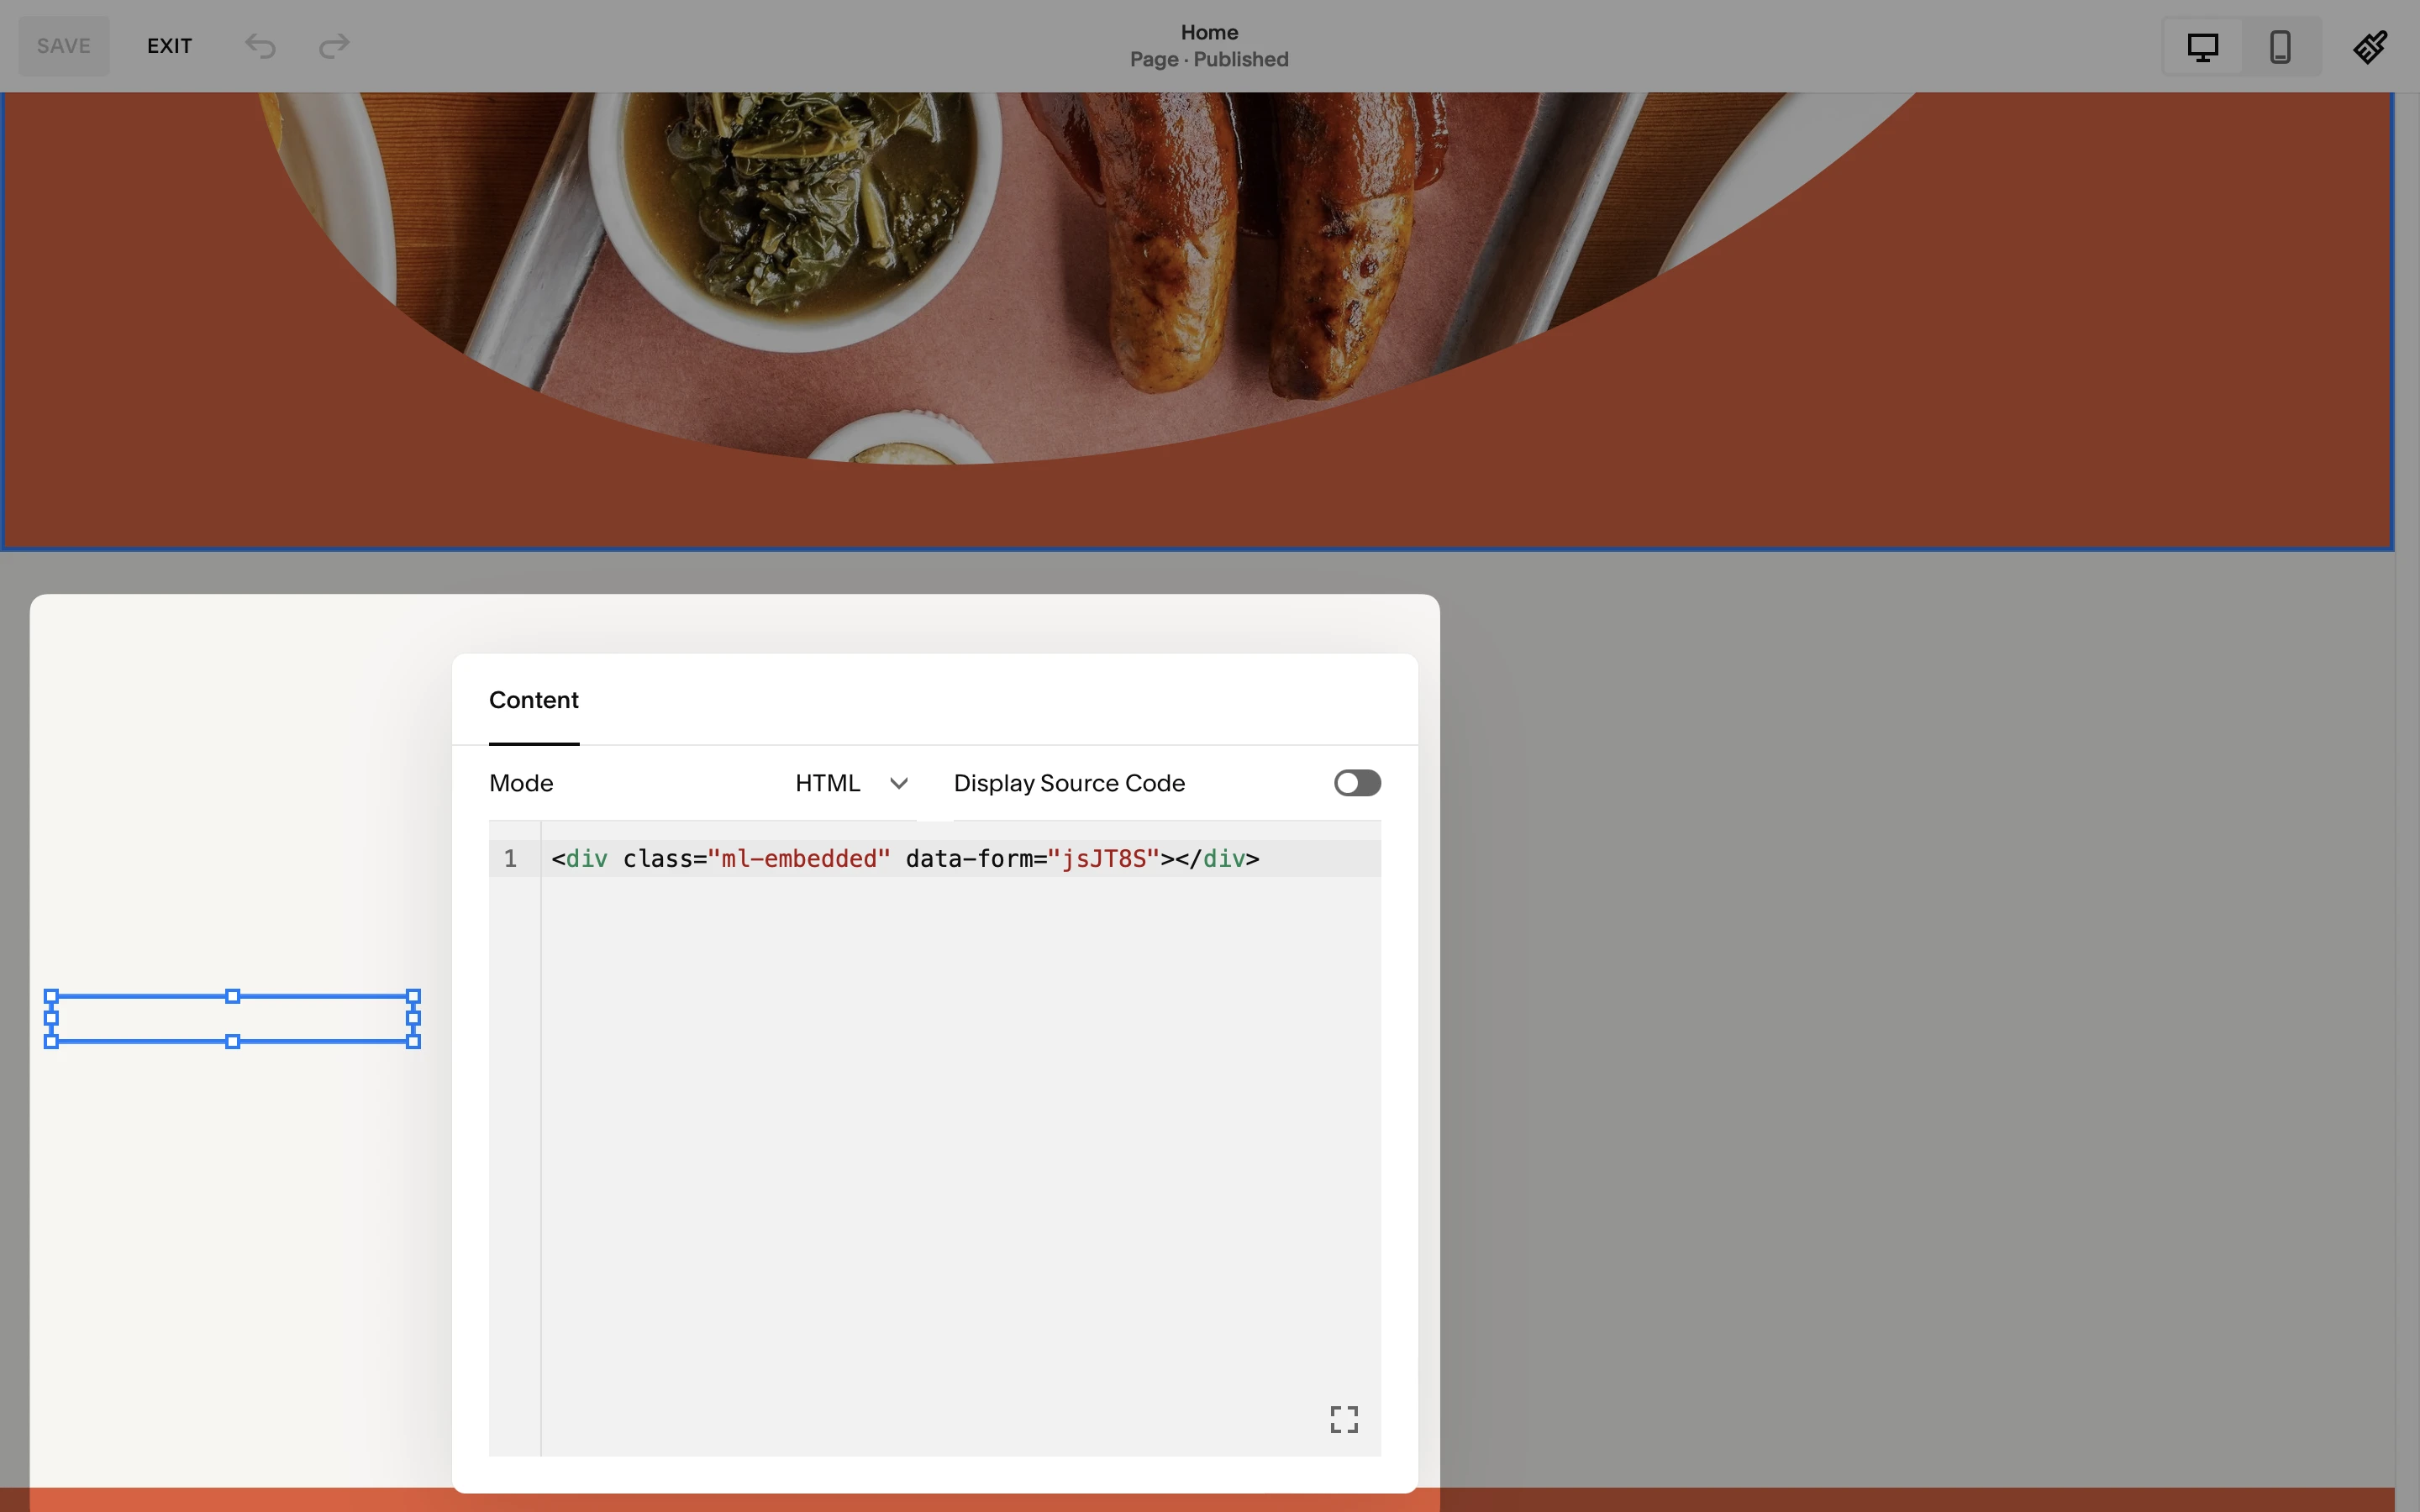
3. Refresh your site to see the embedded MailerLite form. Keep in mind the form will not be shown in Edit mode and the page must be accessed in Preview mode or via a live link in order for the form to show.

All data collected will be synchronized with the designated MailerLite subscriber group(s).


