This article is meant for those who already successfully registered a domain with Wordpress.
How to add a domain to MailerLite
Head to the Account settings page and click the Domains tab.
Under Sending domains, click Add domain.
To verify that you are adding a domain that you own, enter an email address that includes your paid domain, which will be used to send campaigns.
Click Save.
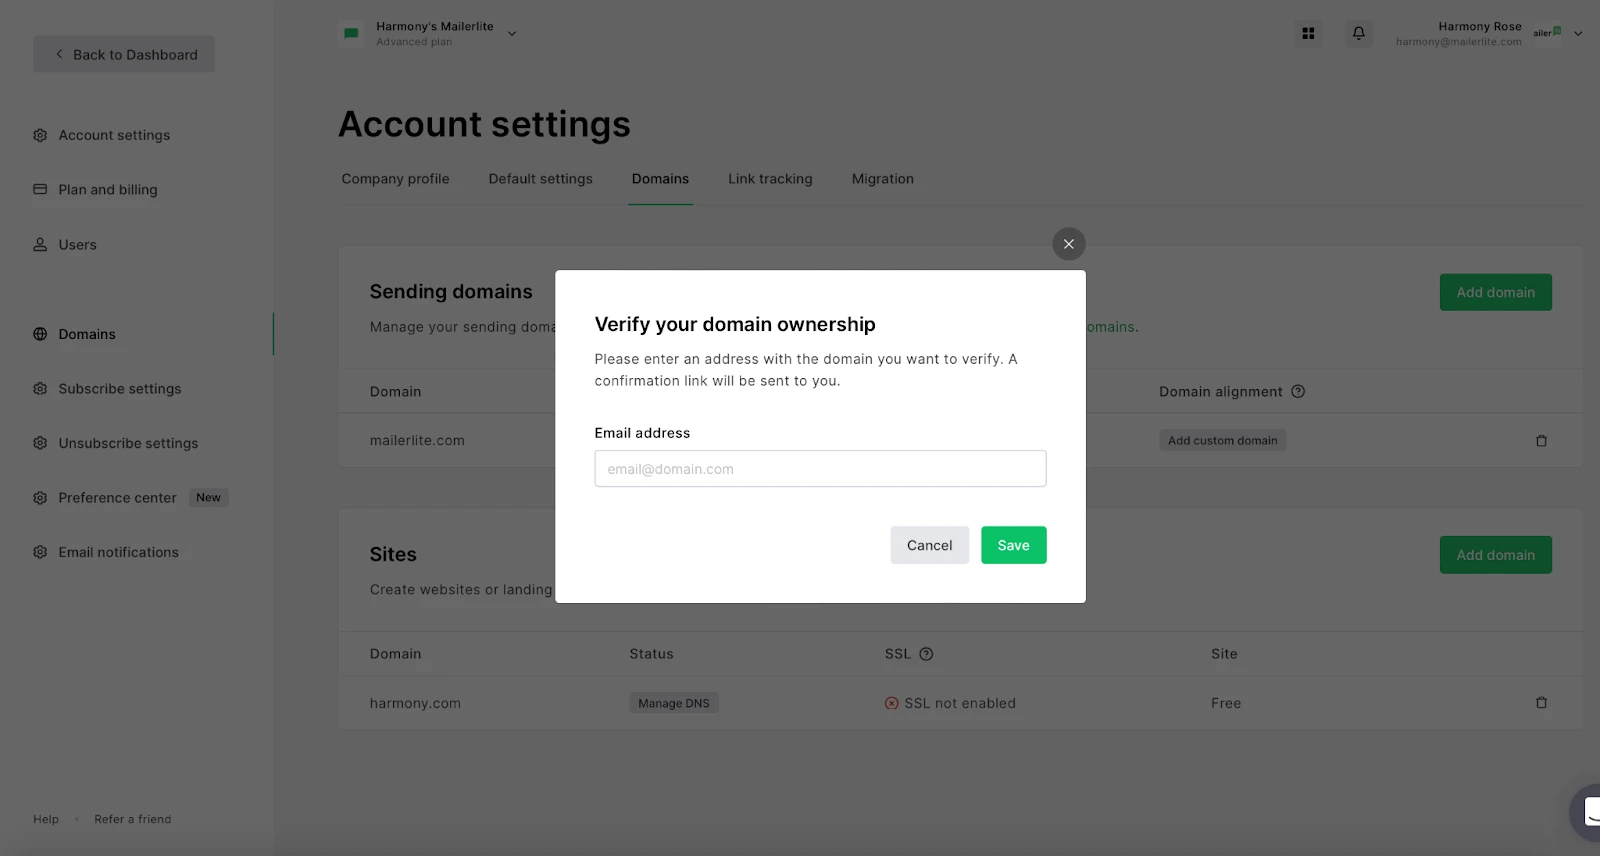
5. Check your inbox for the verification email and follow the steps to verify the email address.
6. Once the domain has been added, click on the Authenticate button. A window will appear containing Name and Value fields of your DKIM and SPF records. Keep this page open, so you can copy the field values later.
How to access the DNS zone page in Wordpress
Log in to the Wordpress dashboard.
Navigate to Upgrades.
Choose Domains.
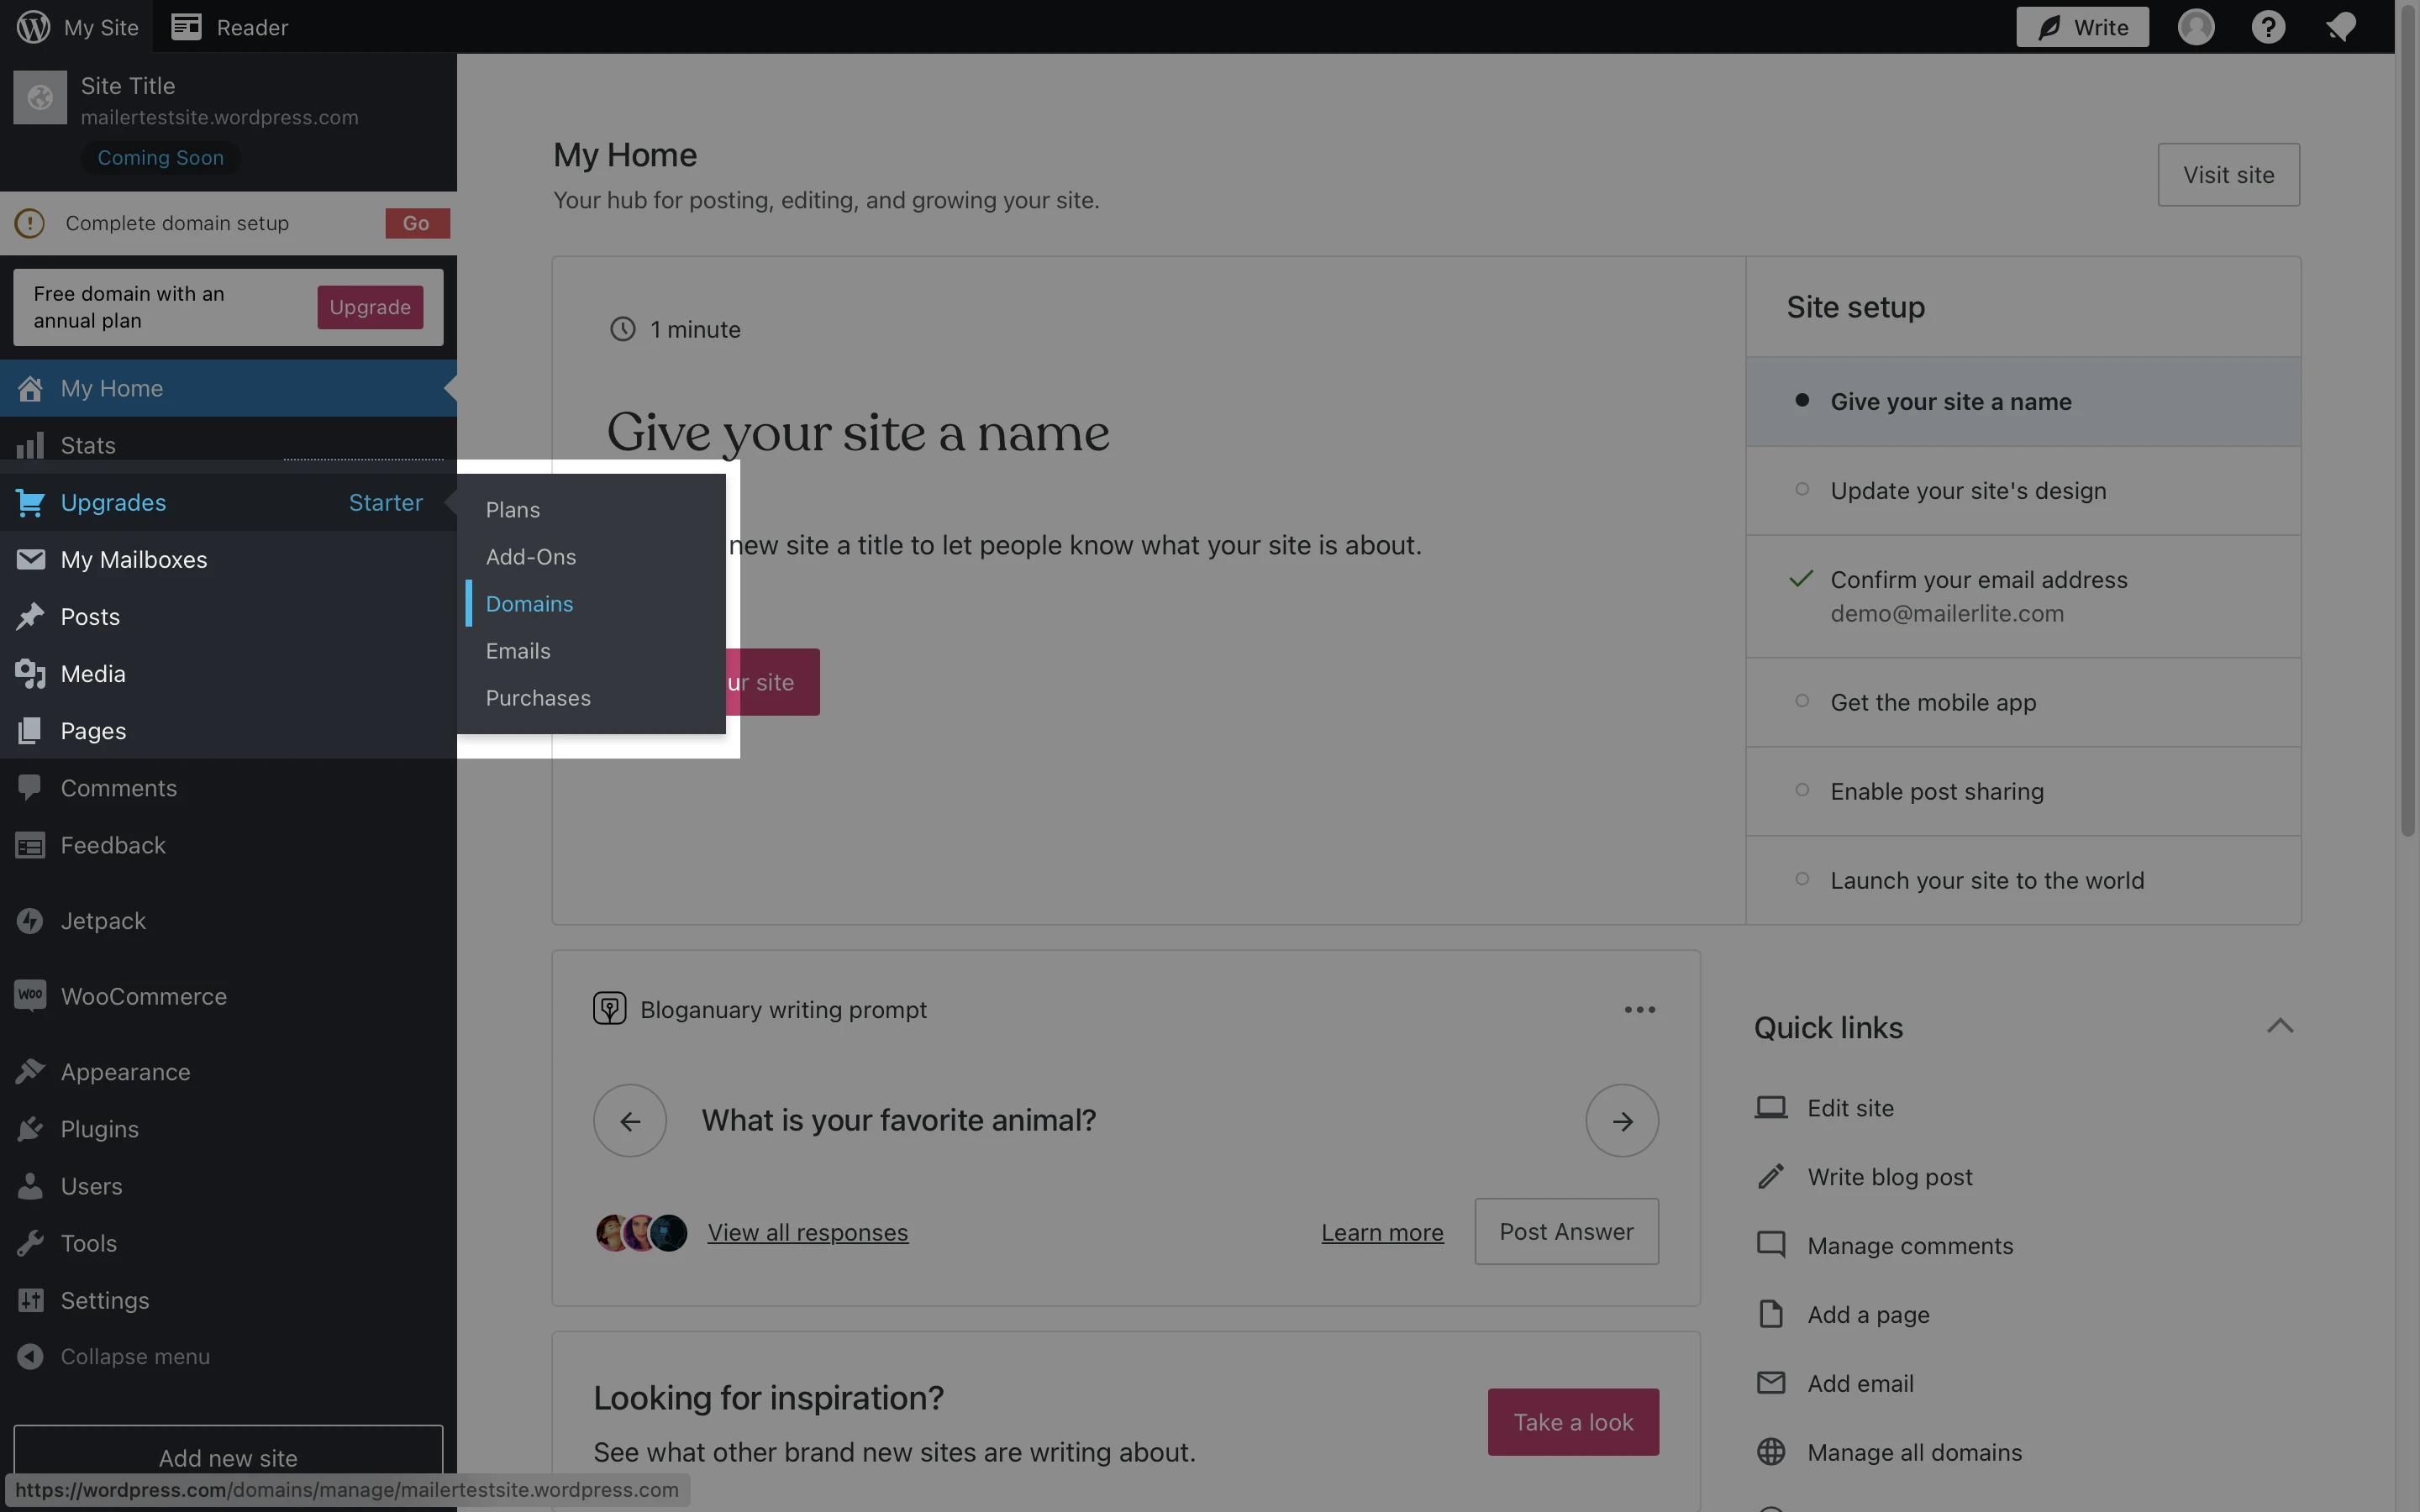
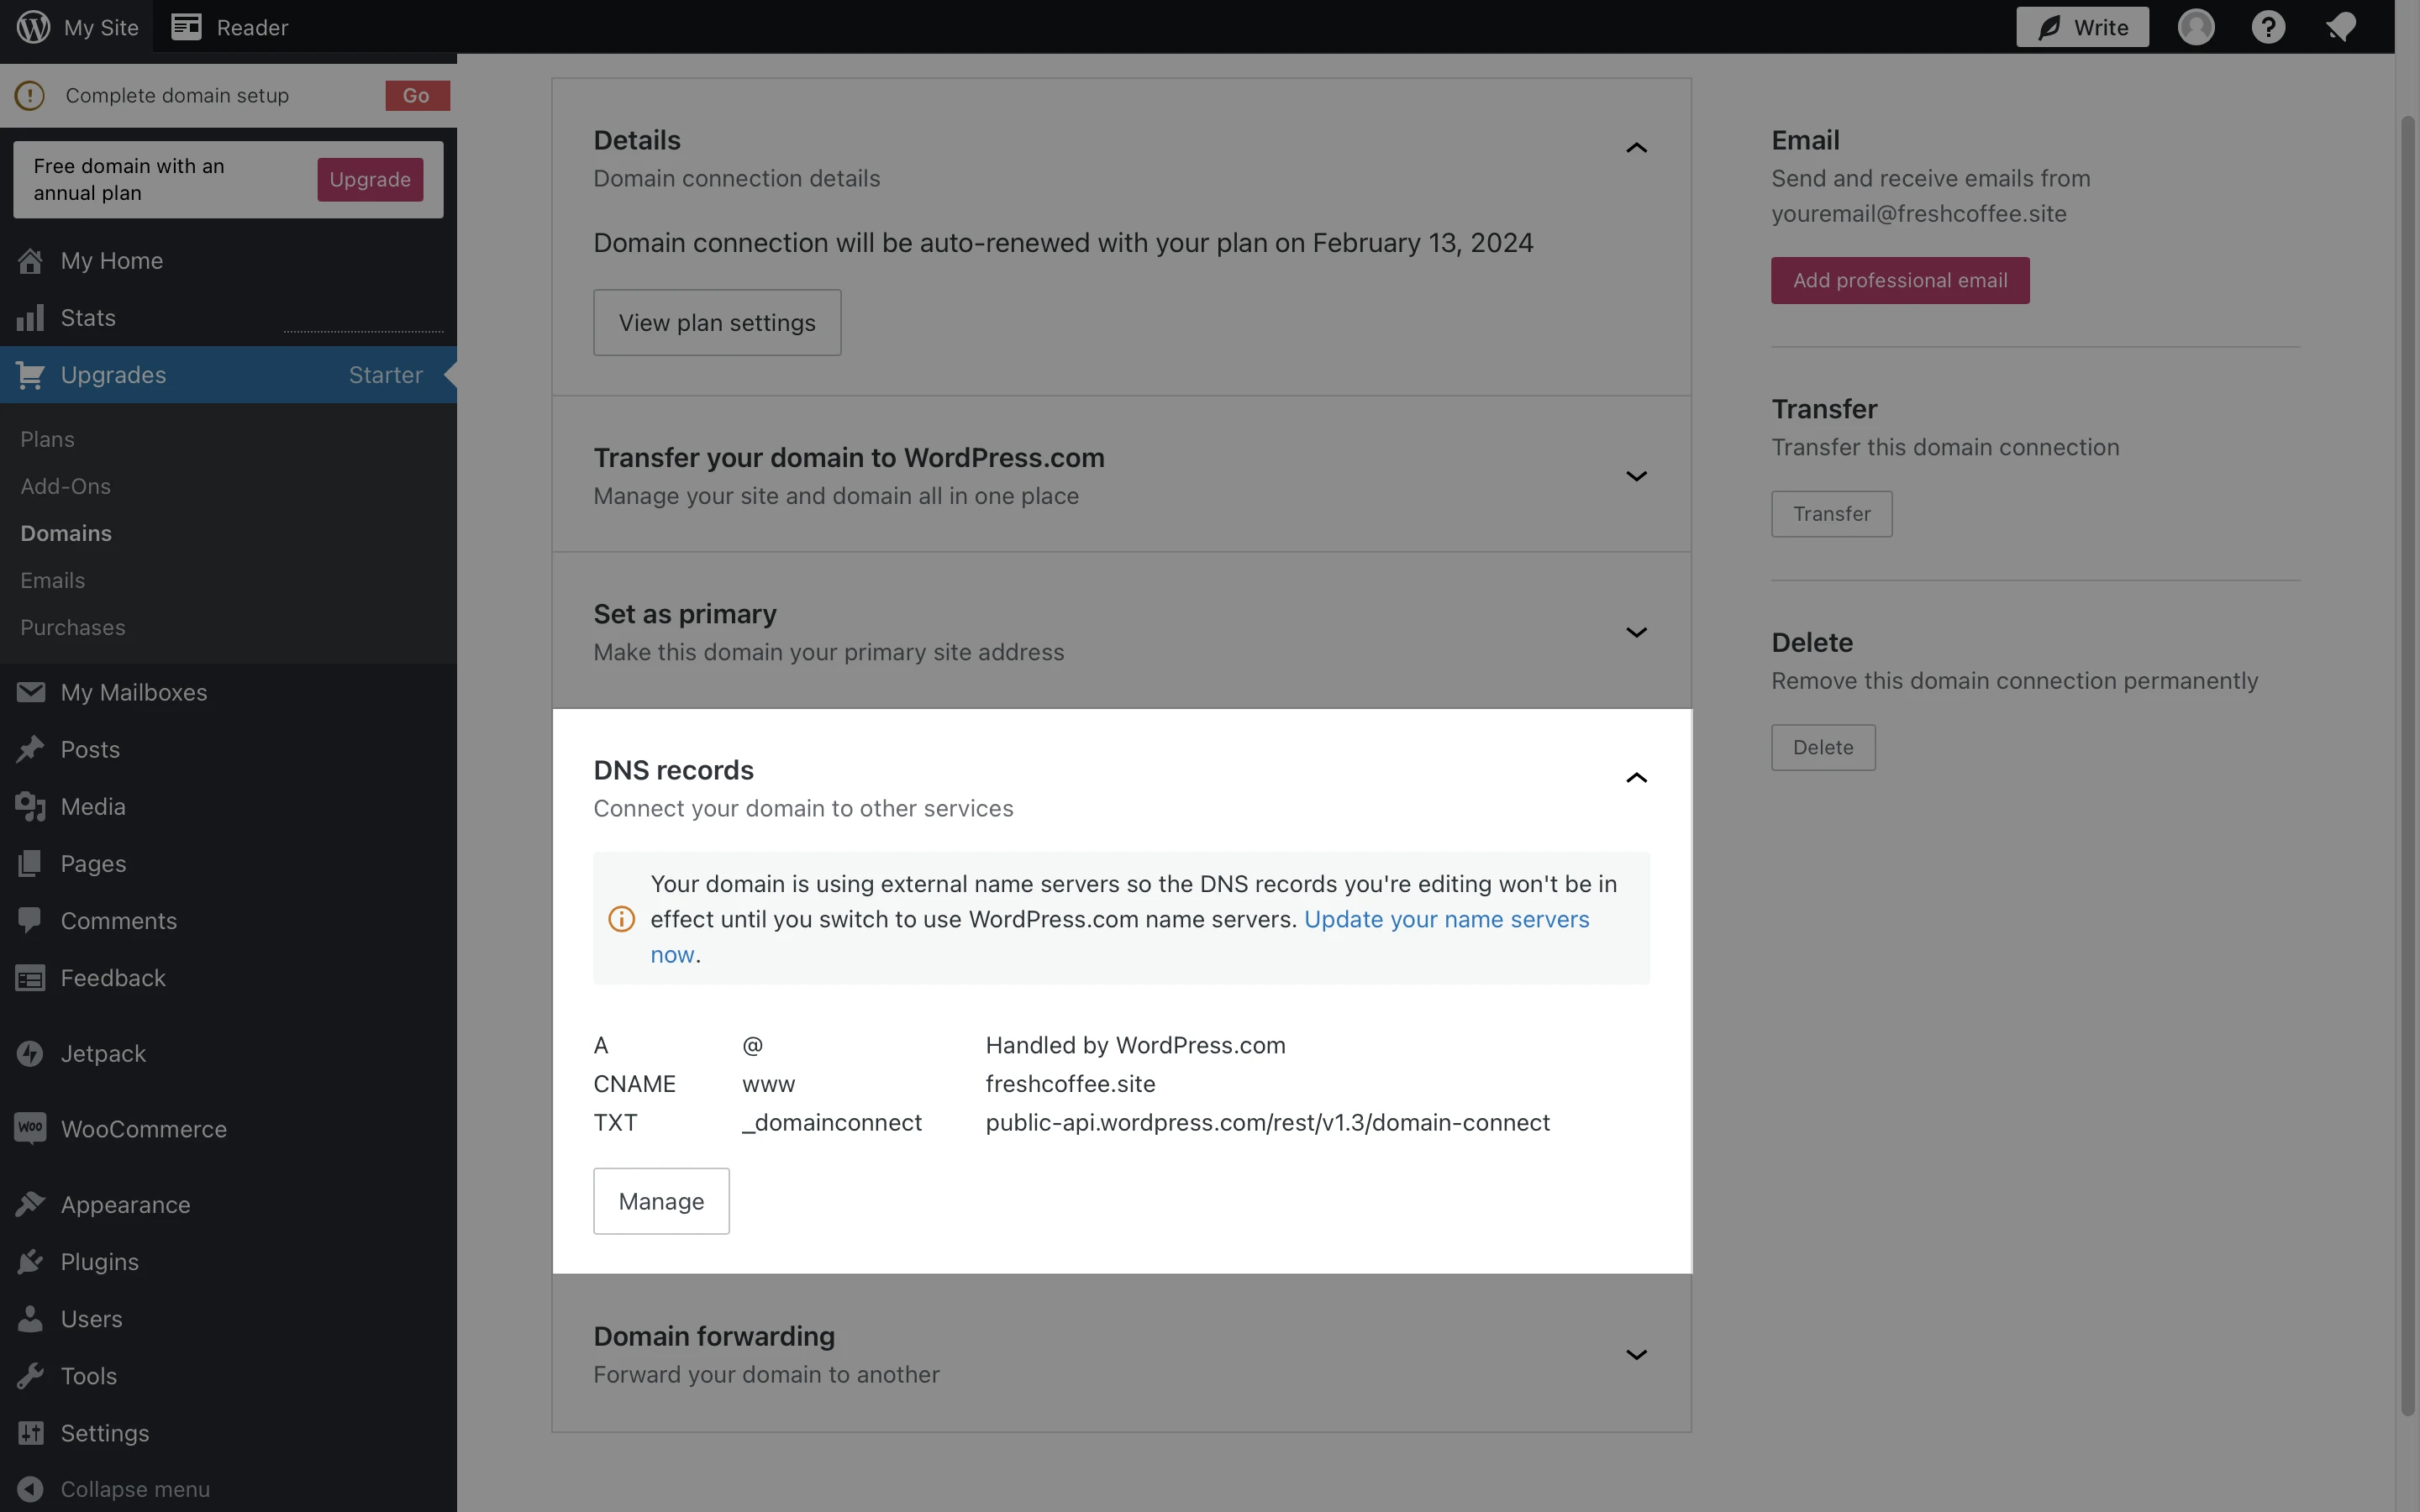
4. Select the domain you wish to authenticate to be taken to the domain settings page.
5. Scroll down to DNS records.
6. Click Manage.
How to add the DKIM record
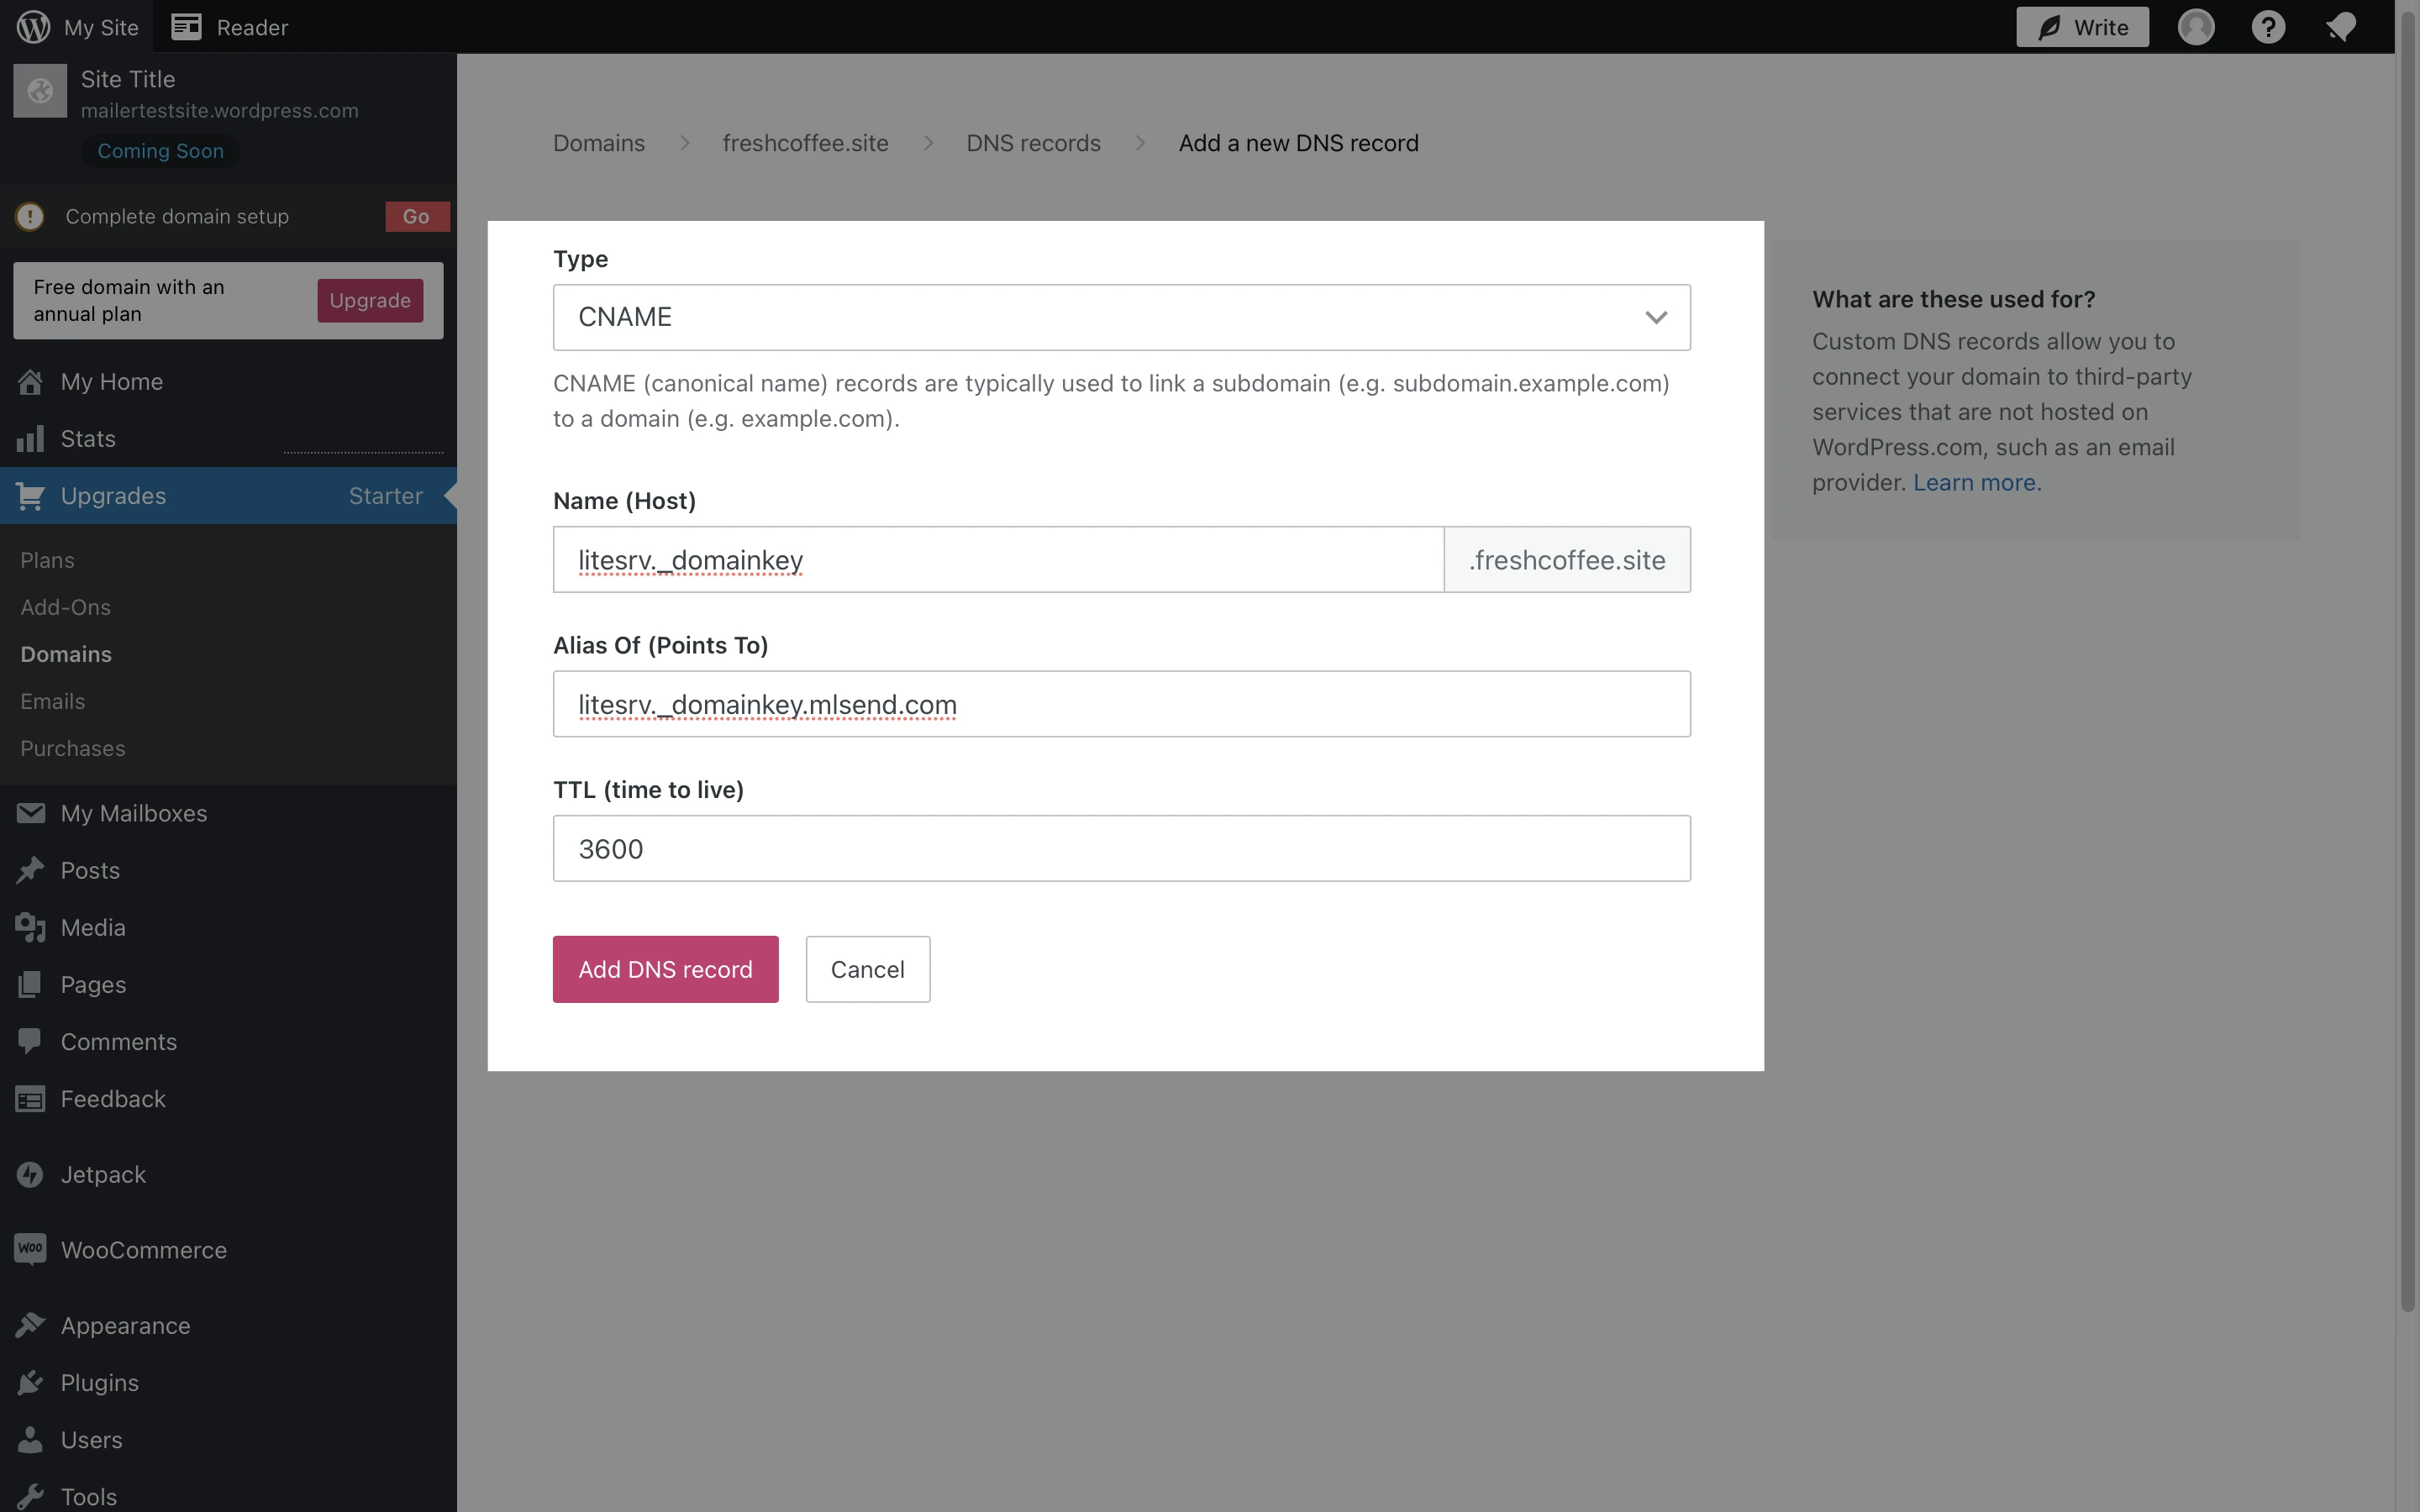
Click + Add a record.
Select the Type as CNAME.
In the Name (Host) field, paste the DKIM Name text that is given to you in your MailerLite account.
In the Alias Of (Points To) box, enter the DKIM Value, also in your account.
Click Add DNS record.
How to add the SPF record
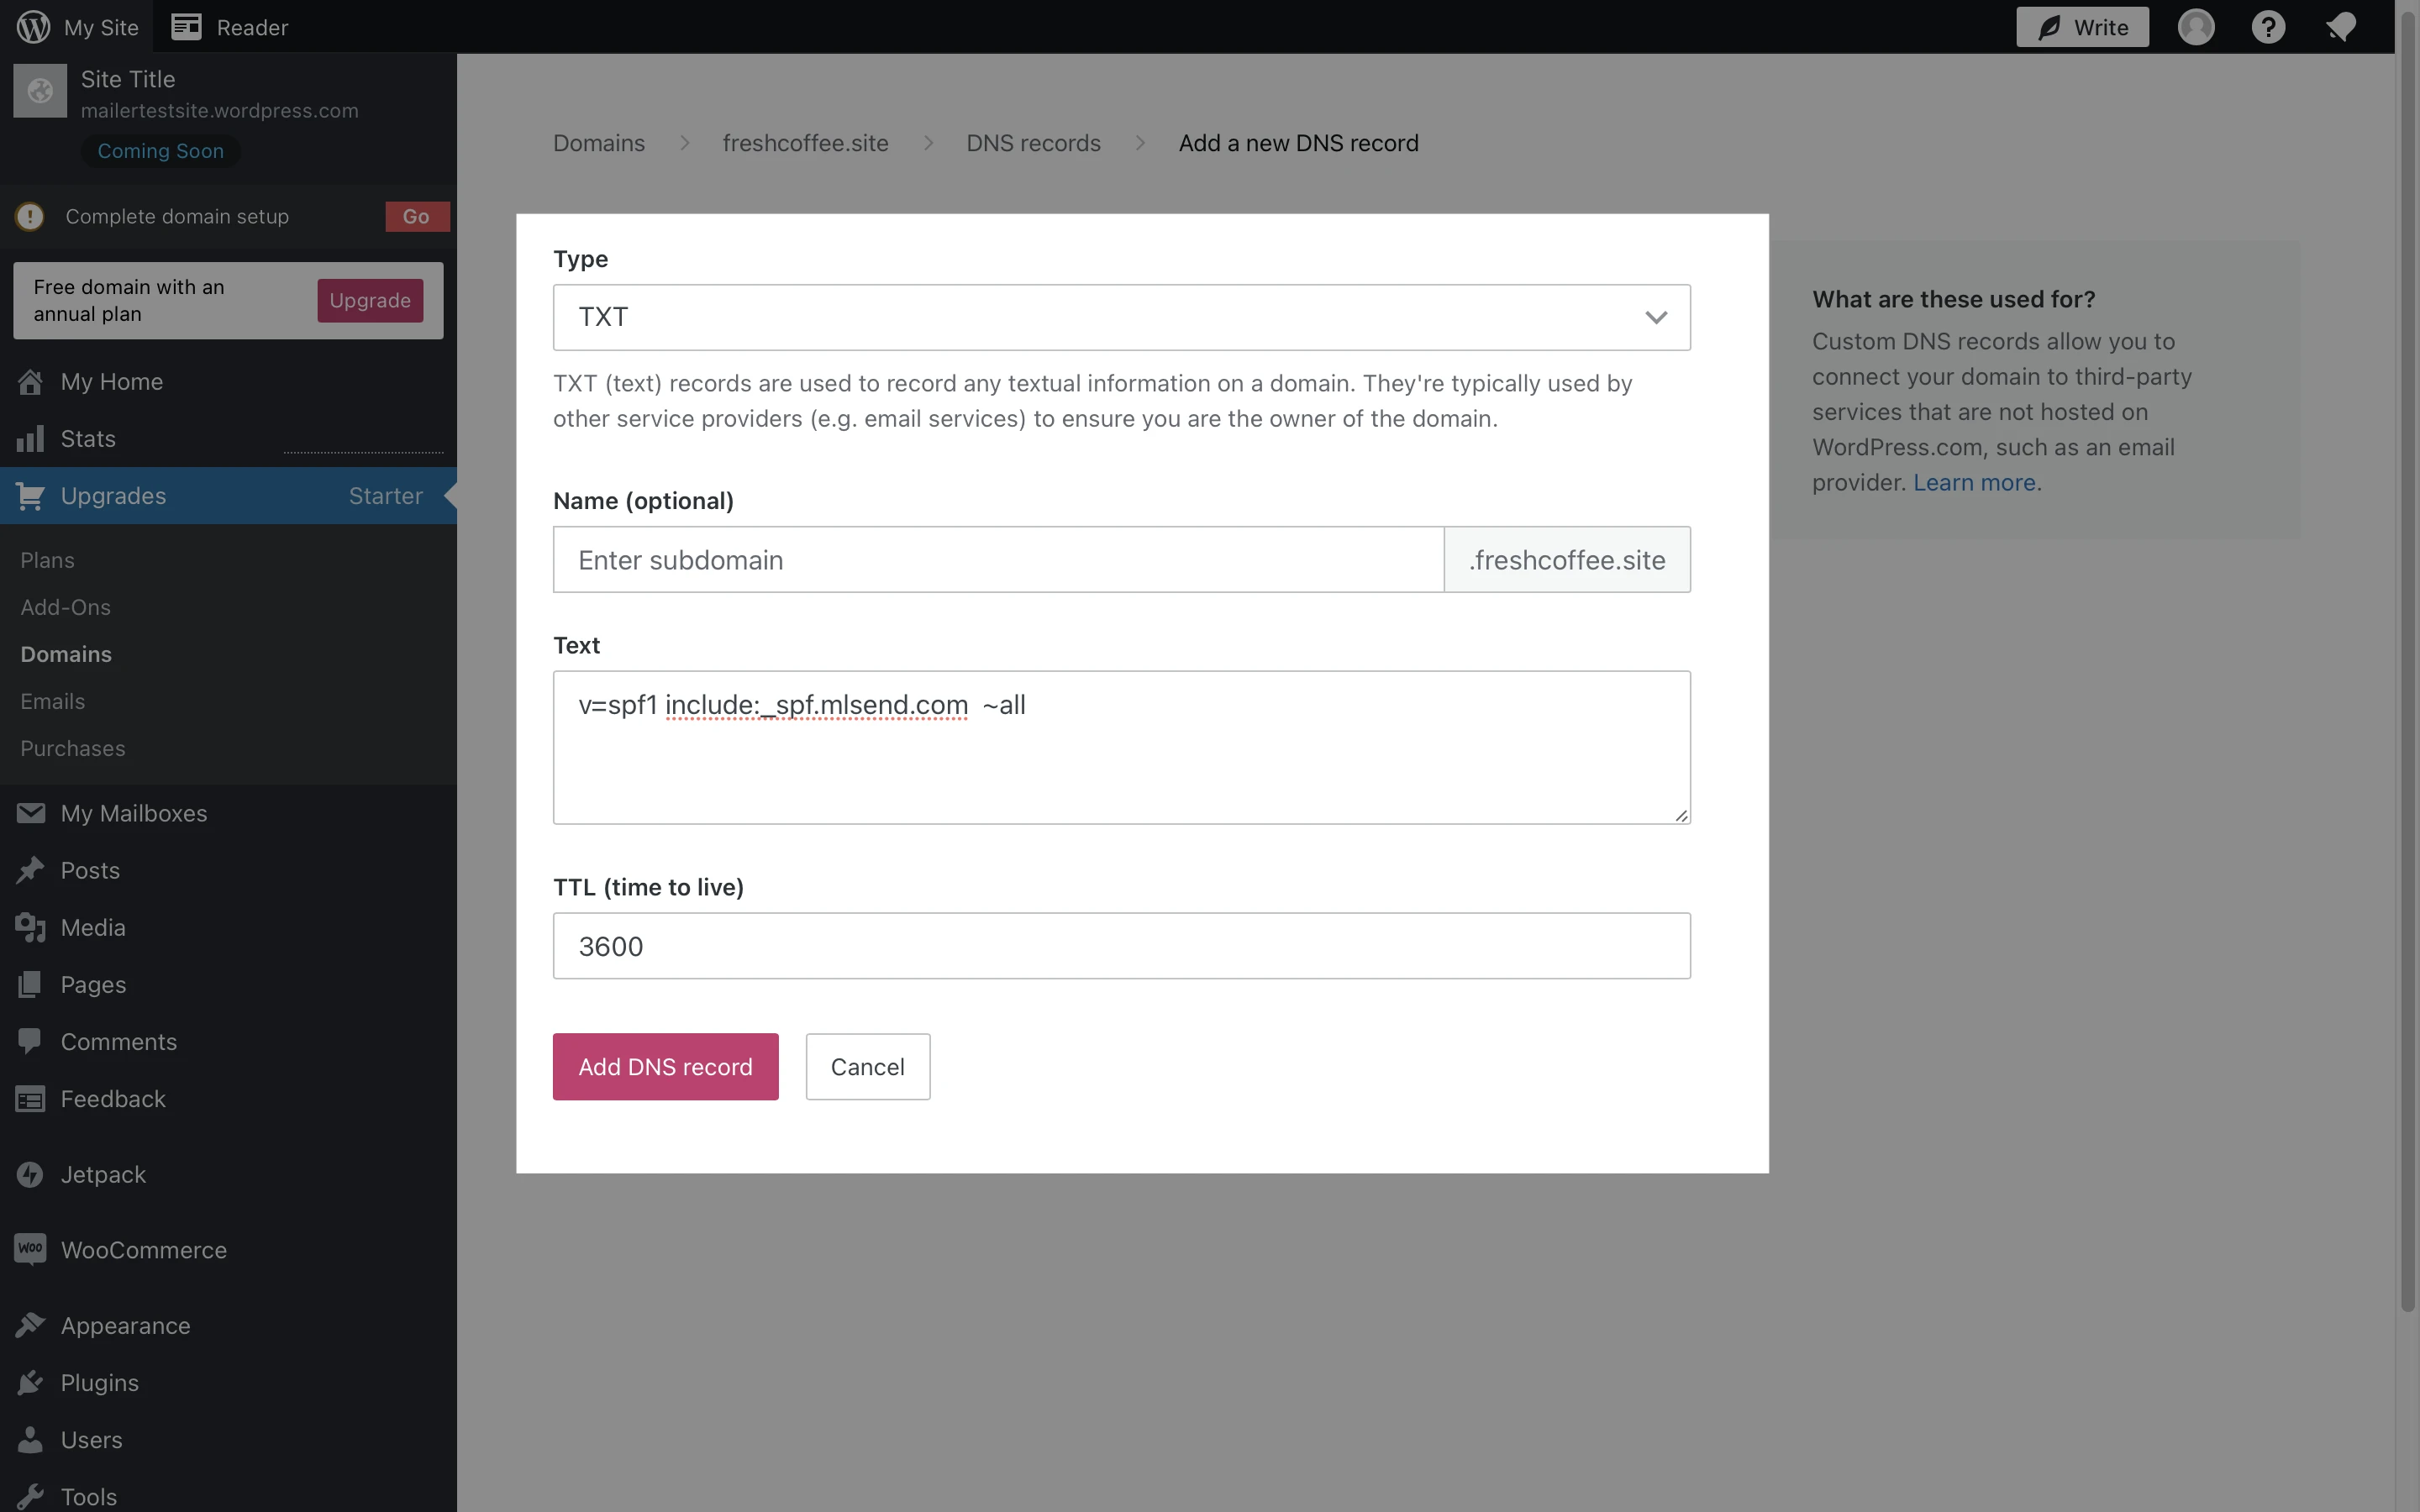
Within the same DNS page, click + Add a record again.
Select the TXT type.
Leave the Name field blank.
In the Text box, paste the SPF Value text that is given to you in your MailerLite account.
Click Add DNS record.
Head back to your MailerLite Domains page and click on the green Check DNS records button on the domain authentication window. Once both records are approved, your new domain will be displayed as Authenticated ✅.
For additional troubleshooting steps, see our guide on how to verify, authenticate and align your domain.
Please note: While our support team is happy to help with any issues taking place on MailerLite’s end, we encourage reaching out directly to the support team of your hosting provider assistance. In this case, the Wordpress support page can be found here.


